RCA RCR815 Owner/User Manual: RCR815 - Page 4
Advanced Volume Punch Through, Programming the Sleep Timer - manual
 |
UPC - 079000332145
View all RCA RCR815 manuals
Add to My Manuals
Save this manual to your list of manuals |
Page 4 highlights
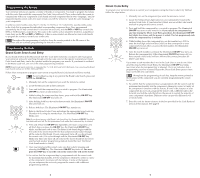
8. Once your component turns on, you have found the correct code. Save the new code by pressing and releasing the STOP key. The illuminated ON·OFF key turns off. You must press the STOP key to save the code or the correct code will not be stored! 9. When you press the STOP key, the code is stored. 10. To confirm that the component key is programmed with the correct code for maximum functionality, test the component. If some of the features of your component do not work, different codes in the list can be tried until you find the code that allows the remote to control the majority of your component's functions. See section entitled "Testing the Code for Maximum Functionality." Code Retrieval Once you've programmed the remote to control your components, record the codes for future reference. If you used the Direct Code Entry method, just make a note of the codes you programmed in the boxes below. If you used one of the Code Search methods to program your remote or if you used the Direct Code Entry method but don't remember the code, you need to retrieve each component's four-digit code. Noting the actual code will save you time if you ever need to program the remote again (e.g., if programming is lost when you change the batteries). If the codes are recorded, you can use the Direct Code Entry method to reprogram your remote. 1. Press and hold the component key whose code you wish to retrieve. The illuminated ON·OFF key turns on. 2. While holding the component key down, press and hold the INFO key. The illuminated ON·OFF key turns off. 3. After holding down both keys for three seconds, the illuminated ON·OFF key turns back on. 4. Release both keys. The illuminated ON·OFF key remains on. 5. Starting with the number 1 key, press and release each number key in the following order (1-9, then 0). The number that causes the illuminated ON·OFF key to blink is the first number of the code. As you find each number of the code, write them down for future reference. Note: All TV codes begin with the number 1; all VCR and DVR codes begin with the number 2; all DVDs, the number 3; all AUDIO, the number 4; all satellite receivers and cable boxes, the number 5; all HDTVs, the number 7. 6. Repeat step 5 until you have retrieved all four numbers in the code. 7. After the fourth number is retrieved, the illuminated ON·OFF key blinks briefly, then turns off. 8. To exit the Code Retrieval mode at any time, press and release the CLEAR key. 9. If you press an invalid key during the Code Retrieval process, the remote will not respond. If you do not press a valid Code Retrieval key, Code Retrieval times out after 15 seconds. The illuminated ON·OFF key blinks four times, and then turns off. SAT·CBL CODE VCR CODE DVD CODE TV CODE AUX CODE AUDIO CODE DVR CODE AUX CODE Using the Remote to Control Your Components Because this remote controls more than one component, you must first "tell" the remote which component you wish to operate. That means, if you wish to operate your TV, you must first press the TV key to put the remote in the TV mode. The remote stays in the chosen mode until you change it. If your remote is in TV mode, you must change the mode in order to operate other components. For example, if you are in VCR mode and you wish to turn off your TV, you must press the TV key first before pressing the ON·OFF key. 8 Volume Punch Through Volume Punch Through allows the VOL+, VOL- and MUTE keys, when pressed in VCR, DVD, DVR, SAT and CABLE modes, to "punch through" to either TV or AUDIO, whichever was accessed last. Volume Punch Through occurs automatically and allows you to control the volume without exiting the current mode. (If the AUX key has been programmed with a TV or AUDIO code, that must be considered when determining the last active TV or AUDIO component used.) Note: Volume Punch Though does not occur in cases where the component code has its own volume/mute data, such as a satellite receiver with its own volume/mute control, or if volume/mute data has been learned for this device. Advanced Volume Punch Through Volume Punch Through, as described above, occurs automatically. However, if you want to specify whether the Volume Punch Through is directed to the TV or AUDIO while in VCR, DVR, DVD, CD, SAT or HDTV STB modes, follow the steps below. This option can also be enabled for an AUX key, if it is programmed with a VCR, DVR, DVD, CD, SAT or HDTV STB. 1. Press and hold any component key programmed for VCR, DVR, DVD, CD, SAT, or HDTV. The illuminated ON·OFF key turns on. 2. While holding down the component key, press and hold the VOL+ key. The illuminated ON·OFF key turns off. 3. After holding down both keys for 3 seconds, the illuminated ON·OFF key turns on and stays on. Release both keys. 4. Press and release the component key you want the Volume Punch Through to be directed to from the selected mode (TV, AUDIO or AUX key). The illuminated ON·OFF key flashes, then turns off. Note: The component key pressed in step 4 must be programmed with a TV or AUDIO component. If an invalid key is pressed, the illuminated ON·OFF key flashes four times, then turns off. 5. Once you have programmed any component with a specified Volume Punch Through, the Volume Punch Through for all other components will default to AUDIO. If you do not want other components' Volume Punch Through to default to AUDIO, you must manually program them, using steps 1-4. Transport Key Punch Through Transport Key Punch Through allows the transport keys (REVERSE, PLAY, FORWARD, RECORD, STOP and PAUSE), when pressed in TV, SAT, CABLE and AUDIO modes, to "punch through" to VCR, DVR or DVD/CD mode, whichever was accessed last. Transport Key Punch Through occurs automatically and allows you to use the transport keys without exiting the current mode. (For example, if the transport keys were last used in DVD mode and accessed again after pressing the TV key, they will punch through to the DVD. The default Transport Key Punch Through is set to DVD for TV, SAT, CABLE and AUDIO. Note: Transport Key Punch Through does not occur in cases where the component code has its own transport key data, such as a satellite receiver with a built-in DVR. Sleep Timer (Select Models Only) This feature automatically turns off your TV at a duration you choose from 1 to 99 minutes. The Sleep Timer only works if you have found a code that controls your TV. The timing mechanism for the Sleep Timer is built into your universal remote control. To program the Sleep Timer, follow these steps. Programming the Sleep Timer 1. Press and release the TV key. 2. Press and hold the SLEEP key for three seconds. The illuminated ON·OFF key turns on. 3. Release the SLEEP key. 4. Using the number keys, enter the desired time in minutes (from 1-99 minutes). To set the timer to a number under 10 minutes, first press 0 and then the desired number (e.g., 05 for five minutes). The illuminated ON·OFF key blinks with each keypress. 5. Once the second number is entered, the illuminated ON·OFF key turns off and the Sleep Timer is now set. ! TIP: Any keypress other than the number keys is ignored. If the sleep time is not entered within 15 seconds after pressing the SLEEP key, the illuminated ON·OFF key blinks four times and turns off, indicating the attempt to program the Sleep Timer has been unsuccessful. 6. Leave the remote aimed at the TV. Once the Sleep Timer is set, you can continue to use the remote without affecting the Sleep Timer. However, the remote must be put back in TV mode and pointed at the TV to activate the Sleep Timer. Note: If the ON·OFF key is pressed, the Sleep Timer is canceled. 9
-
 1
1 -
 2
2 -
 3
3 -
 4
4 -
 5
5 -
 6
6 -
 7
7 -
 8
8 -
 9
9 -
 10
10 -
11
-
12
-
13
-
14
-
15
-
16
-
17
-
18
-
19
-
20
-
21
-
22
 |
 |