RCA RTD258 User Manual - RTD258 - Page 6
Connecting to audiovisual, equipment, Explanation of jacks and cables, Video cables, Audio cables - codes
 |
UPC - 044319504088
View all RCA RTD258 manuals
Add to My Manuals
Save this manual to your list of manuals |
Page 6 highlights
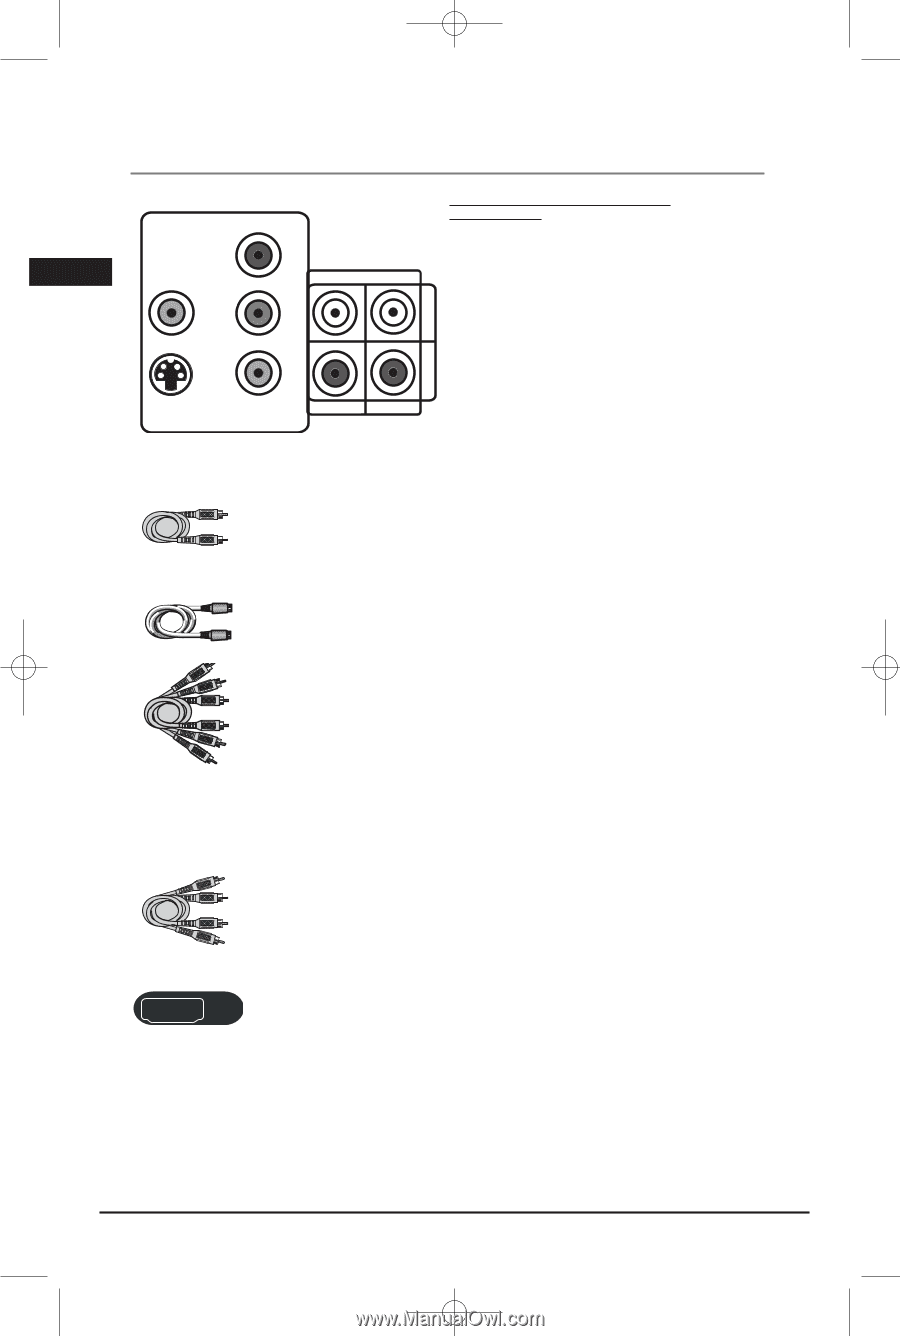
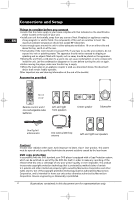
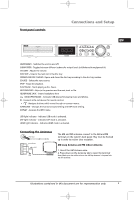
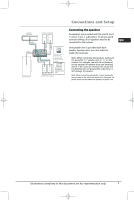
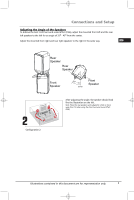
Connections and Setup Connecting to audiovisual equipment EN PPrr VVIIDDEEOO PPbb AUADUDIIOOIIN N Explanation of jacks and cables The jacks on the back of your receiver (pictured left) and the cables shown below are used to connect to other components. YY SS--VIVIDDEOEO COMCPOOMNPEONNTENVTDIVEIODEO AUAXUX 11 R(REEGGUULLAARR AANNDD PPRROOGGSCSCANA)N The video jacks are OUT jacks, which need to be connected to IN jacks on the TV or monitor you're connecting to (so the video content goes from the receiver to the screen). The audio jacks are IN jacks, which need to be connected to OUT jacks UAXUX 22 A on the component you're connecting to, so the sound from the component comes into the receiver (and out through the speakers). Video cables Composite video cable S-VIDEO cable Composite video cable (included) The basic Video jack (usually color-coded yellow) is also referred to as composite video. S-VIDEO cable (not included) The S-VIDEO (separate video) jack provides better picture quality than composite video (the VIDEO jack) because the color is kept separate from the brightness and chroma part of the video singal. Component video cables (Pr, Pb, Y) (not included) The Y, Pb, Pr jacks provide optimum picture quality by separating the video signal into three parts. To ensure maximum picture quality, use three videograde cables for the connection. You can also buy bundled component video cables that are color-coded to match the Y, Pb, Pr inputs (green, blue and red). Component video cable Note: If your television is a high definition television, use the DVD player's progressive scan output to get the highest possible video resolution. Set the Progressive Scan option in the Video menu to On Note: If one of the devices is not working, check that all the cables have been inserted properly into the jacks. Audio cables (not included) AUDIO IN L (left) and AUDIO IN R (right) These jacks and cables are often color-coded (red for right audio, and white for left audio). Audio cables (red and white) HDMI Note: If your component has only one input for audio (mono), connect it to the left (white L/Mono) audio jack on the TV and don't connect the right audio part of the cable. HDMI connector and cable (not included) HDMI (High-Definition Multimedia Interface) provides optimum digital video and audio quality. Use an HDMI cable to connect to a HDMI-supported monitor to allow transfer of the digital images of DVD video and the stereo sound. If your television is a high definition television, use the DVD player's HDMI output to get the highest possible video resolution. Set the HDMI option in the Video menu to switch on. (See page 25 and 26) The HDMI indicator will light up on the front panel. 4 Illustrations contained in this document are for representation only.
-
 1
1 -
 2
2 -
 3
3 -
 4
4 -
 5
5 -
 6
6 -
 7
7 -
 8
8 -
 9
9 -
 10
10 -
 11
11 -
 12
12 -
13
-
14
-
15
-
16
-
17
-
18
-
19
-
20
-
21
-
22
-
23
-
24
-
25
-
26
-
27
-
28
-
29
-
30
-
31
-
32
-
33
-
34
-
35
-
36
 |
 |