| Section |
Page |
| Manuals for This Machine |
5 |
| Manuals for This Machine |
5 |
| Manuals for This Machine |
5 |
| The following manuals describe the operational procedures of this machine. For particular functio... |
5 |
| The following manuals describe the operational procedures of this machine. For particular functio... |
5 |
| Manuals provided are specific to machine type. |
5 |
| Manuals provided are specific to machine type. |
5 |
| Adobe Acrobat Reader is necessary to view the manuals as a PDF file. |
5 |
| Two CD-ROMs are provided: |
5 |
| General Settings Guide |
5 |
| General Settings Guide |
5 |
| General Settings Guide |
5 |
| Provides an overview of the machine and describes System Settings (paper trays, Key Operator Tool... |
5 |
| Provides an overview of the machine and describes System Settings (paper trays, Key Operator Tool... |
5 |
| Refer to this manual for Address Book procedures such as registering fax numbers, e-mail addresse... |
5 |
| Network Guide (PDF file - CD-ROM1) |
5 |
| Network Guide (PDF file - CD-ROM1) |
5 |
| Network Guide (PDF file - CD-ROM1) |
5 |
| Describes procedures for configuring the machine and computers in a network environment. |
5 |
| Describes procedures for configuring the machine and computers in a network environment. |
5 |
| Copy Reference |
5 |
| Copy Reference |
5 |
| Copy Reference |
5 |
| Describes operations, functions, and troubleshooting for the machine’s copier function. |
5 |
| Describes operations, functions, and troubleshooting for the machine’s copier function. |
5 |
| Facsimile Reference <Basic Features> |
5 |
| Facsimile Reference <Basic Features> |
5 |
| Facsimile Reference <Basic Features> |
5 |
| Describes operations, functions, and troubleshooting for the machine’s facsimile function. |
5 |
| Describes operations, functions, and troubleshooting for the machine’s facsimile function. |
5 |
| Facsimile Reference <Advanced Features> |
5 |
| Facsimile Reference <Advanced Features> |
5 |
| Facsimile Reference <Advanced Features> |
5 |
| Describes advanced functions and settings for key operators. |
5 |
| Describes advanced functions and settings for key operators. |
5 |
| Printer Reference 1 (this manual) |
5 |
| Printer Reference 1 (this manual) |
5 |
| Printer Reference 1 (this manual) |
5 |
| Describes system settings and operations for the machine’s printer function. |
5 |
| Describes system settings and operations for the machine’s printer function. |
5 |
| Printer Reference 2 (PDF file - CD-ROM1) |
5 |
| Printer Reference 2 (PDF file - CD-ROM1) |
5 |
| Printer Reference 2 (PDF file - CD-ROM1) |
5 |
| Describes operations, functions, and troubleshooting for the machine’s printer function. |
5 |
| Describes operations, functions, and troubleshooting for the machine’s printer function. |
5 |
| Scanner Reference (PDF file - CD-ROM1) |
5 |
| Scanner Reference (PDF file - CD-ROM1) |
5 |
| Scanner Reference (PDF file - CD-ROM1) |
5 |
| Describes operations, functions, and troubleshooting for the machine’s scanner function. |
5 |
| Describes operations, functions, and troubleshooting for the machine’s scanner function. |
5 |
| Manuals for DeskTopBinder V2 Lite |
6 |
| Manuals for DeskTopBinder V2 Lite |
6 |
| Manuals for DeskTopBinder V2 Lite |
6 |
| DeskTopBinder V2 Lite is a utility included on the CD-ROM labeled “Scanner Driver & Document Mana... |
6 |
| DeskTopBinder V2 Lite is a utility included on the CD-ROM labeled “Scanner Driver & Document Mana... |
6 |
| • DeskTopBinder V2 Lite Setup Guide (PDF file - CD-ROM2) |
6 |
| • DeskTopBinder V2 Lite Setup Guide (PDF file - CD-ROM2) |
6 |
| • DeskTopBinder V2 Lite Setup Guide (PDF file - CD-ROM2) |
6 |
| Describes installation of, and the operating environment for DeskTopBinder V2 Lite in detail. Thi... |
6 |
| • DeskTopBinder V2 Introduction Guide (PDF file - CD-ROM2) |
6 |
| • DeskTopBinder V2 Introduction Guide (PDF file - CD-ROM2) |
6 |
| Describes operations of DeskTopBinder V2 Lite and provides an overview of its functions. This gui... |
6 |
| • Auto Document Link Guide (PDF file - CD-ROM2) |
6 |
| • Auto Document Link Guide (PDF file - CD-ROM2) |
6 |
| Describes operations and functions of Auto Document Link installed with DeskTopBinder V2 Lite. Th... |
6 |
| Manuals for ScanRouter V2 Lite |
6 |
| Manuals for ScanRouter V2 Lite |
6 |
| Manuals for ScanRouter V2 Lite |
6 |
| ScanRouter V2 Lite is a utility included on the CD-ROM labeled “Scanner Driver & Document Managem... |
6 |
| ScanRouter V2 Lite is a utility included on the CD-ROM labeled “Scanner Driver & Document Managem... |
6 |
| • ScanRouter V2 Lite Setup Guide (PDF file - CD-ROM2) |
6 |
| • ScanRouter V2 Lite Setup Guide (PDF file - CD-ROM2) |
6 |
| • ScanRouter V2 Lite Setup Guide (PDF file - CD-ROM2) |
6 |
| Describes installation of, settings, and the operating environment for ScanRouter V2 Lite in deta... |
6 |
| • ScanRouter V2 Lite Management Guide (PDF file - CD-ROM2) |
6 |
| • ScanRouter V2 Lite Management Guide (PDF file - CD-ROM2) |
6 |
| Describes delivery server management and operations, and provides an overview of ScanRouter V2 Li... |
6 |
| Other manuals |
6 |
| Other manuals |
6 |
| • PostScript 3 Supplement (PDF file - CD-ROM1) |
6 |
| • PostScript 3 Supplement (PDF file - CD-ROM1) |
6 |
| • PostScript 3 Supplement (PDF file - CD-ROM1) |
6 |
| • PostScript 3 Supplement (PDF file - CD-ROM1) |
6 |
| • UNIX Supplement (available from an authorized dealer, or as a PDF file on our Web site) |
6 |
| • UNIX Supplement (available from an authorized dealer, or as a PDF file on our Web site) |
6 |
| TABLE OF CONTENTS |
7 |
| TABLE OF CONTENTS |
7 |
| Manuals for This Machine i |
7 |
| How to Read This Manual |
9 |
| How to Read This Manual |
9 |
| How to Read This Manual |
9 |
| Symbols |
9 |
| Symbols |
9 |
| In this manual, the following symbols are used: |
9 |
| In this manual, the following symbols are used: |
9 |
| This symbol indicates a potentially hazardous situation which, if instructions are not followed, ... |
9 |
| This symbol indicates a potentially hazardous situation which, if instructions are not followed, ... |
9 |
| * The statements above are notes for your safety. |
9 |
| If this instruction is not followed, paper might misfeed, originals might be damaged, or data mig... |
9 |
| This symbol indicates prior knowledge or preparation is required before operation. |
9 |
| This symbol indicates precautions for operation, or actions to take after mal-operation. |
9 |
| This symbol indicates numerical limits, functions that cannot be used together, or conditions in ... |
9 |
| This symbol indicates a reference. |
9 |
| Keys and buttons that appear on the computer's display. |
9 |
| Keys and buttons that appear on the computer's display. |
9 |
| Keys and buttons that appear on the computer's display. |
9 |
| Keys that appear on the machine's display. |
9 |
| Keys built into the machine's control panel. |
9 |
| Keys built into the machine's control panel. |
9 |
| Keys built into the machine's control panel. |
9 |
| Keys on the computer's keyboard. |
9 |
| Names of Major Components and Software |
10 |
| Names of Major Components and Software |
10 |
| The following software products are referred to using a general name: |
10 |
| The following software products are referred to using a general name: |
10 |
| • DeskTopBinder V2 Lite and DeskTopBinder V2 professionalÆ DeskTopBinder V2 Lite/professional |
10 |
| • DeskTopBinder V2 Lite and DeskTopBinder V2 professionalÆ DeskTopBinder V2 Lite/professional |
10 |
| • DeskTopBinder V2 Lite and DeskTopBinder V2 professionalÆ DeskTopBinder V2 Lite/professional |
10 |
| • ScanRouter V2 Lite and ScanRouter V2 professional (optional)Æ ScanRouter V2 Lite/professional |
10 |
| • ScanRouter V2 Lite and ScanRouter V2 professional (optional)Æ ScanRouter V2 Lite/professional |
10 |
| 1.� Getting Started |
11 |
| 1.� Getting Started |
11 |
| Control Panel |
11 |
| Control Panel |
11 |
| <GRAPHIC> |
11 |
| <GRAPHIC> |
11 |
| <GRAPHIC> |
11 |
| Printer |
11 |
| Printer |
11 |
| Printer |
11 |
| Printer |
11 |
| Press to activate the printer function. |
11 |
| 2.� Indicators |
11 |
| 2.� Indicators |
11 |
| Displays errors and machine status. |
11 |
| h: Error indicator. See |
11 |
| B: Load Paper indicator. See |
11 |
| D: Add Toner indicator. See |
11 |
| 3.� Display |
11 |
| 3.� Display |
11 |
| Displays operation status and messages. |
11 |
| 4.� Selection keys |
11 |
| 4.� Selection keys |
11 |
| Correspond to items on the display. Press to select the corresponding item. |
11 |
| 5.� Scroll keys |
11 |
| 5.� Scroll keys |
11 |
| Press to select an item. |
11 |
| U |
11 |
| U |
11 |
| T |
11 |
| T |
11 |
| V |
11 |
| V |
11 |
| W |
11 |
| W |
11 |
| User Tools/Counter |
11 |
| User Tools/Counter |
11 |
| User Tools/Counter |
11 |
| Press to change default or operation parameters according to requirement. |
11 |
| Clear/Stop |
11 |
| Clear/Stop |
11 |
| Clear/Stop |
11 |
| Clear: clears an entered numeric value. |
11 |
| 8.� Main power indicator and On indicator |
11 |
| 8.� Main power indicator and On indicator |
11 |
| The main power indicator lights when the main power switch is turned on. The On indicator lights ... |
11 |
| 9.� Operation switch |
11 |
| 9.� Operation switch |
11 |
| Press to turn the power on. The On indicator lights. To turn the power off, press again. |
11 |
| This key is inactivate during printing or while setting printer defaults. |
11 |
| This key is inactivate during printing or while setting printer defaults. |
11 |
| Online |
11 |
| Online |
11 |
| Online |
11 |
| Press to switch the printer between online and offline. |
11 |
| 11.� Data In indicator |
11 |
| 11.� Data In indicator |
11 |
| Blinks while the printer is receiving data from a computer. Lights when there is data remaining t... |
11 |
| Cancel |
11 |
| Cancel |
11 |
| Cancel |
11 |
| Press to cancel an operation or return to the previous display. |
11 |
| OK |
11 |
| OK |
11 |
| OK |
11 |
| Press to set a selected item or entered numeric value. |
11 |
| 14.� Number keys |
11 |
| 14.� Number keys |
11 |
| Press to enter numeric values. |
11 |
| Reading the Display and Using Keys |
12 |
| Reading the Display and Using Keys |
12 |
| This section explains how to read the display and using the selection key for the initial display. |
12 |
| This section explains how to read the display and using the selection key for the initial display. |
12 |
| The copy display is set as the default screen when the machine is turned on. You can change the s... |
12 |
| The copy display is set as the default screen when the machine is turned on. You can change the s... |
12 |
| The copy display is set as the default screen when the machine is turned on. You can change the s... |
12 |
| <GRAPHIC> |
12 |
| <GRAPHIC> |
12 |
| 1.� Selection keys |
12 |
| 1.� Selection keys |
12 |
| 1.� Selection keys |
12 |
| Correspond to the function items at the bottom line on the display. |
12 |
| Example: Basic screen |
12 |
| When the instruction \ |
12 |
| Cancel |
12 |
| Cancel |
12 |
| Cancel |
12 |
| Press to cancel an operation or return to the previous display. |
12 |
| OK |
12 |
| OK |
12 |
| OK |
12 |
| Press to set a selected item or entered numeric value. |
12 |
| 4.� Scroll keys |
12 |
| 4.� Scroll keys |
12 |
| Press to move the cursor in each direction, step by step. |
12 |
| When the |
12 |
| 2.� Preparing to Print |
13 |
| 2.� Preparing to Print |
13 |
| This section gives instructions for connecting the machine and computer, configuring the machine,... |
13 |
| This section gives instructions for connecting the machine and computer, configuring the machine,... |
13 |
| When operating the machine with a USB connection, parallel connection, or IEEE 1394 (SCSI print) ... |
13 |
| When operating the machine with a USB connection, parallel connection, or IEEE 1394 (SCSI print) ... |
13 |
| When operating the machine with a USB connection, parallel connection, or IEEE 1394 (SCSI print) ... |
13 |
| • Connect the machine and computer using a USB cable, a parallel cable, or an IEEE 1394 (SCSI pri... |
13 |
| • Connect the machine and computer using a USB cable, a parallel cable, or an IEEE 1394 (SCSI pri... |
13 |
| • Connect the machine and computer using a USB cable, a parallel cable, or an IEEE 1394 (SCSI pri... |
13 |
| • Connect the machine and computer using a USB cable, a parallel cable, or an IEEE 1394 (SCSI pri... |
13 |
| For more information, see |
13 |
| For more information, see |
13 |
| • Install a printer driver from the CD-ROM. |
13 |
| • Install a printer driver from the CD-ROM. |
13 |
| For more information, see |
13 |
| For more information, see |
13 |
| When operating the machine under a network environment |
13 |
| When operating the machine under a network environment |
13 |
| • Configure the network using the machine's control panel. |
13 |
| • Configure the network using the machine's control panel. |
13 |
| • Configure the network using the machine's control panel. |
13 |
| • Configure the network using the machine's control panel. |
13 |
| For more information, see \ |
13 |
| For more information, see \ |
13 |
| • Install a printer driver and other utilities from the CD-ROM. |
13 |
| • Install a printer driver and other utilities from the CD-ROM. |
13 |
| For more information, see |
13 |
| For more information, see |
13 |
| \ |
13 |
| \ |
13 |
| Preparing the Machine |
14 |
| Preparing the Machine |
14 |
| Connecting the Machine |
14 |
| Connecting the Machine |
14 |
| Connection:Parallel interface connection |
14 |
| Connection:IEEE 1394 interface board connection |
14 |
| Connection:Ethernet board connection |
14 |
| Connection:USB connection |
14 |
| For information about connection using Ethernet and wireless LAN, see \ |
14 |
| For information about connection using Ethernet and wireless LAN, see \ |
14 |
| For information about connection using Ethernet and wireless LAN, see \ |
14 |
| For information about connection using Bluetooth |
14 |
| Requirements |
14 |
| Requirements |
14 |
| Before using this machine, make sure all environmental and electrical requirements are met. Conne... |
14 |
| Before using this machine, make sure all environmental and electrical requirements are met. Conne... |
14 |
| Make sure all cables, connectors, and electrical outlets necessary to attach the machine to the h... |
14 |
| Connecting the Machine to the host using a USB cable |
14 |
| Connecting the Machine to the host using a USB cable |
14 |
| You can connect the machine to the host computer using a USB interface cable. |
14 |
| You can connect the machine to the host computer using a USB interface cable. |
14 |
| This machine does not come with a USB interface cable. Make sure you purchase the appropriate cab... |
14 |
| Follow the procedure below to connect the machine to the host computer using a USB interface cable. |
14 |
| Follow the procedure below to connect the machine to the host computer using a USB interface cable. |
14 |
| A Connect the USB 2.0 interface cable to the USB port on the right side of the machine's back cover. |
14 |
| A Connect the USB 2.0 interface cable to the USB port on the right side of the machine's back cover. |
14 |
| A Connect the USB 2.0 interface cable to the USB port on the right side of the machine's back cover. |
14 |
| <GRAPHIC> |
14 |
| B Connect the other end to the USB port on the host computer. |
14 |
| The machine and computer are now connected. The printer driver must be installed next. For detail... |
14 |
| The USB 2.0 interface is supported by Windows 98 SE/Me, Windows 2000/XP, Mac OS 9.x, and Mac OS X. |
14 |
| The USB 2.0 interface is supported by Windows 98 SE/Me, Windows 2000/XP, Mac OS 9.x, and Mac OS X. |
14 |
| Connecting the Machine to the host using the parallel cable/IEEE 1394 (SCSI print) cable |
15 |
| Connecting the Machine to the host using the parallel cable/IEEE 1394 (SCSI print) cable |
15 |
| Connect the machine to the host computer using the optional IEEE 1284 interface board or optional... |
15 |
| Connect the machine to the host computer using the optional IEEE 1284 interface board or optional... |
15 |
| The machine's parallel interface is a standard bidirectional interface. It requires an IEEE 1284 ... |
15 |
| Do not use a parallel cable that is longer than 3 meters (10 feet). |
15 |
| Do not use a parallel cable that is longer than 3 meters (10 feet). |
15 |
| Do not use a parallel cable that is longer than 3 meters (10 feet). |
15 |
| Rating voltage of the interface connector: Max. DC 5V |
15 |
| Follow the procedure below to connect the machine to the host computer. |
15 |
| Before connecting the machine to a computer using a parallel interface cable, make sure the machi... |
15 |
| Before connecting the machine to a computer using a parallel interface cable, make sure the machi... |
15 |
| Be sure to use a specified interface cable. Other cables may cause radio interference. |
15 |
| A Turn off the main power switches of the machine and computer. |
15 |
| A Turn off the main power switches of the machine and computer. |
15 |
| A Turn off the main power switches of the machine and computer. |
15 |
| Before turning off the main power switch, see “Turning Off the Power”, |
15 |
| Before turning off the main power switch, see “Turning Off the Power”, |
15 |
| B Plug the cable into the connector on the machine’s interface. |
15 |
| B Plug the cable into the connector on the machine’s interface. |
15 |
| Parallel Connection |
15 |
| Parallel Connection |
15 |
| <GRAPHIC> |
15 |
| IEEE 1394 (SCSI print) Connection |
15 |
| <GRAPHIC> |
15 |
| C Plug the other end of the cable into the connector on the computer’s interface. |
15 |
| D Turn on the machine's main power switch. |
15 |
| D Turn on the machine's main power switch. |
15 |
| E Turn on the computer. |
15 |
| E Turn on the computer. |
15 |
| When using Windows 95/98 SE/Me/2000/XP or Windows Server 2003, a printer driver installation scre... |
15 |
| When using Windows 95/98 SE/Me/2000/XP or Windows Server 2003, a printer driver installation scre... |
15 |
| The machine and computer are now connected. The printer driver must be installed next. For inform... |
15 |
| Setting Paper on the Bypass Tray |
16 |
| Setting Paper on the Bypass Tray |
16 |
| Bypass tray |
16 |
| Custom size paper:printing, bypass tray |
16 |
| This section gives instructions for setting paper on the bypass tray. Use the bypass tray to prin... |
16 |
| This section gives instructions for setting paper on the bypass tray. Use the bypass tray to prin... |
16 |
| For details about setting paper in the paper tray, see |
16 |
| For details about setting paper in the paper tray, see |
16 |
| For details about setting paper in the paper tray, see |
16 |
| When loading letterhead paper, pay attention to its orientation. See “Orientation-Fixed Paper or ... |
16 |
| When loading letterhead paper, pay attention to its orientation. See “Orientation-Fixed Paper or ... |
16 |
| Paper within the following dimensions can be set in the bypass tray: |
16 |
| Be sure to set the paper with the side you want to print facing down in the bypass tray. |
16 |
| When loading OHP transparencies or thick paper in the bypass tray, make the paper setting using t... |
16 |
| The number of sheets that can be loaded in the bypass tray depends on the paper type. |
16 |
| The following functions are disabled when printing from the bypass tray: |
16 |
| The following functions are disabled when printing from the bypass tray: |
16 |
| When printing using the printer function, original images are always rotated by 180 degrees (the ... |
16 |
| When printing using the printer function, original images are always rotated by 180 degrees (the ... |
16 |
| Be sure to set the paper size using the printer driver when printing data from the computer. The ... |
16 |
| A Open the bypass tray. |
16 |
| A Open the bypass tray. |
16 |
| A Open the bypass tray. |
16 |
| <GRAPHIC> |
16 |
| B Adjust the paper guides to the paper size. |
16 |
| If the paper guides are not flush against the paper, skewed images or paper misfeeds might occur. |
16 |
| If the paper guides are not flush against the paper, skewed images or paper misfeeds might occur. |
16 |
| C Gently insert paper face down into the bypass tray. |
17 |
| C Gently insert paper face down into the bypass tray. |
17 |
| <GRAPHIC> |
17 |
| <GRAPHIC> |
17 |
| 1.� Extender |
17 |
| 1.� Extender |
17 |
| 1.� Extender |
17 |
| 2.� Paper guides |
17 |
| 2.� Paper guides |
17 |
| Do not stack paper over the limit mark, otherwise a skewed image or misfeeds might occur. |
17 |
| Do not stack paper over the limit mark, otherwise a skewed image or misfeeds might occur. |
17 |
| Open out the extender to support paper sizes larger than A4 L, 81/2\ |
17 |
| Fan the paper to get air between the sheets to avoid a multi-sheet feed. |
17 |
| When setting an OHP transparency, make sure that its front and back sides are properly positioned. |
17 |
| Select paper type when printing onto OHP transparencies or thick paper (over 105g/m |
17 |
| Select paper type when printing onto envelopes. For details, see |
17 |
| D Select the paper size. |
17 |
| D Select the paper size. |
17 |
| You can set paper size using the printer driver. The following procedures are not necessary when ... |
17 |
| You can set paper size using the printer driver. The following procedures are not necessary when ... |
17 |
| The paper size set using the printer driver has priority over that set using the control panel. |
17 |
| When the printer driver is not used, make settings using the control panel. |
17 |
| For printer driver settings, see the printer driver Help. |
17 |
| For printer driver settings, see the printer driver Help. |
17 |
| For details about setting custom sizes, see |
17 |
| A Press the |
17 |
| A Press the |
17 |
| A Press the |
17 |
| B Select |
17 |
| B Select |
17 |
| <GRAPHIC> |
17 |
| C Select |
17 |
| <GRAPHIC> |
18 |
| D Select |
18 |
| <GRAPHIC> |
18 |
| E Select the paper size using |
18 |
| <GRAPHIC> |
18 |
| When printing onto thick paper or OHP transparencies, select the paper type. For details, see |
18 |
| When printing onto thick paper or OHP transparencies, select the paper type. For details, see |
18 |
| F Press the |
18 |
| F Press the |
18 |
| Setting custom size paper |
18 |
| Setting custom size paper |
18 |
| Custom size paper |
18 |
| Custom sizes can also be set using the printer driver. The following procedures are not necessary... |
18 |
| Custom sizes can also be set using the printer driver. The following procedures are not necessary... |
18 |
| Custom sizes can also be set using the printer driver. The following procedures are not necessary... |
18 |
| Custom size settings set using the printer driver have priority over those set using the machine'... |
18 |
| When the printer driver is not used, make settings using the control panel. |
18 |
| For printer driver settings, see the printer driver Help. |
18 |
| For printer driver settings, see the printer driver Help. |
18 |
| A Press the |
18 |
| A Press the |
18 |
| A Press the |
18 |
| B Select |
18 |
| B Select |
18 |
| <GRAPHIC> |
18 |
| C Select |
18 |
| <GRAPHIC> |
18 |
| D Select |
18 |
| <GRAPHIC> |
18 |
| E Select |
18 |
| <GRAPHIC> |
18 |
| F Enter the vertical size of the paper using the number keys, and then press the |
18 |
| <GRAPHIC> |
19 |
| G Enter the horizontal size of the paper using the number keys, and then press the |
19 |
| <GRAPHIC> |
19 |
| H Press the |
19 |
| Setting thick paper or OHP transparencies |
19 |
| Setting thick paper or OHP transparencies |
19 |
| Thick Paper:printing, bypass tray |
19 |
| OHP Transparencies:printing, bypass tray |
19 |
| Paper settings can also be set using the printer driver. The following procedures are not necessa... |
19 |
| Paper settings can also be set using the printer driver. The following procedures are not necessa... |
19 |
| Paper settings can also be set using the printer driver. The following procedures are not necessa... |
19 |
| Paper size settings set using the printer driver have priority over those set using the machine's... |
19 |
| When the printer driver is not used, make settings using the control panel. |
19 |
| For printer driver settings, see the printer driver Help. |
19 |
| For printer driver settings, see the printer driver Help. |
19 |
| A Press the |
19 |
| A Press the |
19 |
| A Press the |
19 |
| B Select |
19 |
| B Select |
19 |
| <GRAPHIC> |
19 |
| C Select |
19 |
| <GRAPHIC> |
19 |
| D Select |
19 |
| <GRAPHIC> |
19 |
| E Select |
19 |
| <GRAPHIC> |
19 |
| F Press the |
19 |
| Settings made remain valid until they are reset again. After printing on OHP transparencies or th... |
19 |
| Settings made remain valid until they are reset again. After printing on OHP transparencies or th... |
19 |
| Setting envelopes |
20 |
| Setting envelopes |
20 |
| A Press the |
20 |
| A Press the |
20 |
| A Press the |
20 |
| A Press the |
20 |
| B Select |
20 |
| B Select |
20 |
| <GRAPHIC> |
20 |
| C Select |
20 |
| <GRAPHIC> |
20 |
| D Select |
20 |
| <GRAPHIC> |
20 |
| E Select |
20 |
| <GRAPHIC> |
20 |
| F Press the |
20 |
| G Select |
20 |
| G Select |
20 |
| <GRAPHIC> |
20 |
| H Select |
20 |
| <GRAPHIC> |
20 |
| I Select |
20 |
| <GRAPHIC> |
20 |
| J Select the paper envelope size from |
20 |
| <GRAPHIC> |
20 |
| K Press the |
20 |
| Installing the Software |
21 |
| Installing the Software |
21 |
| This manual assumes you are familiar with general Windows procedures and practices. If you are no... |
21 |
| This manual assumes you are familiar with general Windows procedures and practices. If you are no... |
21 |
| The procedure for installing the printer driver depends on the connection with the computer. With... |
21 |
| The procedure for installing the printer driver depends on the connection with the computer. With... |
21 |
| • For details about the parallel/network connection, see |
21 |
| • For details about the parallel/network connection, see |
21 |
| • For details about the parallel/network connection, see |
21 |
| • For details about the USB connection, see |
21 |
| • For details about the USB connection, see |
21 |
| • For details about the IEEE 1394 connection (SCSI print), see |
21 |
| • For details about the IEEE 1394 connection (SCSI print), see |
21 |
| Auto Run |
21 |
| Auto Run |
21 |
| Printer driver:Auto Run |
21 |
| Inserting the CD-ROM into the CD- ROM drive starts the installer automatically. The installer hel... |
21 |
| Inserting the CD-ROM into the CD- ROM drive starts the installer automatically. The installer hel... |
21 |
| If “plug and play” starts, click |
21 |
| If “plug and play” starts, click |
21 |
| Auto Run might not work automatically with certain operating system settings. If this happens, la... |
21 |
| If you want to cancel Auto Run, hold down the |
21 |
| If your operating system is Windows 2000/XP, Windows Server 2003, or Windows NT 4.0, installing s... |
21 |
| If your operating system is Windows 2000/XP, Windows Server 2003, or Windows NT 4.0, installing s... |
21 |
| The following table shows the printer drivers and software that can be installed using Auto Run: |
22 |
| <TABLE> |
22 |
| <TABLE> |
22 |
| <TABLE> |
22 |
| <TABLE BODY> |
22 |
| <TABLE ROW> |
22 |
| Auto Run *1 |
22 |
| <TABLE ROW> |
22 |
| Quick Install |
22 |
| Add Printer and Utility Wizard |
22 |
| <TABLE ROW> |
22 |
| Network connection with TCP/IP |
22 |
| Parallel connection |
22 |
| <TABLE ROW> |
22 |
| PCL 6 printer driver |
22 |
| m |
22 |
| m |
22 |
| m |
22 |
| <TABLE ROW> |
22 |
| PCL 5e printer driver |
22 |
| m |
22 |
| <TABLE ROW> |
22 |
| RPCS™ printer driver |
22 |
| m |
22 |
| m |
22 |
| m |
22 |
| <TABLE ROW> |
22 |
| PostScript 3 printer driver |
22 |
| m |
22 |
| <TABLE ROW> |
22 |
| LAN-Fax Driver |
22 |
| m |
22 |
| <TABLE ROW> |
22 |
| Font Manager 2000 |
22 |
| m |
22 |
| <TABLE ROW> |
22 |
| SmartDeviceMonitor for Admin |
22 |
| m |
22 |
| <TABLE ROW> |
22 |
| SmartDeviceMonitor for Client |
22 |
| m |
22 |
| m |
22 |
| *1 Available operating systems are: Windows 95/98/Me, Windows 2000/XP, Windows Server 2003, and W... |
22 |
| *1 Available operating systems are: Windows 95/98/Me, Windows 2000/XP, Windows Server 2003, and W... |
22 |
| *1 Available operating systems are: Windows 95/98/Me, Windows 2000/XP, Windows Server 2003, and W... |
22 |
| Quick Install |
22 |
| Quick Install |
22 |
| Auto Run will start the installer automatically when you insert the CD- ROM into the CD-ROM drive... |
22 |
| Auto Run will start the installer automatically when you insert the CD- ROM into the CD-ROM drive... |
22 |
| Before starting installation, close all documents and applications. |
22 |
| Before starting installation, close all documents and applications. |
22 |
| The following conditions are required: |
22 |
| The following conditions are required: |
22 |
| The following conditions are required: |
22 |
| • Windows 95/98/Me/2000/XP, Windows Server 2003, or Windows NT 4.0 |
22 |
| • Windows 95/98/Me/2000/XP, Windows Server 2003, or Windows NT 4.0 |
22 |
| • Windows 95/98/Me/2000/XP, Windows Server 2003, or Windows NT 4.0 |
22 |
| For network connections: |
22 |
| • The machine must be connected to the network using an Ethernet cable. |
22 |
| • The machine must be connected to the network using an Ethernet cable. |
22 |
| • The machine must be connected to the network using an Ethernet cable. |
22 |
| • TCP/IP protocol must be configured. |
22 |
| • TCP/IP protocol must be configured. |
22 |
| • The IP address must be assigned to both machine and computer. |
22 |
| • The IP address must be assigned to both machine and computer. |
22 |
| • The IEEE 802.11b interface unit is installed and the connection is properly made. |
22 |
| • The IEEE 802.11b interface unit is installed and the connection is properly made. |
22 |
| • The IEEE 1394 interface board (IP over 1394) is installed and the connection is properly made. |
22 |
| • The IEEE 1394 interface board (IP over 1394) is installed and the connection is properly made. |
22 |
| For parallel connections: |
22 |
| • The machine must be connected to the computer using a parallel cable. |
22 |
| • The machine must be connected to the computer using a parallel cable. |
22 |
| • The machine must be connected to the computer using a parallel cable. |
22 |
| • Bidirectional transmission must be enabled. |
22 |
| • Bidirectional transmission must be enabled. |
22 |
| If your system is Windows NT 4.0, we recommend that you upgrade the Windows NT 4.0 operating syst... |
23 |
| If your system is Windows NT 4.0, we recommend that you upgrade the Windows NT 4.0 operating syst... |
23 |
| When the machine is connected to the computer using the USB 2.0 interface or the IEEE 1394 interf... |
23 |
| When the machine is connected to the computer using the USB 2.0 interface or the IEEE 1394 interf... |
23 |
| A Quit all applications running. |
23 |
| A Quit all applications running. |
23 |
| A Quit all applications running. |
23 |
| B Insert the CD-ROM into the CD- ROM drive. |
23 |
| B Insert the CD-ROM into the CD- ROM drive. |
23 |
| Auto Run will start the installer. |
23 |
| C Select a language for the interface language, and then click |
23 |
| C Select a language for the interface language, and then click |
23 |
| The following languages are available: Cestina (Czech), Dansk (Danish), Deutsch (German), English... |
23 |
| The default interface language is English. |
23 |
| D Click |
23 |
| D Click |
23 |
| The software license agreement appears in the |
23 |
| E After reading through the agreement, click |
23 |
| E After reading through the agreement, click |
23 |
| F Click the machine model you are using when the |
23 |
| F Click the machine model you are using when the |
23 |
| For TCP/IP network connection, select the machine whose IP address is displayed in the |
23 |
| For TCP/IP network connection, select the machine whose IP address is displayed in the |
23 |
| For parallel connection, select the machine whose printer port is displayed in the |
23 |
| G Click |
23 |
| G Click |
23 |
| H Follow the instructions on the screen. |
23 |
| H Follow the instructions on the screen. |
23 |
| A message prompting you to restart your computer may appear. To complete installation, restart yo... |
23 |
| If the machine has options installed, you should make settings for them using the printer driver.... |
23 |
| If the machine has options installed, you should make settings for them using the printer driver.... |
23 |
| If you want to change the printer name, follow the procedure below: |
23 |
| If you want to change the printer name, follow the procedure below: |
23 |
| • Windows 95/98/Me, Windows 2000, and Windows NT 4.0 |
23 |
| • Windows 95/98/Me, Windows 2000, and Windows NT 4.0 |
23 |
| • Windows 95/98/Me, Windows 2000, and Windows NT 4.0 |
23 |
| • Windows 95/98/Me, Windows 2000, and Windows NT 4.0 |
23 |
| On the |
23 |
| • Windows XP Professional and Windows Server 2003 |
24 |
| • Windows XP Professional and Windows Server 2003 |
24 |
| • Windows XP Professional and Windows Server 2003 |
24 |
| On the |
24 |
| • Windows XP Home Edition |
24 |
| • Windows XP Home Edition |
24 |
| • Windows XP Home Edition |
24 |
| On the |
24 |
| Installing the PCL 6/5e and RPCS™ Printer Driver |
24 |
| Installing the PCL 6/5e and RPCS™ Printer Driver |
24 |
| PCL 5e:Windows 95/98/Me, installing |
24 |
| Windows 95/98/Me:PCL 5e, installing |
24 |
| PCL 5e:Windows 2000/XP and Windows Server 2003, installing |
24 |
| Windows 2000/XP and Windows Server 2003:PCL 5e, installing |
24 |
| PCL 5e:Windows NT 4.0, installing |
24 |
| Windows NT 4.0:PCL 5e, installing |
24 |
| PCL 6:Windows 95/98/Me, installing |
24 |
| Windows 95/98/Me:PCL 6, installing |
24 |
| PCL 6:Windows 2000/XP and Windows Server 2003, installing |
24 |
| Windows 2000/XP and Windows Server 2003:PCL 6, installing |
24 |
| PCL 6:Windows NT 4.0, installing |
24 |
| Windows NT 4.0:PCL 6, installing |
24 |
| RPCS:Windows 95/98/Me, installing |
24 |
| Windows 95/98/Me:RPCS, installing |
24 |
| RPCS:Windows 2000/XP and Windows Server 2003, installing |
24 |
| Windows 2000/XP and Windows Server 2003:RPCS, installing |
24 |
| RPCS:Windows NT 4.0, installing |
24 |
| Windows NT 4.0:RPCS, installing |
24 |
| This section gives basic instructions for installing the PCL 6/5e printer driver and RPCS™ printe... |
24 |
| This section gives basic instructions for installing the PCL 6/5e printer driver and RPCS™ printe... |
24 |
| See |
24 |
| See |
24 |
| See |
24 |
| If your operating system is Windows 2000/XP, Windows Server 2003, or Windows NT 4.0, installing a... |
24 |
| If your operating system is Windows 2000/XP, Windows Server 2003, or Windows NT 4.0, installing a... |
24 |
| If your operating system is Windows NT 4.0, we recommend that you upgrade the Windows NT 4.0 oper... |
24 |
| If your operating system is Windows NT 4.0, we recommend that you upgrade the Windows NT 4.0 oper... |
24 |
| If you want to share the machine on a Windows 2000/XP, Windows Server 2003, or Windows NT 4.0 pla... |
24 |
| If you want to share the machine on a Windows 2000/XP, Windows Server 2003, or Windows NT 4.0 pla... |
24 |
| When prompted for the additional driver (alternate driver) location, select the following folders... |
24 |
| A Quit all applications running. |
25 |
| A Quit all applications running. |
25 |
| A Quit all applications running. |
25 |
| B Insert the CD-ROM into the CD- ROM drive. |
25 |
| B Insert the CD-ROM into the CD- ROM drive. |
25 |
| Auto Run will start the installer. |
25 |
| C Select a language for the interface language, and then click |
25 |
| C Select a language for the interface language, and then click |
25 |
| The following languages are available: Cestina (Czech), Dansk (Danish), Deutsch (German), English... |
25 |
| The default interface language is English. |
25 |
| D Click |
25 |
| D Click |
25 |
| The software license agreement appears in the |
25 |
| E After reading through the agreement, click |
25 |
| E After reading through the agreement, click |
25 |
| F Select the printer drivers you want to install when the |
25 |
| F Select the printer drivers you want to install when the |
25 |
| G Select the model of the machine you are using. |
25 |
| G Select the model of the machine you are using. |
25 |
| To change the printer name, change it in the |
25 |
| H Double-click the machine name to display the printer settings. |
25 |
| H Double-click the machine name to display the printer settings. |
25 |
| I Select SmartDeviceMonitor. |
25 |
| I Select SmartDeviceMonitor. |
25 |
| SmartDeviceMonitor |
25 |
| SmartDeviceMonitor |
25 |
| A Click |
25 |
| A Click |
25 |
| B Click |
25 |
| B Click |
25 |
| C Select the machine you want to use. |
25 |
| C Select the machine you want to use. |
25 |
| TCP/IP |
25 |
| TCP/IP |
25 |
| TCP/IP |
25 |
| A Click |
25 |
| A Click |
25 |
| A Click |
25 |
| A Click |
25 |
| Available machines will be listed. |
25 |
| B Select the machine you want to use, and then click |
25 |
| B Select the machine you want to use, and then click |
25 |
| Machines that respond to an IP broadcast from the computer will be displayed. To print to a machi... |
25 |
| Machines that respond to an IP broadcast from the computer will be displayed. To print to a machi... |
25 |
| Part of the printer's IP address is used for the port name. Under Windows 95/98/Me, avoid using a... |
25 |
| NetBEUI |
26 |
| NetBEUI |
26 |
| A Click |
26 |
| A Click |
26 |
| A Click |
26 |
| A Click |
26 |
| A list of machines that can be used with NetBEUI appears. |
26 |
| B Select the machine you want to use, and then click |
26 |
| B Select the machine you want to use, and then click |
26 |
| NetBEUI cannot be used under Windows XP or Windows Server 2003. |
26 |
| NetBEUI cannot be used under Windows XP or Windows Server 2003. |
26 |
| Machines that respond to a broadcast from the computer will be displayed. To print to a machine n... |
26 |
| You cannot print to machines beyond routers. |
26 |
| IPP |
26 |
| IPP |
26 |
| A Click |
26 |
| A Click |
26 |
| A Click |
26 |
| A Click |
26 |
| The IPP setting dialog box appears. |
26 |
| B To specify the IP address of the machine, enter \ |
26 |
| B To specify the IP address of the machine, enter \ |
26 |
| (Example: IP address is 192.168.15.16) |
26 |
| http://192.168.15.16/ printer ipp://192.168.15.16 /printer |
26 |
| C If necessary, enter the names to distinguish the machine in the |
26 |
| C If necessary, enter the names to distinguish the machine in the |
26 |
| If you do not do this, the address entered in the |
26 |
| D If a proxy server and IPP user name are used, click |
26 |
| D If a proxy server and IPP user name are used, click |
26 |
| For more information about these settings, see SmartDeviceMonitor for Client Help. |
26 |
| For more information about these settings, see SmartDeviceMonitor for Client Help. |
26 |
| E Click |
26 |
| E Click |
26 |
| J Make sure the location for the selected machine appears after |
26 |
| J Make sure the location for the selected machine appears after |
26 |
| K Configure the user code and default printer as necessary. |
26 |
| K Configure the user code and default printer as necessary. |
26 |
| User Code |
27 |
| User Code |
27 |
| User Code |
27 |
| User codes are eight digit codes that allow you to keep track of printing done under each code. T... |
27 |
| User codes are eight digit codes that allow you to keep track of printing done under each code. T... |
27 |
| Use the following methods to enter a user code for registration: |
27 |
| • For the PCL 6/5e or PostScript 3 printer drivers, enter the user code on the |
27 |
| • For the PCL 6/5e or PostScript 3 printer drivers, enter the user code on the |
27 |
| • For the PCL 6/5e or PostScript 3 printer drivers, enter the user code on the |
27 |
| • For the RPCS™ printer driver, click the |
27 |
| • For the RPCS™ printer driver, click the |
27 |
| When using the RPCS™ printer driver on Windows 95/98/Me, the user code cannot be changed once it ... |
27 |
| When using the RPCS™ printer driver on Windows 95/98/Me, the user code cannot be changed once it ... |
27 |
| For more information about user codes, see “User Code (MFP)”, |
27 |
| For more information about user codes, see “User Code (MFP)”, |
27 |
| Default Printer |
27 |
| Default Printer |
27 |
| Select the |
27 |
| Select the |
27 |
| L Click |
27 |
| L Click |
27 |
| M Follow the instructions on the screen. |
27 |
| M Follow the instructions on the screen. |
27 |
| Changing port settings |
27 |
| Changing port settings |
27 |
| Follow these steps to change SmartDeviceMonitor for Client settings, such as the proxy server set... |
27 |
| Follow these steps to change SmartDeviceMonitor for Client settings, such as the proxy server set... |
27 |
| There are no settings for NetBEUI. |
27 |
| There are no settings for NetBEUI. |
27 |
| A In the |
27 |
| A In the |
27 |
| A In the |
27 |
| Under Windows XP and Windows Server 2003, click the icon of the machine you want to use in the |
27 |
| Under Windows XP and Windows Server 2003, click the icon of the machine you want to use in the |
27 |
| B Click the |
27 |
| B Click the |
27 |
| The |
27 |
| Under Windows 2000/XP, Windows Server 2003, and Windows NT 4.0, click the |
27 |
| Under Windows 2000/XP, Windows Server 2003, and Windows NT 4.0, click the |
27 |
| • For TCP/IP, you can configure Timeout Settings. |
27 |
| • For TCP/IP, you can configure Timeout Settings. |
27 |
| • For TCP/IP, you can configure Timeout Settings. |
27 |
| If you cannot set the items on the |
28 |
| If you cannot set the items on the |
28 |
| • For IPP, you can configure IPP User Settings, Proxy Settings and Timeout Settings. |
28 |
| • For IPP, you can configure IPP User Settings, Proxy Settings and Timeout Settings. |
28 |
| For more information about these settings, see SmartDeviceMonitor for Client Help. |
28 |
| For more information about these settings, see SmartDeviceMonitor for Client Help. |
28 |
| Setting Up Options - PCL 6/5e and RPCS |
28 |
| Setting Up Options - PCL 6/5e and RPCS |
28 |
| If the machine has options installed, you should set the options using the printer driver. |
28 |
| If the machine has options installed, you should set the options using the printer driver. |
28 |
| Under Windows 2000/XP and Windows Server 2003, changing printer settings requires Manage Printers... |
28 |
| Under Windows 2000/XP and Windows Server 2003, changing printer settings requires Manage Printers... |
28 |
| Under Windows NT 4.0, changing printer settings requires Full Control permission. Members of the ... |
28 |
| When setting up options, you should access the printer properties dialog box from Windows. You ca... |
28 |
| PCL 6/5e printer driver |
28 |
| PCL 6/5e printer driver |
28 |
| A On the |
28 |
| A On the |
28 |
| A On the |
28 |
| A On the |
28 |
| The |
28 |
| If using Windows XP Professional or Windows Server 2003, click the |
28 |
| If using Windows XP Professional or Windows Server 2003, click the |
28 |
| If using Windows XP Home Edition, access the |
28 |
| B Click the icon of the machine you want to use. |
28 |
| B Click the icon of the machine you want to use. |
28 |
| C On the |
28 |
| C On the |
28 |
| The printer properties dialog box appears. |
28 |
| D Click the |
28 |
| D Click the |
28 |
| E Select the options installed in the |
28 |
| E Select the options installed in the |
28 |
| F Click |
28 |
| F Click |
28 |
| RPCS™ printer driver |
29 |
| RPCS™ printer driver |
29 |
| A On the |
29 |
| A On the |
29 |
| A On the |
29 |
| A On the |
29 |
| The |
29 |
| If using Windows XP Professional or Windows Server 2003, click the |
29 |
| If using Windows XP Professional or Windows Server 2003, click the |
29 |
| If using Windows XP Home Edition, access the |
29 |
| B Click the icon of the machine you want to use. |
29 |
| B Click the icon of the machine you want to use. |
29 |
| C On the |
29 |
| C On the |
29 |
| The printer properties dialog box appears. |
29 |
| If the following message appears “Configure installed accessories in the |
29 |
| If the following message appears “Configure installed accessories in the |
29 |
| D Click the |
29 |
| D Click the |
29 |
| In Windows 95/98/Me, click |
29 |
| In Windows 95/98/Me, click |
29 |
| E Select the options installed in the |
29 |
| E Select the options installed in the |
29 |
| F Click |
29 |
| F Click |
29 |
| G Click |
29 |
| G Click |
29 |
| Installing the PostScript 3 Printer Driver |
29 |
| Installing the PostScript 3 Printer Driver |
29 |
| This section gives basic instructions for installing the PostScript 3 printer driver. Actual proc... |
29 |
| This section gives basic instructions for installing the PostScript 3 printer driver. Actual proc... |
29 |
| To use the PostScript 3 printer driver, see |
29 |
| To use the PostScript 3 printer driver, see |
29 |
| To use the PostScript 3 printer driver, see |
29 |
| Windows 95/98/Me - Installing the PostScript 3 printer driver |
29 |
| Windows 95/98/Me - Installing the PostScript 3 printer driver |
29 |
| PostScript 3:Windows 95/98/Me, installing |
29 |
| Windows 95/98/Me:PostScript 3, installing |
29 |
| A Quit all applications running. |
29 |
| A Quit all applications running. |
29 |
| A Quit all applications running. |
29 |
| A Quit all applications running. |
29 |
| B Insert the CD-ROM into the CD- ROM drive. |
29 |
| B Insert the CD-ROM into the CD- ROM drive. |
29 |
| Auto Run will start the installer. |
29 |
| C Select a language for the interface language, and then click |
29 |
| C Select a language for the interface language, and then click |
29 |
| The following languages are available: Cestina (Czech), Dansk (Danish), Deutsch (German), English... |
29 |
| The default interface language is English. |
29 |
| The printer driver with the selected language will be installed. |
30 |
| The printer driver with the selected language will be installed. |
30 |
| The printer driver will be installed in English if you select the following languages: Cestina, M... |
30 |
| D Click |
30 |
| D Click |
30 |
| Add Printer Wizard starts. |
30 |
| E Click |
30 |
| E Click |
30 |
| F Click |
30 |
| F Click |
30 |
| A dialog box for selecting the printer appears. |
30 |
| G Select the model of the machine you are using, and then click |
30 |
| G Select the model of the machine you are using, and then click |
30 |
| H In the |
30 |
| H In the |
30 |
| I Change the name of the machine if you want to, and then click |
30 |
| I Change the name of the machine if you want to, and then click |
30 |
| Click |
30 |
| Click |
30 |
| J Follow the instructions on the screen. |
30 |
| J Follow the instructions on the screen. |
30 |
| Windows 95/98/Me - Setting up options |
30 |
| Windows 95/98/Me - Setting up options |
30 |
| If the machine has options installed, you should make settings for them using the printer driver. |
30 |
| If the machine has options installed, you should make settings for them using the printer driver. |
30 |
| A On the |
30 |
| A On the |
30 |
| A On the |
30 |
| The |
30 |
| B Click the icon of the machine you want to use. |
30 |
| B Click the icon of the machine you want to use. |
30 |
| C On the |
30 |
| C On the |
30 |
| The printer properties dialog box appears. |
30 |
| D Click the |
30 |
| D Click the |
30 |
| E Select the options you have installed in the |
30 |
| E Select the options you have installed in the |
30 |
| F Click |
30 |
| F Click |
30 |
| Windows 2000/XP and Windows Server 2003 - Installing the PostScript 3 printer driver |
30 |
| Windows 2000/XP and Windows Server 2003 - Installing the PostScript 3 printer driver |
30 |
| PostScript 3:Windows 2000/XP and Windows Server 2003, installing |
30 |
| Windows 2000/XP and Windows Server 2003:PostScript 3, installing |
30 |
| Installing a printer driver requires Administrator permission. When you install a printer driver,... |
30 |
| Installing a printer driver requires Administrator permission. When you install a printer driver,... |
30 |
| Installing a printer driver requires Administrator permission. When you install a printer driver,... |
30 |
| If you want to share the machine on a Windows 2000/XP or Windows Server 2003 platform, use the |
30 |
| If you want to share the machine on a Windows 2000/XP or Windows Server 2003 platform, use the |
30 |
| When prompted for the additional driver (alternate driver) location, select the following folders... |
30 |
| A Quit all applications that are running. |
31 |
| A Quit all applications that are running. |
31 |
| A Quit all applications that are running. |
31 |
| B Insert the CD-ROM into the CD- ROM drive. |
31 |
| B Insert the CD-ROM into the CD- ROM drive. |
31 |
| Auto Run will start the installer. |
31 |
| C Select a language for the interface language, and then click |
31 |
| C Select a language for the interface language, and then click |
31 |
| The following languages are available: Cestina (Czech), Dansk (Danish), Deutsch (German), English... |
31 |
| The default interface language is English. |
31 |
| The printer driver with the selected language will be installed. |
31 |
| The printer driver with the selected language will be installed. |
31 |
| The printer driver will be installed in English if you select the following languages: Cestina, M... |
31 |
| D Click |
31 |
| D Click |
31 |
| Add Printer Wizard starts. |
31 |
| E Click |
31 |
| E Click |
31 |
| F Click |
31 |
| F Click |
31 |
| If using Windows XP or Windows Server 2003, click |
31 |
| If using Windows XP or Windows Server 2003, click |
31 |
| A dialog box for selecting the printer port appears. |
31 |
| G Select the check box of the port you want to use, and then click |
31 |
| G Select the check box of the port you want to use, and then click |
31 |
| A dialog box for selecting the printer appears. |
31 |
| H Select the model of the machine you are using, and then click |
31 |
| H Select the model of the machine you are using, and then click |
31 |
| I Change the name of the machine if you want to, and then click |
31 |
| I Change the name of the machine if you want to, and then click |
31 |
| Click |
31 |
| Click |
31 |
| J Select whether or not you want to share the machine, and then click |
31 |
| J Select whether or not you want to share the machine, and then click |
31 |
| See |
31 |
| See |
31 |
| K Follow the instructions on the screen. |
31 |
| K Follow the instructions on the screen. |
31 |
| Windows 2000/XP and Windows Server 2003 - Setting up options |
31 |
| Windows 2000/XP and Windows Server 2003 - Setting up options |
31 |
| If the machine has options installed, you should make settings for them using the printer driver. |
31 |
| If the machine has options installed, you should make settings for them using the printer driver. |
31 |
| Changing the printer settings requires Manage Printers permission. Members of the Administrators ... |
31 |
| Changing the printer settings requires Manage Printers permission. Members of the Administrators ... |
31 |
| A On the |
32 |
| A On the |
32 |
| A On the |
32 |
| The |
32 |
| In Windows XP Professional or Windows Server 2003, click the |
32 |
| In Windows XP Professional or Windows Server 2003, click the |
32 |
| In Windows XP Home Edition, access the |
32 |
| B Click the icon of the machine you want to use. |
32 |
| B Click the icon of the machine you want to use. |
32 |
| C On the |
32 |
| C On the |
32 |
| The printer properties dialog box appears. |
32 |
| D Click the |
32 |
| D Click the |
32 |
| E Select the options you have installed under |
32 |
| E Select the options you have installed under |
32 |
| F Click |
32 |
| F Click |
32 |
| Windows NT 4.0 - Installing the PostScript 3 printer driver |
32 |
| Windows NT 4.0 - Installing the PostScript 3 printer driver |
32 |
| PostScript 3:Windows NT 4.0, installing |
32 |
| Windows NT 4.0:PostScript 3, installing |
32 |
| Installing a printer driver requires Administrator permission. When you install a printer driver,... |
32 |
| Installing a printer driver requires Administrator permission. When you install a printer driver,... |
32 |
| Installing a printer driver requires Administrator permission. When you install a printer driver,... |
32 |
| The CD-ROM containing Windows NT Server operating system version 4.0, or the Windows NT Workstati... |
32 |
| The CD-ROM containing Windows NT Server operating system version 4.0, or the Windows NT Workstati... |
32 |
| We recommend that you upgrade Windows NT 4.0 operating system to Service Pack 6 or later before i... |
32 |
| If you want to share the machine on a Windows NT 4.0 platform, use the |
32 |
| If you want to share the machine on a Windows NT 4.0 platform, use the |
32 |
| When prompted for the additional driver (alternate driver) location, select the following folders... |
32 |
| • Windows 95/98/Me: |
32 |
| • Windows 95/98/Me: |
32 |
| • Windows 95/98/Me: |
32 |
| • Windows 95/98/Me: |
32 |
| A Quit all applications running. |
32 |
| A Quit all applications running. |
32 |
| A Quit all applications running. |
32 |
| B Insert the CD-ROM into the CD- ROM drive. |
32 |
| B Insert the CD-ROM into the CD- ROM drive. |
32 |
| Auto Run will start the installer. |
32 |
| C Select a language for the interface language, and then click |
32 |
| C Select a language for the interface language, and then click |
32 |
| The following languages are available: Cestina (Czech), Dansk (Danish), Deutsch (German), English... |
32 |
| The default interface language is English. |
32 |
| The printer driver with the selected language will be installed. |
33 |
| The printer driver with the selected language will be installed. |
33 |
| The printer driver will be installed in English if you select the following languages: Cestina, M... |
33 |
| D Click |
33 |
| D Click |
33 |
| Add Printer Wizard starts. |
33 |
| E Confirm that the |
33 |
| E Confirm that the |
33 |
| A dialog box for selecting the printer port appears. |
33 |
| F Select the check box of the port you want to use, and then click |
33 |
| F Select the check box of the port you want to use, and then click |
33 |
| A dialog box for selecting the printer appears. |
33 |
| G Select the model of the machine you are using, and then click |
33 |
| G Select the model of the machine you are using, and then click |
33 |
| H Change the name of the machine if you want to, and then click |
33 |
| H Change the name of the machine if you want to, and then click |
33 |
| Click |
33 |
| Click |
33 |
| I Select whether or not you want to share the machine, and then click |
33 |
| I Select whether or not you want to share the machine, and then click |
33 |
| See |
33 |
| See |
33 |
| J Follow the instructions on the screen. |
33 |
| J Follow the instructions on the screen. |
33 |
| Windows NT 4.0 - Setting up options |
33 |
| Windows NT 4.0 - Setting up options |
33 |
| If the machine has options installed, you should make settings for them using the printer driver. |
33 |
| If the machine has options installed, you should make settings for them using the printer driver. |
33 |
| Changing printer settings requires Manage Printers permission. Members of the Administrators and ... |
33 |
| Changing printer settings requires Manage Printers permission. Members of the Administrators and ... |
33 |
| A On the |
33 |
| A On the |
33 |
| A On the |
33 |
| The |
33 |
| B Click the icon of the machine you want to use. |
33 |
| B Click the icon of the machine you want to use. |
33 |
| C On the |
33 |
| C On the |
33 |
| The printer properties dialog box appears. |
33 |
| D Click the |
33 |
| D Click the |
33 |
| E Select the options you have installed under |
33 |
| E Select the options you have installed under |
33 |
| F Click |
33 |
| F Click |
33 |
| - Bidirectional transmission |
33 |
| - Bidirectional transmission |
33 |
| Bidirectional transmission |
33 |
| When bidirectional transmission is enabled, information such as paper size and feed orientation i... |
33 |
| • Bidirectional transmission is supported under Windows 95/98/Me/ 2000/XP, Windows Server 2003, a... |
33 |
| • Bidirectional transmission is supported under Windows 95/98/Me/ 2000/XP, Windows Server 2003, a... |
33 |
| • Bidirectional transmission is supported under Windows 95/98/Me/ 2000/XP, Windows Server 2003, a... |
33 |
| • When bidirectional transmission is running, machine status and information can be viewed by ope... |
34 |
| • When bidirectional transmission is running, machine status and information can be viewed by ope... |
34 |
| To support bidirectional transmission, the following conditions are required: |
34 |
| When connecting with USB 2.0 |
34 |
| When connecting with USB 2.0 |
34 |
| When connecting with USB 2.0 |
34 |
| • The port on the USB 2.0 interface and the USB port on the computer are connected using a USB in... |
34 |
| • The port on the USB 2.0 interface and the USB port on the computer are connected using a USB in... |
34 |
| • The port on the USB 2.0 interface and the USB port on the computer are connected using a USB in... |
34 |
| • The port on the USB 2.0 interface and the USB port on the computer are connected using a USB in... |
34 |
| In Windows 98 SE/Me, |
34 |
| In Windows 98 SE/Me, |
34 |
| In Windows 2000/XP or Windows Server 2003, |
34 |
| When connecting with the network |
34 |
| When connecting with the network |
34 |
| • The machine must be set to bidirectional transmission. |
34 |
| • The machine must be set to bidirectional transmission. |
34 |
| • The machine must be set to bidirectional transmission. |
34 |
| • The machine must be set to bidirectional transmission. |
34 |
| • SmartDeviceMonitor for Client included on the CD-ROM must be installed. |
34 |
| • SmartDeviceMonitor for Client included on the CD-ROM must be installed. |
34 |
| One of the following conditions must also be satisfied as well as the two requirements mentioned ... |
34 |
| • The port for SmartDeviceMonitor and TCP/IP must be used. |
34 |
| • The port for SmartDeviceMonitor and TCP/IP must be used. |
34 |
| • The port for SmartDeviceMonitor and TCP/IP must be used. |
34 |
| • The standard TCP/IP port is used without changing the port name (Windows 2000/XP, Windows Serve... |
34 |
| • The standard TCP/IP port is used without changing the port name (Windows 2000/XP, Windows Serve... |
34 |
| • The IP address specified in the Microsoft TCP/IP Print is used (Windows NT 4.0). |
34 |
| • The IP address specified in the Microsoft TCP/IP Print is used (Windows NT 4.0). |
34 |
| • The IP address is included in port name, if using IPP protocol. |
34 |
| • The IP address is included in port name, if using IPP protocol. |
34 |
| In Windows 95/98/Me, |
34 |
| In Windows 95/98/Me, |
34 |
| In Windows 2000/XP, Windows Server 2003, or Windows NT 4.0, |
34 |
| When connecting with IEEE 1394 |
34 |
| When connecting with IEEE 1394 |
34 |
| • The port on the optional IEEE 1394 interface board and the IEEE 1394 port on the computer are c... |
34 |
| • The port on the optional IEEE 1394 interface board and the IEEE 1394 port on the computer are c... |
34 |
| • The port on the optional IEEE 1394 interface board and the IEEE 1394 port on the computer are c... |
34 |
| • The port on the optional IEEE 1394 interface board and the IEEE 1394 port on the computer are c... |
34 |
| SCSI print (SBP-2) |
34 |
| SCSI print (SBP-2) |
34 |
| SCSI print (SBP-2) |
34 |
| In Windows Me, |
34 |
| In Windows 2000/XP, Windows Server 2003, |
34 |
| When connecting with a parallel cable |
35 |
| When connecting with a parallel cable |
35 |
| • The computer must support bidirectional transmission. |
35 |
| • The computer must support bidirectional transmission. |
35 |
| • The computer must support bidirectional transmission. |
35 |
| • The computer must support bidirectional transmission. |
35 |
| • The machine must be set to bidirectional transmission. |
35 |
| • The machine must be set to bidirectional transmission. |
35 |
| • The machine parallel port and computer parallel port are connected using a parallel interface c... |
35 |
| • The machine parallel port and computer parallel port are connected using a parallel interface c... |
35 |
| In Windows 95/98/Me, |
35 |
| In Windows 95/98/Me, |
35 |
| In Windows 2000/XP, Windows Server 2003, or Windows NT 4.0, |
35 |
| Mac OS - Installing the PostScript 3 Printer Driver and Utilities |
35 |
| Mac OS - Installing the PostScript 3 Printer Driver and Utilities |
35 |
| PostScript 3:Mac OS, installing |
35 |
| Mac OS:PostScript 3, installing |
35 |
| It is necessary to install a printer driver and a PPD file to print from a Macintosh. |
35 |
| It is necessary to install a printer driver and a PPD file to print from a Macintosh. |
35 |
| Follow this procedure to install a printer driver and a PPD file on Macintosh running OS 8.6 or l... |
35 |
| For installation under Mac OS X (v10.1.x), see |
35 |
| For installation under Mac OS X (v10.1.x), see |
35 |
| For installation under Mac OS X (v10.1.x), see |
35 |
| A Insert the CD-ROM into the CD- ROM drive. |
35 |
| A Insert the CD-ROM into the CD- ROM drive. |
35 |
| A Insert the CD-ROM into the CD- ROM drive. |
35 |
| B Double-click the CD-ROM icon. |
35 |
| B Double-click the CD-ROM icon. |
35 |
| C Double-click the |
35 |
| C Double-click the |
35 |
| D Double-click the |
35 |
| D Double-click the |
35 |
| E Double-click the folder of the language you use. |
35 |
| E Double-click the folder of the language you use. |
35 |
| F Open |
35 |
| F Open |
35 |
| The PostScript 3 printer driver installer window appears. |
35 |
| G Follow the instructions on the screen. |
35 |
| G Follow the instructions on the screen. |
35 |
| H Double-click |
35 |
| H Double-click |
35 |
| I Double-click |
35 |
| I Double-click |
35 |
| J Double-click the CD-ROM icon on the desktop. |
35 |
| J Double-click the CD-ROM icon on the desktop. |
35 |
| K Double-click the |
35 |
| K Double-click the |
35 |
| L Double-click |
35 |
| L Double-click |
35 |
| M Drag the PPD file into |
35 |
| M Drag the PPD file into |
35 |
| N Restart the Macintosh. |
35 |
| N Restart the Macintosh. |
35 |
| Setting up the PPD file |
35 |
| Setting up the PPD file |
35 |
| Make sure that the machine is connected to an AppleTalk network before performing the following p... |
35 |
| Make sure that the machine is connected to an AppleTalk network before performing the following p... |
35 |
| A On the Apple menu, click |
35 |
| A On the Apple menu, click |
35 |
| A On the Apple menu, click |
35 |
| A On the Apple menu, click |
35 |
| B Click the |
35 |
| B Click the |
35 |
| C In the |
36 |
| C In the |
36 |
| D Click |
36 |
| D Click |
36 |
| E Click |
36 |
| E Click |
36 |
| F Click the printer description file you want to use, and then click |
36 |
| F Click the printer description file you want to use, and then click |
36 |
| G Click |
36 |
| G Click |
36 |
| The PPD file is set up, and the |
36 |
| Setting up options |
36 |
| Setting up options |
36 |
| A On the Apple menu, click |
36 |
| A On the Apple menu, click |
36 |
| A On the Apple menu, click |
36 |
| A On the Apple menu, click |
36 |
| B Click the |
36 |
| B Click the |
36 |
| C In the |
36 |
| C In the |
36 |
| D Click |
36 |
| D Click |
36 |
| A list of options appears. |
36 |
| E Select the option you want to set up, and then select the appropriate setting for it. |
36 |
| E Select the option you want to set up, and then select the appropriate setting for it. |
36 |
| If the option you want to set up is not displayed, the PPD file might not be set up correctly. Ch... |
36 |
| If the option you want to set up is not displayed, the PPD file might not be set up correctly. Ch... |
36 |
| F Click |
36 |
| F Click |
36 |
| The list of options closes. |
36 |
| G Click |
36 |
| G Click |
36 |
| H Close the |
36 |
| H Close the |
36 |
| Installing Adobe Type Manager (ATM) |
36 |
| Installing Adobe Type Manager (ATM) |
36 |
| ATM:Macintosh, installing |
36 |
| Macintosh:ATM, installing |
36 |
| Quit all applications running before installation. Install after restarting. |
36 |
| Quit all applications running before installation. Install after restarting. |
36 |
| Quit all applications running before installation. Install after restarting. |
36 |
| A Start the Macintosh. |
36 |
| A Start the Macintosh. |
36 |
| A Start the Macintosh. |
36 |
| B Insert the CD-ROM into the CD- ROM drive. |
36 |
| B Insert the CD-ROM into the CD- ROM drive. |
36 |
| C Double-click the CD-ROM icon. |
36 |
| C Double-click the CD-ROM icon. |
36 |
| D Double-click the |
36 |
| D Double-click the |
36 |
| E Double-click the |
36 |
| E Double-click the |
36 |
| F Double-click the |
36 |
| F Double-click the |
36 |
| G Follow the instructions on screen. |
36 |
| G Follow the instructions on screen. |
36 |
| H Restart the Macintosh. |
36 |
| H Restart the Macintosh. |
36 |
| Make sure to restart the computer. |
36 |
| Make sure to restart the computer. |
36 |
| I Select |
36 |
| I Select |
36 |
| J Open the ATM control panel. |
36 |
| J Open the ATM control panel. |
36 |
| For more information about installation, see the User's Guide in the ATM folder. |
36 |
| For more information about installation, see the User's Guide in the ATM folder. |
36 |
| Installing screen fonts |
37 |
| Installing screen fonts |
37 |
| Screen fonts:Macintosh, installing |
37 |
| Macintosh:Screen fonts, installing |
37 |
| A Start the Macintosh. |
37 |
| A Start the Macintosh. |
37 |
| A Start the Macintosh. |
37 |
| A Start the Macintosh. |
37 |
| B Insert the CD-ROM into the CD- ROM drive. |
37 |
| B Insert the CD-ROM into the CD- ROM drive. |
37 |
| C Double-click the CD-ROM icon. |
37 |
| C Double-click the CD-ROM icon. |
37 |
| D Double-click the |
37 |
| D Double-click the |
37 |
| E Double-click the |
37 |
| E Double-click the |
37 |
| F Copy the fonts you want to install into the |
37 |
| F Copy the fonts you want to install into the |
37 |
| A confirmation dialog box appears. |
37 |
| G Click |
37 |
| G Click |
37 |
| The fonts are installed. |
37 |
| H Restart the Macintosh. |
37 |
| H Restart the Macintosh. |
37 |
| For information about installing Printer Utility for Mac, see |
37 |
| For information about installing Printer Utility for Mac, see |
37 |
| Mac OS X - Installing the PostScript 3 Printer Driver |
37 |
| Mac OS X - Installing the PostScript 3 Printer Driver |
37 |
| PostScript 3:Mac OS X, installing |
37 |
| Mac OS X:PostScript 3, installing |
37 |
| It is necessary to install a PPD file to print from a Macintosh. Follow the procedures to install... |
37 |
| It is necessary to install a PPD file to print from a Macintosh. Follow the procedures to install... |
37 |
| Printer driver is included in Mac OS. When printing under Mac OS X v10.1.x, use the printer drive... |
37 |
| You need an administrator name and a password (phrase). For more information, consult your admini... |
37 |
| You need an administrator name and a password (phrase). For more information, consult your admini... |
37 |
| A Insert the CD-ROM into the CD- ROM drive. |
37 |
| A Insert the CD-ROM into the CD- ROM drive. |
37 |
| A Insert the CD-ROM into the CD- ROM drive. |
37 |
| A Insert the CD-ROM into the CD- ROM drive. |
37 |
| B Double-click the CD-ROM icon. |
37 |
| B Double-click the CD-ROM icon. |
37 |
| C Double-click the |
37 |
| C Double-click the |
37 |
| D Double-click the |
37 |
| D Double-click the |
37 |
| E Follow the instructions on screen. |
37 |
| E Follow the instructions on screen. |
37 |
| Setting up the PPD file |
37 |
| Setting up the PPD file |
37 |
| A Run |
37 |
| A Run |
37 |
| A Run |
37 |
| A Run |
37 |
| B Click |
37 |
| B Click |
37 |
| Select |
37 |
| Select |
37 |
| If the zone has been set, select the zone in the second pop-up menu. |
37 |
| C Select the PPD file for the model you are using from the |
37 |
| C Select the PPD file for the model you are using from the |
37 |
| D Click |
37 |
| D Click |
37 |
| Setting up options |
37 |
| Setting up options |
37 |
| You can make settings for all printer features, even if the necessary option is not installed, du... |
37 |
| You can make settings for all printer features, even if the necessary option is not installed, du... |
37 |
| You can make settings for all printer features, even if the necessary option is not installed, du... |
37 |
| Installing the Printer Driver Using USB |
38 |
| Installing the Printer Driver Using USB |
38 |
| Printer driver:installing, USB connection |
38 |
| USB connection:printer driver, installing |
38 |
| This section gives basic instructions for installing printer drivers using USB. The printer drive... |
38 |
| This section gives basic instructions for installing printer drivers using USB. The printer drive... |
38 |
| Make sure that all other applications are closed and the computer is not printing before installa... |
38 |
| Make sure that all other applications are closed and the computer is not printing before installa... |
38 |
| Windows 98 SE/Me - Installing the printer driver using USB |
38 |
| Windows 98 SE/Me - Installing the printer driver using USB |
38 |
| The procedure below uses Windows 98 SE as an example. The procedure for Windows Me may be slightl... |
38 |
| The procedure below uses Windows 98 SE as an example. The procedure for Windows Me may be slightl... |
38 |
| When the USB interface cable is used for the first time, the “plug and play” function starts and |
38 |
| If printer drivers are already installed, “plug and play” appears, and the printer with its port ... |
38 |
| A Click |
38 |
| A Click |
38 |
| A Click |
38 |
| B Click |
38 |
| B Click |
38 |
| C Select the |
38 |
| C Select the |
38 |
| The |
38 |
| D Insert the CD-ROM provided into the CD-ROM drive. |
38 |
| D Insert the CD-ROM provided into the CD-ROM drive. |
38 |
| When Auto Run starts, click |
38 |
| When Auto Run starts, click |
38 |
| If you want to disable Auto Run, press |
38 |
| E Select the drive where the printer driver is located according to your operating system, and th... |
38 |
| E Select the drive where the printer driver is located according to your operating system, and th... |
38 |
| If the CD-ROM drive is D, the folder will be “D:\\DRIVERS\\USBPRINT\\WIN98ME”. |
38 |
| F Confirm the printer driver location, and then click |
38 |
| F Confirm the printer driver location, and then click |
38 |
| USB Printing Support will be installed. |
38 |
| G Click |
38 |
| G Click |
38 |
| H Follow the “plug and play” on the screen to install the printer drivers. |
38 |
| H Follow the “plug and play” on the screen to install the printer drivers. |
38 |
| Each printer driver is stored in the following folders on the CD- ROM: |
38 |
| Each printer driver is stored in the following folders on the CD- ROM: |
38 |
| When installation is complete, the printer with its port directed to “USB00n” appears in the |
38 |
| Windows 2000/XP and Windows Server 2003 - Installing the printer driver using USB |
39 |
| Windows 2000/XP and Windows Server 2003 - Installing the printer driver using USB |
39 |
| Installing a printer driver requires the Administrators permission. When you install a printer dr... |
39 |
| Installing a printer driver requires the Administrators permission. When you install a printer dr... |
39 |
| Installing a printer driver requires the Administrators permission. When you install a printer dr... |
39 |
| When the USB interface cable is used for the first time, the |
39 |
| If the printer driver is already installed, the “plug and play” is displayed, and the printer wit... |
39 |
| Under Windows XP, even if the printer driver has already been installed, |
39 |
| Under Windows XP, even if the printer driver has already been installed, |
39 |
| A Install the printer driver by referring to the instructions for installation. |
39 |
| A Install the printer driver by referring to the instructions for installation. |
39 |
| A Install the printer driver by referring to the instructions for installation. |
39 |
| Each printer driver is stored in the following folders on the CD- ROM: |
39 |
| Each printer driver is stored in the following folders on the CD- ROM: |
39 |
| When installation is complete, the printer with its port directed to “USB00n” appears in the |
39 |
| *1 In Windows XP, the folder is |
39 |
| *1 In Windows XP, the folder is |
39 |
| *1 In Windows XP, the folder is |
39 |
| Macintosh - Creating a desktop printer icon |
39 |
| Macintosh - Creating a desktop printer icon |
39 |
| When you connect the machine and your computer using USB 2.0, create a Desktop Printer icon. |
39 |
| When you connect the machine and your computer using USB 2.0, create a Desktop Printer icon. |
39 |
| In Mac OS X Native mode, printing is disabled when connected to the machine using USB. |
39 |
| In Mac OS X Native mode, printing is disabled when connected to the machine using USB. |
39 |
| A Double-click |
39 |
| A Double-click |
39 |
| A Double-click |
39 |
| B Select |
39 |
| B Select |
39 |
| C Click |
39 |
| C Click |
39 |
| D Select the model of the machine you are using in |
39 |
| D Select the model of the machine you are using in |
39 |
| E Click |
39 |
| E Click |
39 |
| F Click |
39 |
| F Click |
39 |
| G Enter the machine name, and then click |
39 |
| G Enter the machine name, and then click |
39 |
| The printer icon appears on the desktop. |
39 |
| H Close the Desktop Printer Utility. |
40 |
| H Close the Desktop Printer Utility. |
40 |
| Installing the Printer Driver Using IEEE 1394 |
40 |
| Installing the Printer Driver Using IEEE 1394 |
40 |
| Printer driver:installing, IEEE 1394 connection |
40 |
| IEEE 1394 connection:installing, printer driver |
40 |
| SCSI print |
40 |
| IP over 1394 |
40 |
| Printing using a SCSI print device with the optional IEEE 1394 interface board is possible under ... |
40 |
| Printing using a SCSI print device with the optional IEEE 1394 interface board is possible under ... |
40 |
| Make sure that all other applications are closed and the computer is not printing before installa... |
40 |
| Make sure that all other applications are closed and the computer is not printing before installa... |
40 |
| When the printer driver is being installed, do not turn on the power of other printers connected ... |
40 |
| When the printer driver is being installed, do not turn on the power of other printers connected ... |
40 |
| When the printer driver is being installed, do not turn on the power of other printers connected ... |
40 |
| Before uninstalling the printer driver, be sure to disconnect the IEEE 1394 interface cable from ... |
40 |
| SCSI print must be enabled using the control panel. See \ |
40 |
| SCSI print using the optional IEEE 1394 interface board is not supported by Windows 95/98/Me, or ... |
40 |
| If |
40 |
| If |
40 |
| If you send data from your computer when data is being received from another client computer, you... |
40 |
| When the machine is connected to the computer properly via the 1394 interface, the appearance of ... |
40 |
| Windows 2000 |
40 |
| Windows 2000 |
40 |
| In Windows 2000, the optional IEEE 1394 interface board can only be used with Service Pack 1 or l... |
40 |
| In Windows 2000, the optional IEEE 1394 interface board can only be used with Service Pack 1 or l... |
40 |
| A Connect the machine and computer using the IEEE 1394 interface cable. |
40 |
| A Connect the machine and computer using the IEEE 1394 interface cable. |
40 |
| The |
40 |
| B Click |
40 |
| B Click |
40 |
| “This wizard will complete the installation for this Device: Unknown” appears. |
40 |
| C Select |
40 |
| C Select |
40 |
| D When “Locate Driver Files” appears, select the |
40 |
| D When “Locate Driver Files” appears, select the |
40 |
| E Hold down the left |
41 |
| E Hold down the left |
41 |
| Keep the left |
41 |
| If the Auto Run program starts, click |
41 |
| F Click |
41 |
| F Click |
41 |
| G Select the printer driver you want to install. Each printer driver is stored in the following f... |
41 |
| G Select the printer driver you want to install. Each printer driver is stored in the following f... |
41 |
| • PCL 6: |
41 |
| • PCL 6: |
41 |
| • PCL 6: |
41 |
| • PCL 6: |
41 |
| • PCL 5e: |
41 |
| • PCL 5e: |
41 |
| • PCL 5e: |
41 |
| • RPCS™: |
41 |
| • RPCS™: |
41 |
| • RPCS™: |
41 |
| • PostScript 3: |
41 |
| • PostScript 3: |
41 |
| • PostScript 3: |
41 |
| H Click |
41 |
| H Click |
41 |
| I Click |
41 |
| I Click |
41 |
| A printer model selection dialog box appears. |
41 |
| J Follow the instructions on the screen. |
41 |
| J Follow the instructions on the screen. |
41 |
| When installation is complete, the printer with its port directed to “1394_00n” appears in the |
41 |
| When installation is complete, the printer with its port directed to “1394_00n” appears in the |
41 |
| Windows XP and Windows Server 2003 |
41 |
| Windows XP and Windows Server 2003 |
41 |
| A Connect the machine and the computer using the IEEE 1394 interface cable. |
41 |
| A Connect the machine and the computer using the IEEE 1394 interface cable. |
41 |
| The |
41 |
| B Confirm that “This wizard helps you install software for: (printer name)” is displayed, and click |
41 |
| B Confirm that “This wizard helps you install software for: (printer name)” is displayed, and click |
41 |
| “Please choose your search and installation option.” appears. |
41 |
| C Select the |
41 |
| C Select the |
41 |
| D Install the printer driver following the same procedure as in steps |
41 |
| D Install the printer driver following the same procedure as in steps |
41 |
| When installation is complete, a printer with its port directed to “1394_00n” appears in the |
41 |
| When installation is complete, a printer with its port directed to “1394_00n” appears in the |
41 |
| - Disabling the Device |
41 |
| - Disabling the Device |
41 |
| If |
41 |
| If |
41 |
| If |
41 |
| • Windows Me |
42 |
| • Windows Me |
42 |
| • Windows Me |
42 |
| • Windows Me |
42 |
| A In the |
42 |
| A In the |
42 |
| A In the |
42 |
| B When “Windows was unable to locate the software for this device.” appears, click |
42 |
| B When “Windows was unable to locate the software for this device.” appears, click |
42 |
| If you do not want to install the printer when |
42 |
| If you do not want to install the printer when |
42 |
| • Windows 2000 |
42 |
| • Windows 2000 |
42 |
| • Windows 2000 |
42 |
| • Windows 2000 |
42 |
| A In the |
42 |
| A In the |
42 |
| A In the |
42 |
| B When “This wizard will complete the installation for this Device: Unknown” appears, click |
42 |
| B When “This wizard will complete the installation for this Device: Unknown” appears, click |
42 |
| C When “Locate Driver Files” appears, remove all selections from |
42 |
| C When “Locate Driver Files” appears, remove all selections from |
42 |
| D When “Driver Files Search Results” appears, click |
42 |
| D When “Driver Files Search Results” appears, click |
42 |
| • Windows XP and Windows Server 2003 |
42 |
| • Windows XP and Windows Server 2003 |
42 |
| A In the |
42 |
| A In the |
42 |
| A In the |
42 |
| B When “Please choose your search and installation option.” appears, remove all selections from |
42 |
| B When “Please choose your search and installation option.” appears, remove all selections from |
42 |
| C When “The wizard could not find the software on your computer for..” appears, click |
42 |
| C When “The wizard could not find the software on your computer for..” appears, click |
42 |
| D When “Cannot Install this Hardware” appears, select the |
42 |
| D When “Cannot Install this Hardware” appears, select the |
42 |
| If |
42 |
| If |
42 |
| • Windows 2000 |
42 |
| • Windows 2000 |
42 |
| • Windows 2000 |
42 |
| • Windows 2000 |
42 |
| A In |
42 |
| A In |
42 |
| A In |
42 |
| B When “This wizard will complete the installation for this Device:” and “IP over 1394” appear, c... |
42 |
| B When “This wizard will complete the installation for this Device:” and “IP over 1394” appear, c... |
42 |
| C When “Locate Driver Files” appears, remove all selections from |
42 |
| C When “Locate Driver Files” appears, remove all selections from |
42 |
| D When “Driver Files Search Results” appears, click |
43 |
| D When “Driver Files Search Results” appears, click |
43 |
| Installing SmartDeviceMonitor for Client/Admin |
43 |
| Installing SmartDeviceMonitor for Client/Admin |
43 |
| SmartDeviceMonitor for Admin<Default Para Font> |
43 |
| SmartDeviceMonitor for Client<Default Para Font> |
43 |
| If your operating system is Windows 2000/XP, Windows Server 2003, or Windows NT 4.0, installing s... |
43 |
| If your operating system is Windows 2000/XP, Windows Server 2003, or Windows NT 4.0, installing s... |
43 |
| If your operating system is Windows 2000/XP, Windows Server 2003, or Windows NT 4.0, installing s... |
43 |
| A Quit all applications running. |
43 |
| A Quit all applications running. |
43 |
| A Quit all applications running. |
43 |
| B Insert the CD-ROM into the CD- ROM drive. |
43 |
| B Insert the CD-ROM into the CD- ROM drive. |
43 |
| Auto Run will start the installer. |
43 |
| C Select a language for the interface language, and then click |
43 |
| C Select a language for the interface language, and then click |
43 |
| The following languages are available: Cestina (Czech), Dansk (Danish), Deutsch (German), English... |
43 |
| The default interface language is English. |
43 |
| D Click |
43 |
| D Click |
43 |
| The software license agreement appears in the |
43 |
| E After reading through the agreement, click |
43 |
| E After reading through the agreement, click |
43 |
| F Select the program you want to install when the |
43 |
| F Select the program you want to install when the |
43 |
| G Follow the instructions on the screen. |
43 |
| G Follow the instructions on the screen. |
43 |
| Installing Font Manager 2000 |
43 |
| Installing Font Manager 2000 |
43 |
| Font Manager 2000<Default Para Font>:installing |
43 |
| If your operating system is Windows 2000/XP, Windows Server 2003, or Windows NT 4.0, installing s... |
43 |
| If your operating system is Windows 2000/XP, Windows Server 2003, or Windows NT 4.0, installing s... |
43 |
| If your operating system is Windows 2000/XP, Windows Server 2003, or Windows NT 4.0, installing s... |
43 |
| Font Manager 2000 English version is provided. |
43 |
| Font Manager 2000 English version is provided. |
43 |
| A Quit all applications running. |
43 |
| A Quit all applications running. |
43 |
| A Quit all applications running. |
43 |
| B Insert the CD-ROM into the CD- ROM drive. |
43 |
| B Insert the CD-ROM into the CD- ROM drive. |
43 |
| Auto Run will start the installer. |
43 |
| C Select a language for the interface language, and then click |
44 |
| C Select a language for the interface language, and then click |
44 |
| The following languages are available: Cestina (Czech), Dansk (Danish), Deutsch (German), English... |
44 |
| The default interface language is English. |
44 |
| D Click |
44 |
| D Click |
44 |
| E Follow the instructions on the screen. |
44 |
| E Follow the instructions on the screen. |
44 |
| Using Adobe PageMaker Version 6.0, 6.5, or 7.0 |
44 |
| Using Adobe PageMaker Version 6.0, 6.5, or 7.0 |
44 |
| If you use the machine under Windows 95/98/Me, Windows 2000/XP, Windows Server 2003, or Windows N... |
44 |
| If you use the machine under Windows 95/98/Me, Windows 2000/XP, Windows Server 2003, or Windows N... |
44 |
| The PPD file is the file with the extension “.ppd” in the folder “DRIVERS\\PS\\WIN9X_ME\\(Language)\\... |
44 |
| The |
44 |
| The third folder, “(Language)” may be renamed with an appropriate language name. |
44 |
| Copy the file with extension “.ppd” to the PageMaker folder. |
44 |
| • For PageMaker 6.0 default installation |
44 |
| • For PageMaker 6.0 default installation |
44 |
| • For PageMaker 6.0 default installation |
44 |
| • For PageMaker 6.0 default installation |
44 |
| The directory is “C:\\PM6\\RSRC\\ PPD4”. |
44 |
| • For PageMaker 6.5 default installation |
44 |
| • For PageMaker 6.5 default installation |
44 |
| • For PageMaker 6.5 default installation |
44 |
| The directory is “C:\\PM65\\RSRC\\ USENGLISH\\PPD4”. |
44 |
| “USENGLISH” may vary depending on your language selection. |
44 |
| • For PageMaker 7.0 default installation |
44 |
| • For PageMaker 7.0 default installation |
44 |
| • For PageMaker 7.0 default installation |
44 |
| The directory is “C:\\PM7\\RSRC\\ USENGLISH\\PPD4”. |
44 |
| “USENGLISH” may vary depending on your language selection. |
44 |
| When using PageMaker, optional features that can be selected by the printer driver will not be ac... |
44 |
| When using PageMaker, optional features that can be selected by the printer driver will not be ac... |
44 |
| A On the |
44 |
| A On the |
44 |
| A On the |
44 |
| The |
44 |
| B Make the necessary settings in the |
44 |
| B Make the necessary settings in the |
44 |
| Software and Utilities Included on the CD- ROM |
45 |
| Software and Utilities Included on the CD- ROM |
45 |
| CD-ROM |
45 |
| There are two CD-ROMs that come with this machine. |
45 |
| There are two CD-ROMs that come with this machine. |
45 |
| The CD-ROM labeled “Printer Drivers and Utilities” is mainly used for machine printer functions. ... |
45 |
| Printer Drivers |
45 |
| Printer Drivers |
45 |
| Printer driver:PCL 6 |
45 |
| Printer driver:PCL 5e |
45 |
| Printer driver:RPCS |
45 |
| Printer driver:PostScript 3 |
45 |
| Printing requires installation of a printer driver for your operating system. The following drive... |
45 |
| Printing requires installation of a printer driver for your operating system. The following drive... |
45 |
| <TABLE> |
45 |
| <TABLE> |
45 |
| <TABLE HEADING> |
45 |
| <TABLE ROW> |
45 |
| Printer Language |
45 |
| PCL 6 |
45 |
| PCL 5e |
45 |
| RPCS ™ |
45 |
| PostScript 3 |
45 |
| <TABLE BODY> |
45 |
| <TABLE ROW> |
45 |
| Windows 95 *1 |
45 |
| ÷ |
45 |
| ÷ |
45 |
| ÷ |
45 |
| ÷ *12 |
45 |
| <TABLE ROW> |
45 |
| Windows 98 *2 |
45 |
| ÷ |
45 |
| ÷ |
45 |
| ÷ |
45 |
| ÷ *12 |
45 |
| <TABLE ROW> |
45 |
| Windows Me *3 |
45 |
| ÷ |
45 |
| ÷ |
45 |
| ÷ |
45 |
| ÷ *12 |
45 |
| <TABLE ROW> |
45 |
| Windows 2000 *4 |
45 |
| ÷ |
45 |
| ÷ |
45 |
| ÷ |
45 |
| ÷ *13 |
45 |
| <TABLE ROW> |
45 |
| Windows XP *5 |
45 |
| ÷ |
45 |
| ÷ |
45 |
| ÷ |
45 |
| ÷ *13 |
45 |
| <TABLE ROW> |
45 |
| Windows Server 2003 *6 |
45 |
| ÷ |
45 |
| ÷ |
45 |
| ÷ |
45 |
| ÷ *13 |
45 |
| <TABLE ROW> |
45 |
| Windows NT 4.0 *7 |
45 |
| ÷ *10 |
45 |
| ÷ *10 |
45 |
| ÷ *10 |
45 |
| ÷ *11 *12 |
45 |
| <TABLE ROW> |
45 |
| Mac OS *8 |
45 |
| ÷ *12 |
45 |
| <TABLE ROW> |
45 |
| Mac OS X *9 |
45 |
| ÷ *14 |
45 |
| *1 Microsoft Windows 95 operating system |
45 |
| *1 Microsoft Windows 95 operating system |
45 |
| *1 Microsoft Windows 95 operating system |
45 |
| *2 Microsoft Windows 98 operating system |
45 |
| *2 Microsoft Windows 98 operating system |
45 |
| *3 Microsoft Windows Millennium Edition |
45 |
| *3 Microsoft Windows Millennium Edition |
45 |
| *4 Microsoft Windows 2000 Advanced Server |
45 |
| *4 Microsoft Windows 2000 Advanced Server |
45 |
| Microsoft Windows 2000 Server |
45 |
| Microsoft Windows 2000 Professional |
45 |
| *5 Microsoft Windows XP Professional |
45 |
| *5 Microsoft Windows XP Professional |
45 |
| Microsoft Windows XP Home Edition |
45 |
| *6 Microsoft Windows Server 2003 Standard Edition |
45 |
| *6 Microsoft Windows Server 2003 Standard Edition |
45 |
| Microsoft Windows Server 2003 Enterprise Edition |
45 |
| Microsoft Windows Server 2003 Web Edition |
45 |
| *7 Microsoft Windows NT Server operating system version 4.0, Microsoft Windows NT Workstation ope... |
45 |
| *7 Microsoft Windows NT Server operating system version 4.0, Microsoft Windows NT Workstation ope... |
45 |
| *8 Versions 8.6 to 9.2 of the Mac OS (Mac OS X Classic mode is supported.) |
45 |
| *8 Versions 8.6 to 9.2 of the Mac OS (Mac OS X Classic mode is supported.) |
45 |
| *9 Mac OS X 10.1 or later (Native mode) |
45 |
| *9 Mac OS X 10.1 or later (Native mode) |
45 |
| *10 Requires Service Pack 4 or later. |
45 |
| *10 Requires Service Pack 4 or later. |
45 |
| *11 Requires Service Pack 6 or later. |
45 |
| *11 Requires Service Pack 6 or later. |
45 |
| *12 The Adobe PostScript 3 printer drivers and PostScript Printer Description (PPD) files are inc... |
45 |
| *12 The Adobe PostScript 3 printer drivers and PostScript Printer Description (PPD) files are inc... |
45 |
| *13 The PostScript Printer Description (PPD) files are included on the CD- ROM labeled “Printer D... |
45 |
| *13 The PostScript Printer Description (PPD) files are included on the CD- ROM labeled “Printer D... |
45 |
| *14 The Adobe PostScript Printer Description (PPD) installer is included on the CD-ROM labeled “P... |
45 |
| *14 The Adobe PostScript Printer Description (PPD) installer is included on the CD-ROM labeled “P... |
45 |
| PCL printer drivers |
46 |
| PCL printer drivers |
46 |
| PCL printer drivers |
46 |
| PCL |
46 |
| Two kinds of PCL printer drivers: PCL 6 and PCL 5e, are included on the CD-ROM that comes with th... |
46 |
| Two kinds of PCL printer drivers: PCL 6 and PCL 5e, are included on the CD-ROM that comes with th... |
46 |
| Some applications may require installation of the PCL 5e printer driver. In this case, you can in... |
46 |
| Some applications may require installation of the PCL 5e printer driver. In this case, you can in... |
46 |
| See |
46 |
| RPCS™ printer driver |
46 |
| RPCS™ printer driver |
46 |
| RPCS™ printer driver |
46 |
| RPCS |
46 |
| The RPCS™ printer drivers are included on the CD-ROM that comes with this machine. This printer d... |
46 |
| The RPCS™ printer drivers are included on the CD-ROM that comes with this machine. This printer d... |
46 |
| See |
46 |
| Adobe PostScript 3 printer drivers and PPD files |
46 |
| Adobe PostScript 3 printer drivers and PPD files |
46 |
| Adobe PostScript 3 printer drivers and PPD files |
46 |
| PostScript 3 |
46 |
| The Adobe PostScript 3 printer drivers and the PPD files are included on the CD-ROM that comes wi... |
46 |
| The Adobe PostScript 3 printer drivers and the PPD files are included on the CD-ROM that comes wi... |
46 |
| See |
46 |
| LAN-Fax driver |
46 |
| LAN-Fax driver |
46 |
| LAN-Fax driver |
46 |
| The LAN-Fax driver is included on the CD-ROM that comes with this machine. This driver allows you... |
46 |
| The LAN-Fax driver is included on the CD-ROM that comes with this machine. This driver allows you... |
46 |
| Software and Utilities |
46 |
| Software and Utilities |
46 |
| SmartDeviceMonitor for Admin |
46 |
| SmartDeviceMonitor for Admin |
46 |
| SmartDeviceMonitor for Admin |
46 |
| SmartDeviceMonitor for Admin |
46 |
| This utility is for the system administrator to manage network printers. |
46 |
| This utility is for the system administrator to manage network printers. |
46 |
| See SmartDeviceMonitor for Admin online Help for more information about using SmartDeviceMonitor ... |
46 |
| See SmartDeviceMonitor for Admin online Help for more information about using SmartDeviceMonitor ... |
46 |
| SmartDeviceMonitor for Client |
46 |
| SmartDeviceMonitor for Client |
46 |
| This utility is for users to manage their own print status on the network. |
46 |
| This utility is for users to manage their own print status on the network. |
46 |
| See SmartDeviceMonitor for Client online Help for more information about using SmartDeviceMonitor... |
46 |
| See SmartDeviceMonitor for Client online Help for more information about using SmartDeviceMonitor... |
46 |
| Font Manager 2000 |
46 |
| Font Manager 2000 |
46 |
| This utility helps you install new screen fonts, or organize and manage fonts already installed o... |
46 |
| This utility helps you install new screen fonts, or organize and manage fonts already installed o... |
46 |
| 1394 Utility |
46 |
| 1394 Utility |
46 |
| This utility is for the IEEE 1394 interface board. For more information, see the Readme file or t... |
46 |
| This utility is for the IEEE 1394 interface board. For more information, see the Readme file or t... |
46 |
| USB Printing Support |
47 |
| USB Printing Support |
47 |
| USB Printing Support<Default Para Font> |
47 |
| This utility is for the USB 2.0 interface. Install this to use USB on computers running Windows 9... |
47 |
| This utility is for the USB 2.0 interface. Install this to use USB on computers running Windows 9... |
47 |
| Acrobat Reader |
47 |
| Acrobat Reader |
47 |
| This utility allows you to read PDF files (Portable Document Format). |
47 |
| This utility allows you to read PDF files (Portable Document Format). |
47 |
| Documentation about using the machine is included on the CD- ROM in PDF format. See Acrobat Reade... |
47 |
| Documentation about using the machine is included on the CD- ROM in PDF format. See Acrobat Reade... |
47 |
| Printer Utility for Mac |
47 |
| Printer Utility for Mac |
47 |
| This utility allows users to download and manage a variety of fonts as well as manage printers. F... |
47 |
| This utility allows users to download and manage a variety of fonts as well as manage printers. F... |
47 |
| Software and utilities must be uninstalled before installing newer versions of Windows. Reinstall... |
47 |
| Software and utilities must be uninstalled before installing newer versions of Windows. Reinstall... |
47 |
| INDEX |
48 |
| INDEX |
48 |
 1
1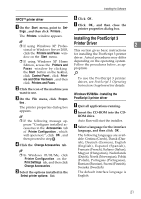 29
29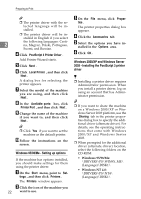 30
30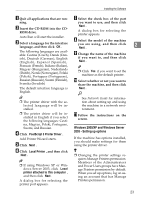 31
31 32
32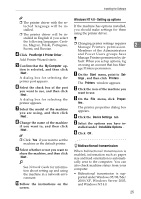 33
33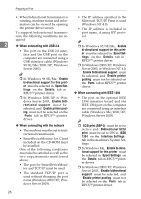 34
34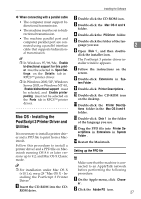 35
35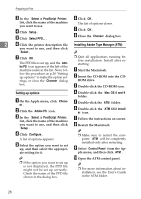 36
36 37
37 38
38 39
39