Ricoh Aficio SP 4110N-KP Software User Guide - Page 35
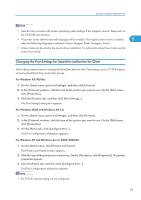
Changing the Port Settings for SmartDeviceMonitor for Client, For Windows 95/98/Me
 |
View all Ricoh Aficio SP 4110N-KP manuals
Add to My Manuals
Save this manual to your list of manuals |
Page 35 highlights
Using the SmartDeviceMonitor Port • Auto Run may not work with certain operating system settings. If this happens, launch "Setup.exe" on the CD-ROM root directory. • The printer driver with the selected language will be installed. The English printer driver is installed 1 when the following language is selected: Cestina, Magyar, Polski, Portugues, Suomi. • A User Code can be set after the printer driver installation. For information about User Code, see the printer driver Help. Changing the Port Settings for SmartDeviceMonitor for Client Follow the procedure below to change the SmartDeviceMonitor for Client settings, such as TCP/IP timeout, recovery/parallel printing, and printer groups. For Windows 95/98/Me: 1. On the [Start] menu, point to [Settings], and then click [Printers]. 2. In the [Printers] window, click the icon of the printer you want to use. On the [File] menu, click [Properties]. 3. Click the [Details] tab, and then click [Port Settings...]. The [Port Settings] dialog box appears. For Windows 2000 and Windows NT 4.0: 1. On the [Start] menu, point to [Settings], and then click [Printers]. 2. In the [Printers] window, click the icon of the printer you want to use. On the [File] menu, click [Properties]. 3. On the [Ports] tab, click [Configure Port...]. The [Port Configuration] dialog box appears. For Windows XP and Windows Server 2003/2003 R2: 1. On the [Start] menu, click [Printers and Faxes]. The [Printers and Faxes] window appears. 2. Click the icon of the printer you want to use. On the [File] menu, click [Properties]. The printer properties appear. 3. Click the [Ports] tab, and then click [Configure Port...]. The [Port Configuration] dialog box appears. • For TCP/IP, timeout setting can be configured. 33
-
 1
1 -
2
-
3
-
4
-
5
-
6
-
7
-
8
-
9
-
10
-
11
-
12
-
13
-
14
-
15
-
16
-
17
-
18
-
19
-
20
-
21
-
22
-
23
-
24
-
25
-
26
-
27
-
28
-
29
-
 30
30 -
 31
31 -
 32
32 -
 33
33 -
 34
34 -
 35
35 -
 36
36 -
 37
37 -
 38
38 -
 39
39 -
 40
40 -
41
-
42
-
43
-
44
-
45
-
46
-
47
-
48
-
49
-
50
-
51
-
52
-
53
-
54
-
55
-
56
-
57
-
58
-
59
-
60
-
61
-
62
-
63
-
64
-
65
-
66
-
67
-
68
-
69
-
70
-
71
-
72
-
73
-
74
-
75
-
76
-
77
-
78
-
79
-
80
-
81
-
82
-
83
-
84
-
85
-
86
-
87
-
88
-
89
-
90
-
91
-
92
-
93
-
94
-
95
-
96
-
97
-
98
-
99
-
100
-
101
-
102
-
103
-
104
-
105
-
106
-
107
-
108
-
109
-
110
-
111
-
112
-
113
-
114
-
115
-
116
-
117
-
118
-
119
-
120
-
121
-
122
-
123
-
124
-
125
-
126
-
127
-
128
-
129
-
130
-
131
-
132
-
133
-
134
-
135
-
136
-
137
-
138
-
139
-
140
-
141
-
142
-
143
-
144
-
145
-
146
-
147
-
148
-
149
-
150
-
151
-
152
-
153
-
154
-
155
-
156
-
157
-
158
-
159
-
160
-
161
-
162
-
163
-
164
-
165
-
166
-
167
-
168
-
169
-
170
-
171
-
172
-
173
-
174
-
175
-
176
-
177
-
178
-
179
-
180
-
181
-
182
-
183
-
184
-
185
-
186
-
187
-
188
-
189
-
190
-
191
-
192
-
193
-
194
-
195
-
196
-
197
-
198
-
199
-
200
-
201
-
202
-
203
-
204
-
205
-
206
-
207
-
208
-
209
-
210
-
211
-
212
-
213
-
214
-
215
-
216
-
217
-
218
-
219
-
220
-
221
-
222
-
223
-
224
-
225
-
226
-
227
-
228
-
229
-
230
-
231
-
232
-
233
-
234
-
235
-
236
-
237
-
238
-
239
-
240
-
241
-
242
-
243
-
244
-
245
-
246
-
247
-
248
-
249
-
250
-
251
-
252
-
253
-
254
-
255
-
256
-
257
-
258
-
259
-
260
-
261
-
262
-
263
-
264
-
265
-
266
-
267
-
268
-
269
-
270
-
271
-
272
-
273
-
274
-
275
-
276
-
277
-
278
-
279
-
280
-
281
-
282
-
283
-
284
-
285
-
286
-
287
-
288
-
289
-
290
-
291
-
292
-
293
-
294
-
295
-
296
-
297
-
298
-
299
-
300
-
301
-
302
-
303
-
304
-
305
-
306
-
307
-
308
-
309
-
310
-
311
-
312
-
313
-
314
-
315
-
316
-
317
-
318
-
319
-
320
-
321
-
322
-
323
-
324
-
325
-
326
-
327
-
328
-
329
-
330
-
331
-
332
-
333
-
334
-
335
-
336
-
337
-
338
-
339
-
340
-
341
-
342
-
343
-
344
 |
 |
