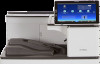
Ricoh SP 8400DN Driver Installation Guide - Page 40
Deleting the Driver from a Windows operating system, Click [Delete].
 |
View all Ricoh SP 8400DN manuals
Add to My Manuals
Save this manual to your list of manuals |
Page 40 highlights
5. Appendix 5. Click [Have Disk...]. 6. Click [Browse...], and then select the driver location. 7. Click [OK]. 8. Select the machine model, and then click [Next]. 9. Click [Finish]. The driver update starts. 10. Click [Apply]. 11. Click [OK] to close the printer properties window. 12. Restart the computer. • If the [User Account Control] dialog box appears, click [Yes] or [Continue]. • If the [Windows Security] dialog box appears, click [Install this driver software anyway]. Deleting the Driver from a Windows operating system • Administrator permission is required to delete the driver in use. Log on as an Administrators group member. Windows Vista, Windows Server 2008 1. On the [Start] menu, select [Control Panel], and then click [Printers] in [Hardware and Sound] category. 2. Right-click the icon of the machine you want to delete, and then click [Delete]. 3. On the [File] menu, point to [Run as administrator], and then click [Server Properties...]. 4. Click the [Drivers] tab. 5. Select the driver you want to delete, and then click [Remove...]. 6. Select [Remove driver and driver package.], and then click [OK]. 7. Click [Yes]. 8. Click [Delete]. 9. Click [OK]. 10. Click [Close] to close the print server properties window. 38
-
 1
1 -
2
-
3
-
4
-
5
-
6
-
7
-
8
-
9
-
10
-
11
-
12
-
13
-
14
-
15
-
16
-
17
-
18
-
19
-
20
-
21
-
22
-
23
-
24
-
25
-
26
-
27
-
28
-
29
-
30
-
31
-
32
-
33
-
34
-
 35
35 -
 36
36 -
 37
37 -
 38
38 -
 39
39 -
 40
40 -
 41
41 -
 42
42 -
 43
43 -
 44
44 -
 45
45 -
46
-
47
-
48
 |
 |
