Ridgid WD0671 Owners Manual - Page 6
Wet/Dry Vac Assembly
 |
View all Ridgid WD0671 manuals
Add to My Manuals
Save this manual to your list of manuals |
Page 6 highlights
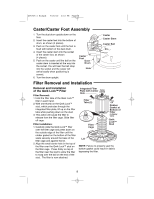
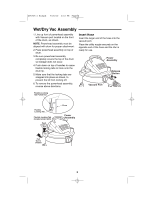
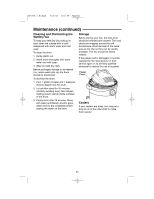
SP6737-1 Ridgid 7/26/10 3:33 PM Page 6 Wet/Dry Vac Assembly 1. Line up front of powerhead assembly with Vacuum port located on the front of the drum, as shown. NOTE: Powerhead assembly must be aligned with drum for proper attachment. 2. Place powerhead assembly on top of drum. 3. Be sure powerhead assembly completely covers the top of the drum so leakage does not occur. 4. Push down on top of handles to cause flexible locking tabs to hook onto the drum lip. 5. Make sure that the locking tabs are snapped into place as shown, to prevent the lid from coming off. 6. To remove the powerhead assembly, reverse above directions. Insert Hose Insert the larger end of the hose into the vacuum port. Place the utility nozzle securely on the opposite end of the hose and the Vac is ready for use. Power Assembly Release Button Vacuum Port Flexible Locking Tab Pulled Out Flexible Locking Tab Flexible Locking Tab (located under latch) Push Down to Latch Drum Power Assembly Pull Out to Unlatch 6
-
 1
1 -
 2
2 -
 3
3 -
 4
4 -
 5
5 -
 6
6 -
 7
7 -
 8
8 -
 9
9 -
 10
10 -
 11
11 -
 12
12 -
13
-
14
-
15
-
16
-
17
-
18
-
19
-
20
-
21
-
22
-
23
-
24
-
25
-
26
-
27
-
28
 |
 |
