Rocketfish RF-HD3035 User Manual (English) - Page 5
RF-HD3035 - 3 5 rf
 |
View all Rocketfish RF-HD3035 manuals
Add to My Manuals
Save this manual to your list of manuals |
Page 5 highlights
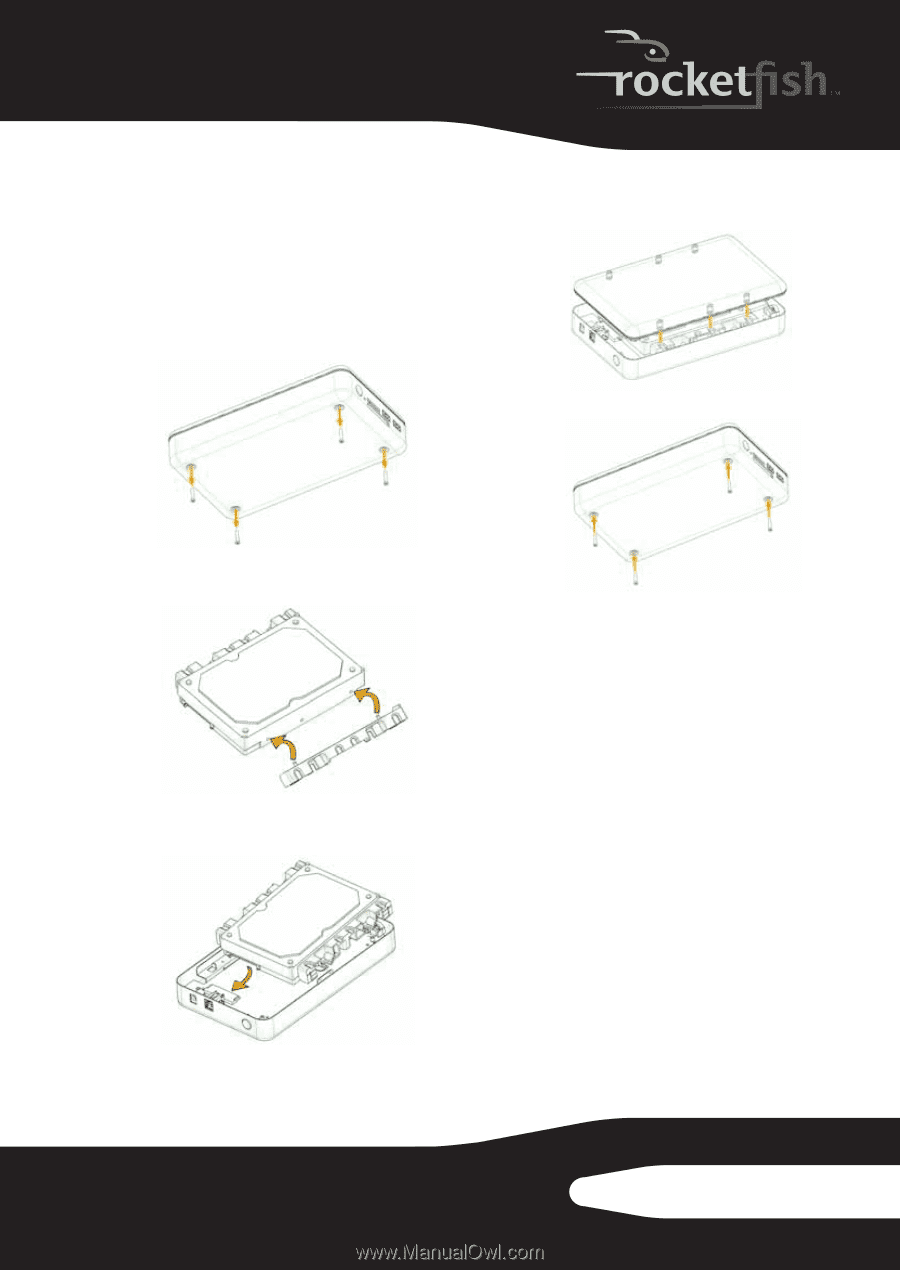
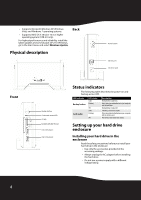
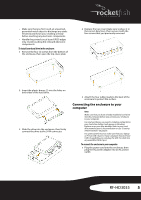
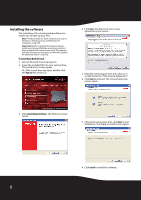
• Make sure that you first touch an unpainted, grounded metal object to discharge any static electricity stored on your clothing or body before touching any electronic components. • Handle the printed circuit board (PCB) edges only. Avoid touching the onboard electronic components. To install your hard drive in the enclosure: 1 Remove the four (4) screws from the bottom of the enclosure, then open the top cover plate. 4 Replace the top cover (make sure to place it in the correct direction), then secure it with the four screws that you previously removed. 2 Insert the plastic braces (2) into the holes on both sides of the hard drive. 3 Slide the drive into the enclosure, then firmly connect the drive to the SATA connector. 5 Attach the four rubber pads to the back of the enclosure to protect the surface. Connecting the enclosure to your computer Notes: Make sure that you have already installed a hard drive into the enclosure before you connect your enclosure to your computer. For new hard drives, you need to initialize and partition your hard drive before it will appear in Windows Explorer or on your Mac desktop. Refer to your hard drive manufacturer's documentation or see "Creating A New Partition" on page 6. For optimal performance, make sure that your laptop or PC has USB 3.0 ports. If your computer does not have USB 3.0 capability, you can plug the USB 3.0 cable into any available USB 2.0 port. To connect the enclosure to your computer: 1 Plug the power cord into the enclosure, then plug the AC power adapter into an AC power outlet. RF-HD3035 5
-
 1
1 -
 2
2 -
 3
3 -
 4
4 -
 5
5 -
 6
6 -
 7
7 -
 8
8 -
 9
9 -
 10
10 -
 11
11 -
12
-
13
-
14
-
15
-
16
-
17
-
18
 |
 |