Ryobi BD4601 Operation Manual - Page 9
Assembly, Operation
 |
View all Ryobi BD4601 manuals
Add to My Manuals
Save this manual to your list of manuals |
Page 9 highlights
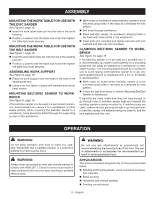
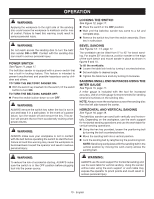
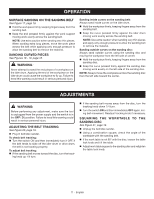
ASSEMBLY MOUNTING THE WORK TABLE FOR USE WITH THE DISC SANDER See Figure 6, page 16. n Insert the work table index pin into the hole in the tool's housing. n Position a washer over the table lock knob then tighten the table lock knob securely. MOUNTING THE WORK TABLE FOR USE WITH THE BELT SANDER See Figure 7, page 16. n Insert the work table index pin into the hole in the sanding belt arm. n Position a washer over the table lock knob then tighten the table lock knob securely. ASSEMBLING WORK SUPPORT See Figure 8, page 16. n Place the work support over the holes in the side of the sanding belt arm. n Using a hex key, fasten in place with washers and socket head screws. MOUNTING BELT/DISC SANDER TO WORKBENCH See Figure 9, page 16. If the belt/disc sander is to be used in a permanent location, it is recommended you secure it to a workbench or other stable surface. When mounting the belt/disc sander to a workbench, holes should be drilled through the supporting surface of the workbench. n Mark holes on workbench where belt/disc sander is to be mounted using holes in the base as a template for hole pattern. n Drill holes through workbench. n Place belt/disc sander on workbench aligning holes in the base with holes drilled in the workbench. n Insert bolts (not included) and tighten securely with lock washers and hex nuts (not included). CLAMPING BELT/DISC SANDER TO WORKBENCH See Figure 10, page 16. If the belt/disc sander is to be used as a portable tool, it is recommended you fasten it permanently to a mounting board that can easily be clamped to a workbench or other stable surface. The mounting board should be of sufficient size to avoid tipping while belt/disc sander is in use. Any good grade plywood or chipboard with a 3/4 in. thickness is recommended. n Mark holes on board where belt/disc sander is to be mounted using holes in the base as a template for hole pattern. n Follow the last three steps in section Mounting Belt/Disc Sander to Workbench. If lag bolts are used, make sure they are long enough to go through holes in belt/disc sander base and material the belt/disc sander is being mounted to. If machine bolts are used, make sure bolts are long enough to go through holes in belt/disc sander, the material being mounted to, and the lock washers and hex nuts. OPERATION WARNING: Do not allow familiarity with tools to make you careless. Remember that a careless fraction of a second is sufficient to inflict serious injury. WARNING: Always wear eye protection with side shields marked to comply with ANSI Z87.1. Failure to do so could result in objects being thrown into your eyes, resulting in possible serious injury. WARNING: Do not use any attachments or accessories not recommended by the manufacturer of this tool. The use of attachments or accessories not recommended can result in serious personal injury. APPLICATIONS This product has been designed only for the purposes listed below: n Sanding and finishing plastic, wood, and wood composi- tion materials n Bevel sanding n Horizontal and vertical sanding n Sanding curved pieces 9 - English
-
 1
1 -
2
-
3
-
 4
4 -
 5
5 -
 6
6 -
 7
7 -
 8
8 -
 9
9 -
 10
10 -
 11
11 -
 12
12
 |
 |