Ryobi P301 Operation Manual - Page 12
Removing A Jammed Staple - stapler jam removal
 |
View all Ryobi P301 manuals
Add to My Manuals
Save this manual to your list of manuals |
Page 12 highlights
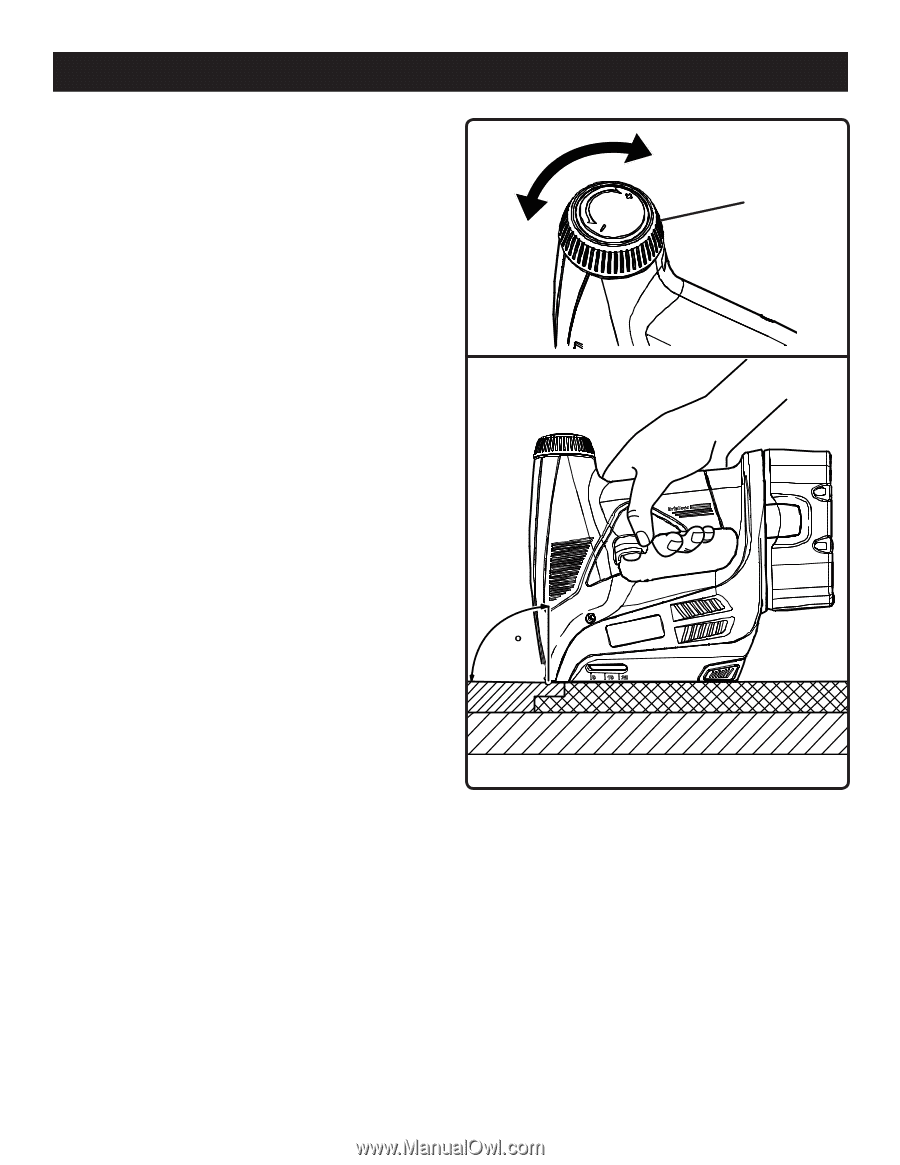
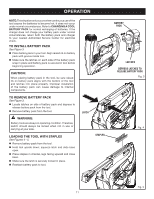
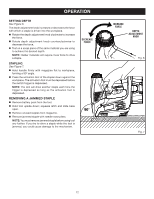
OPERATION SETTING DEPTH See Figure 6. The depth adjustment knob increases or decreases the force with which a staple is driven into the workpiece. Rotate the depth adjustment knob clockwise to increase the force. Rotate depth adjustment knob counterclockwise to decrease the force. Test on a scrap piece of the same material you are using to achieve the desired depth. NOTE: Harder materials will require more force to drive a staple. STAPLING See Figure 7. Hold handle firmly with magazine flat to workpiece, forming a 90º angle. Press the activation foot of the stapler down against the workpiece. The activation foot must be depressed before the switch trigger is depressed. NOTE: The tool will drive another staple each time the trigger is depressed as long as the activation foot is depressed. REMOVING A JAMMED STAPLE Remove battery pack from the tool. Hold tool upside down; squeeze latch and slide base open. Remove unused staples from magazine. Remove jammed staple with needle nose pliers. NOTE: You must remove jammed staple before using tool any further. If you try to drive a staple while the tool is jammed, you could cause damage to the mechanism. DECREASE FORCE 90 INCREASE FORCE DEPTH ADJUSTMENT KNOB Fig. 6 Fig. 7 12
-
 1
1 -
2
-
3
-
4
-
5
-
6
-
 7
7 -
 8
8 -
 9
9 -
 10
10 -
 11
11 -
 12
12 -
 13
13 -
 14
14
 |
 |