Ryobi P305 Manual 1 - Page 6
Maintenance, Operation
 |
View all Ryobi P305 manuals
Add to My Manuals
Save this manual to your list of manuals |
Page 6 highlights
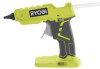
OPERATION HELPFUL HINTS FOR USE Before applying glue to a surface or workpiece, use a scrap piece of paper or material that is similar to your workpiece as a test. Use caution when applying hot glue to thin or porous material. The underlying surface could be damaged or glue could adhere to the surface and be difficult to remove. Do not force the trigger when applying hot glue. This could damage the glue gun. Use a test piece of material to make sure the glue has melted enough to flow without forcing. Apply only as much glue as needed for your application. When gluing two objects together, do not pick up the object to which hot glue has been applied. Instead, pick up the other object and join it to the object to which you have applied hot glue. Do not use your fingers to press down on an object to which hot glue has just been applied. This can cause hot glue to escape from the edges or heat up the bonding surface and possibly cause burns or damage to surrounding objects. Allow glue to dry completely before moving your work to ensure proper adhesion and reduce the risk of burns. If applying glue to very small objects, use tweezers or tongs to avoid getting the nozzle close to your fingers. APPLYING HOT GLUE See Figure 3, page 7. Install the battery pack and turn the on/off switch to the on (I) position. Allow time for the glue to melt so that it flows freely from the nozzle. Holding the glue gun firmly, place the nozzle close to the surface where glue will be applied. NOTE: Holding the glue gun too far from the intended surface may result in applying glue to a surface other than your workpiece or may result in "strings" of glue between your work and the nozzle. Pull the trigger until glue flows from the nozzle. Do not over-apply. NOTE: For better control and consistency of application, it is advisable to use two fingers to pull the trigger. When the desired amount of glue has been applied, release the trigger. Tilt the nozzle slightly to the side and carefully pull the nozzle away from the object. This helps avoid strings of glue clinging to the work. NOTE: The glue gun will stop dispensing glue when the glue stick in the chamber is almost used up. To refill the chamber, set the glue gun down and insert another glue stick. Always turn the on/off switch to the off (O) position when you are finished using the glue gun. Set the glue gun on a protective surface, such as a piece of paper, while the product cools to catch possible glue drips. Allow the glue stick and glue gun nozzle to completely cool before removing the battery pack. MAINTENANCE WARNING: When servicing, use only identical replacement parts. Use of any other parts could create a hazard or cause product damage. GENERAL MAINTENANCE Avoid using solvents when cleaning plastic parts. Most plastics are susceptible to damage from various types of commercial solvents and may be damaged by their use. Use clean cloths to remove dirt, dust, oil, grease, etc. STORAGE Allow the glue gun to cool completely before storing. Turn the switch to the off (O) position and remove the battery pack. WARNING: Always remove the battery pack before storage to ensure the product is off. Allow a minimum of 30 minutes of cooldown time before storage. Storing a glue gun with a hot nozzle can cause serious burns and/or ignite combustible objects. To help prevent drips and clogs the next time the glue gun is used, remove dried glue from the nozzle area. NOTE: ILLUSTRATIONS START ON PAGE 7 FOLLOWING FRENCH AND SPANISH LANGUAGE SECTIONS 6 - English
-
 1
1 -
 2
2 -
 3
3 -
 4
4 -
 5
5 -
 6
6 -
 7
7 -
 8
8 -
 9
9 -
 10
10 -
 11
11 -
 12
12 -
13
-
14
-
15
-
16
-
17
-
18
-
19
-
20
 |
 |
