Ryobi P3410 Operation Manual - Page 7
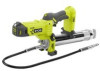
Operation - grease gun
 |
View all Ryobi P3410 manuals
Add to My Manuals
Save this manual to your list of manuals |
Page 7 highlights
OPERATION TURNING THE GREASE GUN ON/OFF See Figure 2, page 11. The lock-off button, located on the handle above the switch trigger, reduces the possibility of accidental starting. To turn the tool on: Slide lock-off button to the unlocked position, and press the switch trigger. To turn the tool off: Release the switch trigger and return the lock-off button to the locked position. CAUTION: The lock-off button should be in the locked position when the tool is not in use or is being transported. LED LIGHT See Figure 3, page 11. The LED light, located on the front of the tool base, illuminates when the switch trigger is depressed. After the switch trigger is released, the LED light will remain on for approximately 15 seconds before shutting off. The LED light illuminates only when there is a charged battery pack in the tool. UNDERSTANDING NLGI RATINGS NLGI ratings are used to express the thickness or fluidity of grease. The higher the rating, the thicker the grease. This grease gun is capable of handling grease with a thickness rated up to NLGI #2. Grease with an NLGI #2 rating has a consistency similar to peanut butter. NLGI No. 000 00 0 1 2 Consistency Very fluid; similar to cooking oil Somewhat fluid; similar to applesauce Very soft; similar to mayonnaise Somewhat soft; similar to toothpaste Creamy; similar to peanut butter CAUTION: Do not load grease rated higher than NLGI #2. Doing so could cause the grease gun to stall, damage the pressure-carrying components of the tool, and/or create a bursting hazard. WARNING: Always follow the grease manufacturer's instructions printed on their product labeling for use, cleaning, and storage. Clean grease tube thoroughly after each use. Grease should be stored out of the reach of children. Failure to do so may result in serious personal injury. LOADING A GREASE CARTRIDGE See Figures 4 - 5, page 12. Lock the switch trigger in the "off" position and remove the battery pack. Turn the grease tube counterclockwise to loosen and remove. Pull the spring-loaded grease tube handle completely out. Then move it to the side into the narrow slot to lock it into place. NOTE: Make sure the grease tube handle is locked in place before adding the grease cartridge. Use a clean dry cloth to remove any old grease from inside the tube. Remove the plastic end cap from the bottom of a 13.7 14.5 oz. grease cartridge (not included). Insert the grease cartridge (not included) into the grease tube with the bottom facing the grease tube handle. Remove the seal from the front of the grease cartridge (not included). Place the grease tube back onto the grease gun and rotate clockwise to secure. NOTE: Be careful to avoid cross-threading, which can cause the grease tube to leak during use. Grab the grease tube handle and move it away from the narrow slot. Slowly allow the grease tube handle to move forward and into the grease tube. NOTE: After the cartridge is loaded, use the purge valve to purge any air trapped in the grease tube. For more details, see Using the Purge Valve later in the manual. To remove an empty grease cartridge: Lock the switch trigger in the "off" position and remove the battery pack. Pull the spring-loaded grease tube handle completely out. Then move it to the side into the narrow slot to lock it into place. NOTE: Make sure the grease tube handle is locked in place before removing the grease tube. 7 - English
-
 1
1 -
 2
2 -
 3
3 -
 4
4 -
 5
5 -
 6
6 -
 7
7 -
 8
8 -
 9
9 -
 10
10 -
 11
11 -
 12
12 -
13
-
14
-
15
-
16
-
17
-
18
-
19
-
20
-
21
-
22
-
23
-
24
-
25
-
26
-
27
-
28
-
29
-
30
-
31
-
32
 |
 |
