Ryobi P360 User Manual - Page 8
Operation - crown stapler
 |
View all Ryobi P360 manuals
Add to My Manuals
Save this manual to your list of manuals |
Page 8 highlights
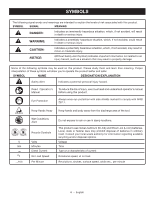
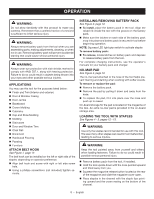
OPERATION WARNING: Do not allow familiarity with this product to make you careless. Remember that a careless fraction of a second is sufficient to inflict serious injury. WARNING: Always remove battery pack from the tool when you are assembling parts, making adjustments, cleaning, or when not in use. Removing battery pack will prevent accidental starting that could cause serious personal injury. WARNING: Always wear eye protection with side shields marked to comply with ANSI Z87.1, along with hearing protection. Failure to do so could result in objects being thrown into your eyes and other possible serious injuries. APPLICATIONS You may use this tool for the purposes listed below: Finish and Trim (Interior and exterior) Door & Window Casing Door Jambs Baseboard Crown Molding Cabinetry Cap and Shoe Molding Molding Staircases Door and Window Trim Chair Rail Brickmold Hardwood Flooring Paneling Furniture ATTACH BELT HOOK See Figure 1, page 12. The belt hook can be installed on the left or right side of the stapler, depending on operator preference. n Align belt hook and screw with right or left side screw hole. n Using a phillips screwdriver (not included) tighten se- curely. INSTALLING/REMOVING BATTERY PACK See Figure 2, page 12. To install, place the battery pack in the tool. Align the raised rib inside the tool with the groove on the battery pack. Make sure the latches on each side of the battery pack snap into place and battery pack is secured in tool before beginning operation. NOTE: Squeeze LED light grip switch to activate stapler. To remove battery pack: To remove, locate latches on battery pack and depress to release battery pack from the tool. For complete charging instructions, see the operator's manuals for your battery pack and charger. NO-MAR PAD See Figure 3, page 12. The no-mar pad attached to the nose of the tool helps prevent marring and denting when working with softer woods. To remove or replace the pad: Remove the battery pack. Remove the pad by pulling it down and away from the nose. To replace the pad, fit it into place over the nose and push up to reseat. On-board storage for the pad is located on the magazine of the tool. An extra no-mar pad is provided in the on-board storage area. LOADING THE TOOL WITH STAPLES See Figures 4 - 5, pages 12 - 13. WARNING: Use only the staples recommended for use with this tool. The use of any other staples can result in tool malfunction, leading to serious injuries. WARNING: Keep the tool pointed away from yourself and others when loading fasteners. Failure to do so could result in possible serious personal injury. Remove battery pack from the tool, if installed. Hold the tool upside down with the nose pointed upward and tilted away from you. Squeeze the magazine release button located at the rear of the magazine and slide the magazine cover open. Place staples in the channel with the staple tips point- ing upward and the crown resting on the bottom of the channel. 8 - English
-
 1
1 -
2
-
 3
3 -
 4
4 -
 5
5 -
 6
6 -
 7
7 -
 8
8 -
 9
9 -
 10
10 -
 11
11 -
 12
12 -
 13
13 -
14
-
15
-
16
-
17
-
18
-
19
-
20
-
21
-
22
-
23
-
24
-
25
-
26
-
27
-
28
-
29
-
30
-
31
-
32
-
33
-
34
-
35
-
36
 |
 |