Ryobi P430 English Manual - Page 11
Caution, To Remove Battery Pack, Prepare The Surface, Warning, Installing/removing, Application,
 |
View all Ryobi P430 manuals
Add to My Manuals
Save this manual to your list of manuals |
Page 11 highlights
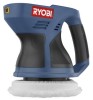
OPERATION CAUTION: When placing battery pack in the tool, be sure raised rib on battery pack aligns with the slot in the buffer/polisher and latches into place properly. Improper installation of the battery pack can cause damage to internal components. TO REMOVE BATTERY PACK See Figure 4. Place the power switch in the OFF ( O ) position. Locate latches on side of battery pack and depress both sides to release battery pack. Remove battery pack from the tool. DEPRESS LATCHES TO RELEASE BATTERY PACK BATTERY PACK LATCHES WARNING: Battery tools are always in operating condition. Therefore, switch should always be in the OFF ( O ) position when not in use or carrying at your side. PREPARE THE SURFACE For best results, the surface should be clean and dry. Most high-gloss surfaces can be cleaned with a mild soap and water solution. For removal of stubborn dirt such as road tar, grease, and bug stains, you can use a mild ammonia solution such as that used in glass cleaners. Before using any cleaning product, check the label for recommended applications and follow the directions for use. Never apply cleaner directly onto surface to be polished. Apply to a clean cloth then use the cloth to clean the surface. Do not use any type of abrasive cleanser as it may damage or scratch the surface. PULL POLISHING BONNET EDGES OVER PAD TO INSTALL Fig. 4 WARNING: The drawstring must be tucked securely inside the bonnet before turning the buffer/polisher on. Failure to do so could result in the drawstring being caught between the motor housing and orbiting pad, increasing the risk of serious personal injury. INSTALLING/REMOVING APPLICATION BONNET See Figure 5. Place the power switch in the OFF ( O ) position. Remove battery pack from the tool. Slip application bonnet edges over pad. Tie bonnet strings securely. To remove, untie bonnet strings and pull bonnet edges over and off pad. TIE STRINGS SECURELY AND TUCK LOOSE ENDS UNDERNEATH PAD Fig. 5 APPLYING POLISH TO THE APPLICATION BONNET Most polishes are either in paste or liquid form. Before using any polish, read all directions on appropriate applications and proper use. 11
-
 1
1 -
2
-
3
-
4
-
5
-
 6
6 -
 7
7 -
 8
8 -
 9
9 -
 10
10 -
 11
11 -
 12
12 -
 13
13 -
 14
14 -
 15
15 -
 16
16
 |
 |
