Ryobi P730 English Manual - Page 11
To Install Battery Pack, Caution, To Remove Battery Pack, Warning, Dual Hoses - air hose
 |
View all Ryobi P730 manuals
Add to My Manuals
Save this manual to your list of manuals |
Page 11 highlights
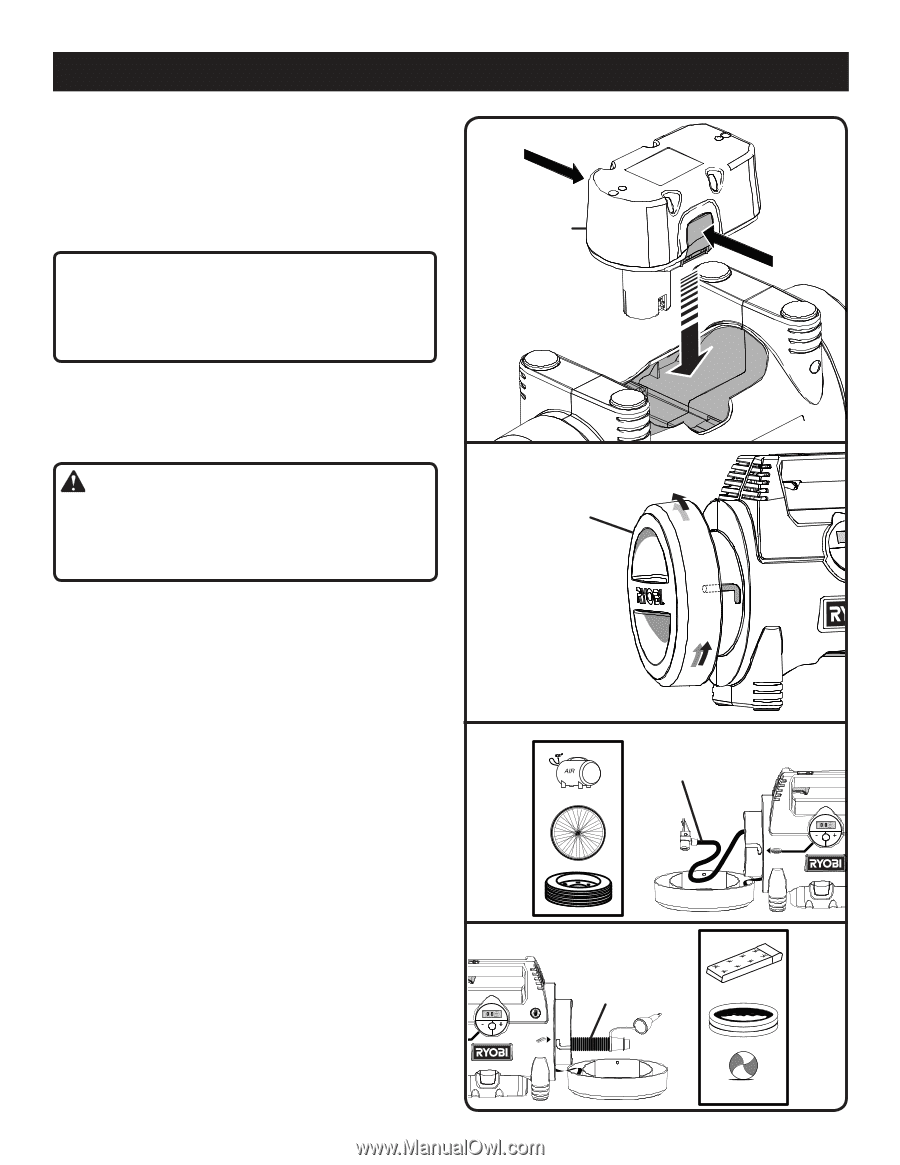
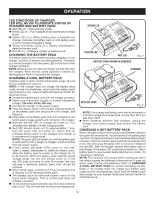
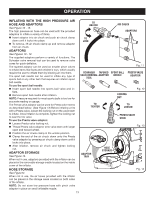
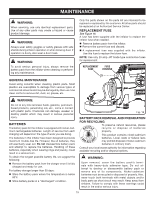
OPERATION TO INSTALL BATTERY PACK See Figure 4. Place the battery pack in the inflator. Align raised rib on battery pack with groove in the inflator's battery port. Make sure the latches on each side of the battery pack snap in place and that battery pack is secured in the inflator before beginning operation. CAUTION: When placing battery pack in the inflator, be sure raised rib on battery pack aligns with the inflator and latches into place properly. Improper installation of the battery pack can cause damage to internal components. TO REMOVE BATTERY PACK See Figure 4. Locate latches on side of battery pack and depress both sides to release battery pack. Remove battery pack from the inflator. WARNING: Improperly attached hoses or adaptors can become detached under pressure and cause serious injury. Possible air leaks can cause faulty pressure readings. Make sure all connections are tightly secured. END CAP REMOVAL See Figure 5. To access the inflator hoses, the end caps must be removed. To remove the end caps, turn counterclockwise and remove. To replace endcap, push endcap tabs into slots on inflator and turn clockwise. DUAL HOSES See Figure 6. The inflator has two hoses for two types of inflation. The high pressure hose is for inflating high pressure items like tires and sports balls. The low pressure hose is designed for inflating low pressure, high volume items like air rafts, mattresses, and floats. NOTE: Pressure gauge and preset features are relative only to high pressure hose applications. BATTERY PACK DEPRESS LATCHES TO RELEASE BATTERY PACK TURN ENDCAP COUNTERCLOCKWISE TO REMOVE HIGH PRESSURE HOSE LATCHES Fig. 4 Fig. 5 LOW PRESSURE HOSE 11 Fig. 6
-
 1
1 -
2
-
3
-
4
-
5
-
 6
6 -
 7
7 -
 8
8 -
 9
9 -
 10
10 -
 11
11 -
 12
12 -
 13
13 -
 14
14 -
 15
15 -
 16
16
 |
 |