Ryobi P738 Manual 1 - Page 6
Toperation Tmaintenance - psi
 |
View all Ryobi P738 manuals
Add to My Manuals
Save this manual to your list of manuals |
Page 6 highlights
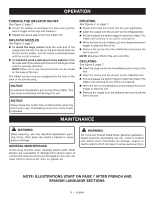
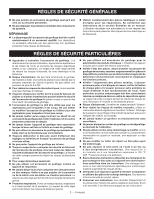
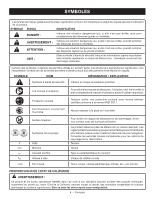
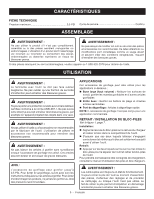
OPERATION TURNING THE INFLATOR ON/OFF See Figure 2, page 7. To turn the inflator on and begin the flow of air, pull the switch trigger all the way and release it. Repeat the above step to turn the inflator off. INFLATOR NOZZLES See Figure 3, page 7. To install the large nozzle: Slide the wide end of the nozzle onto the tool. The tab on the tool should slide into the slot on the nozzle. Turn the nozzle counterclockwise until the nozzle is secure. To install the small nozzle (pinch valve adaptor): Slide the wide end of the nozzle onto the end of the large nozzle until it is securely attached. NOTE: When not in use, the small nozzle can be stored on the base of the tool. The inflator can be hung on a pegboard by the hole on the back of the tool housing. NOTICE: Do not block the deflation port on top of the inflator. This can cause overheating and damage the unit. NOTICE: Always leave the nozzle free of obstructions when the tool is not in use. Overheating could occur if the nozzle is blocked. INFLATING See Figures 4 - 5, page 7. Select and install the nozzle that fits your application. Insert the nozzle into the air port on the inflatable item. Pull and release the switch trigger to start the inflator. The inflator will continue to run until it is turned off. When the item is fully inflated, pull and release the switch trigger to stop the flow of air. Remove the nozzle from the inflated item and close the item's air port. NOTE: Maximum PSI for this unit is 0.5 PSI. DEFLATING See Figure 6, page 7. Insert the large nozzle into the deflation port on top of the tool. Insert the nozzle into the air port on the inflatable item. Pull and release the switch trigger to start the inflator. The inflator will continue to run until it is turned off. When the item is fully deflated, pull and release the switch trigger to stop the tool. Remove the nozzle from the deflated item and close the item's air port. MAINTENANCE WARNING: When servicing, use only identical replacement parts. Use of any other parts can create a hazard or cause product damage. GENERAL MAINTENANCE Avoid using solvents when cleaning plastic parts. Most plastics are susceptible to damage from various types of commercial solvents and may be damaged by their use. Use clean cloths to remove dirt, dust, oil, grease, etc. WARNING: Do not at any time let brake fluids, gasoline, petroleumbased products, penetrating oils, etc., come in contact with plastic parts. Chemicals can damage, weaken or destroy plastic which can result in serious personal injury. NOTE: ILLUSTRATIONS START ON PAGE 7 AFTER FRENCH AND SPANISH LANGUAGE SECTIONS. 6 - English
-
 1
1 -
 2
2 -
 3
3 -
 4
4 -
 5
5 -
 6
6 -
 7
7 -
 8
8 -
 9
9 -
 10
10 -
 11
11 -
 12
12 -
13
-
14
-
15
-
16
-
17
-
18
-
19
-
20
 |
 |