Ryobi P739 Operation Manual - Page 9
Operation
 |
View all Ryobi P739 manuals
Add to My Manuals
Save this manual to your list of manuals |
Page 9 highlights
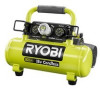
OPERATION APPLICATIONS Air compressors are utilized in a variety of air system applications. Match hoses, connectors, air tools, and accessories to the capabilities of the air compressor. You may use this product for the purposes listed below: Operating light- to medium-duty air-powered tools Operating air accessories such as air nozzles and automotive tire chucks INSTALLING/REMOVING BATTERY PACK See Figure 1, page 13. Make sure the air compressor is turned off. Insert a fully charged battery pack into the product as shown. NOTE: For best performance, a 4.0 Ah battery pack is recommended. Make sure the latches on each side of the battery pack snap into place and the battery pack is secured in the product before beginning operation. Depress the latches to remove the battery pack. For complete charging instructions, see the operator's manuals for your battery pack and charger. CONNECTING/DISCONNECTING AIR HOSE (HOSE NOT PROVIDED) See Figure 2, page 13. To disconnect an air hose or an air tool: n Confirm that the outlet pressure is at zero (0) psi. n When disconnecting a hose from 1/4-in. quick coupler, always firmly hold release end of hose. n Pull back on the release sleeve on the 1/4-in. quick coupler. n With a firm grip, pull out the quick-connect air fitting that is attached to the quick coupler. BREAK-IN PERIOD Before first use, install a fully charged 4.0 Ah battery pack, then run the air compressor at zero tank pressure with the drain valve fully open for 30 minutes or until the battery pack is completely discharged, whichever happens first. TURNING THE AIR COMPRESSOR ON/OFF See Figure 3, page 14. n Install the battery pack. n Move the Auto On/Off switch to the AUTO ON (I) position to power the compressor on. n To turn the air compressor off, move the Auto On/Off switch to the OFF (O) position. NOTE: When the compressor is in the AUTO ON (I) position, the air compressor will automatically turn back on when the designated tank air pressure drops below the preset pressure limit. It will also shut off again when the cut-off pressure is reached. WARNING: Never exceed the air tool's pressure rating as recommended by the manufacturer. When using this air compressor as an inflation device, always follow the maximum inflation guidelines stated by the manufacturer of the item being inflated. n Make sure the air compressor is turned off and the battery pack is not installed. n Rotate pressure regulator knob fully in the counter- clockwise direction so that the outlet pressure is at zero (0) psi. n Attach hose with quick connect air fitting to 1/4 in. quick coupler on air compressor. Make sure to push the hose adaptor end fully into the coupler until the sleeve springs forward to lock it in place. NOTE: Your air hose can be looped around the hose wrap brackets for storage or any time the air compressor is not in use. WARNING: Never exceed the air tool's pressure rating as recommended by the manufacturer. When using this air compressor as an inflation device, always follow the maximum inflation guidelines stated by the manufacturer of the item being inflated. WARNING: Always ensure the switch is in the OFF (O) position and the regulator pressure gauge reads zero before changing air tools or disconnecting the hose from the air outlet. Failure to do so could result in possible serious personal injury. 9 - English
-
 1
1 -
2
-
3
-
 4
4 -
 5
5 -
 6
6 -
 7
7 -
 8
8 -
 9
9 -
 10
10 -
 11
11 -
 12
12 -
 13
13 -
 14
14 -
15
-
16
-
17
-
18
-
19
-
20
-
21
-
22
-
23
-
24
-
25
-
26
-
27
-
28
-
29
-
30
-
31
-
32
-
33
-
34
-
35
-
36
 |
 |
