Ryobi RY14110 Operator's Manual - Page 16
Maintenance - batteries
 |
View all Ryobi RY14110 manuals
Add to My Manuals
Save this manual to your list of manuals |
Page 16 highlights
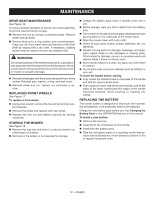
MAINTENANCE DRIVE GEAR MAINTENANCE See Figure 16. To ensure smooth operation of wheels, the wheel assembly should be cleaned before storage. Remove the nut by turning counterclockwise. Remove wheel and set aside. Remove dust cover, e-ring, washer, pins, and wheel gear. Clean any dirt from these items and the end of the drive shaft by wiping with a dry cloth. If necessary, rubbing alcohol may be used to remove any stubborn dirt. WARNING: Do not lubricate any of the wheel components. Lubrication may cause the wheel components to fail during use, which could result in serious personal injury to the operator and/ or mower or property damage. Reinstall wheel gear with the arrows facing the front of the mower. Reinstall pins, washer, e-ring, and dust cover. Reinstall wheel and nut. Tighten nut clockwise to secure. REPLACING FRONT WHEELS See Figure 17. To replace a front wheel: Using a hex wrench, remove the hex nut by turning coun- terclockwise. Remove the wheel and replace with new wheel. Replace the hex nut and tighten securely by turning clockwise. STORING THE MOWER See Figure 18. Remove the fuse key and store in a secure location out of the reach of children. Removal of the battery is not required for storage. Charge the battery pack every 2 months when not in use. Before storage, wipe any dirt or debris from the battery area. Turn mower on its side and clean grass clippings that have accumulated on the underside of the mower deck. Wipe the mower clean with a dry cloth. Check all nuts, bolts, knobs, screws, fasteners, etc., for tightness. Inspect moving parts for damage, breakage, and wear. Have repairs made on any damaged or missing parts. Check blade for damage, uneven, or excessive wear and replace blade if these conditions exist. Store mower indoors in a clean, dry place out of the reach of children. Do not store near corrosive materials such as fertilizer or rock salt. To lower the handle before storing: Fully loosen the handle knobs on the sides of the handle and fold the upper handle down. Push inward on each side of the lower handle, and lift the sides of the lower handle past the edges of the handle mounting brackets. Avoid pinching or trapping any cables. REPLACING THE BATTERY The mower battery is designed for maximum life; however, like all batteries, it will eventually need to be replaced. Charge the new battery pack before use. See Charging the Battery Pack in the OPERATION section of this manual. To install a new battery: Remove the fuse key. Carefully lift the old battery by the handle. Install the new battery pack. Take the old battery pack to a recycling center that accepts lead acid batteries. Never dispose of battery in fire or regular household trash. 12 - English
-
 1
1 -
2
-
3
-
4
-
5
-
6
-
7
-
8
-
9
-
10
-
 11
11 -
 12
12 -
 13
13 -
 14
14 -
 15
15 -
 16
16 -
 17
17 -
 18
18 -
 19
19 -
 20
20 -
 21
21 -
22
-
23
-
24
-
25
-
26
-
27
-
28
-
29
-
30
-
31
-
32
-
33
-
34
-
35
-
36
-
37
-
38
-
39
-
40
-
41
-
42
-
43
-
44
-
45
-
46
-
47
-
48
 |
 |