Ryobi RY142300 User Manual - Page 14
Connecting The High Pressure Hose, To The Trigger Handle, To The Pump, Connecting The Garden Hose
 |
View all Ryobi RY142300 manuals
Add to My Manuals
Save this manual to your list of manuals |
Page 14 highlights
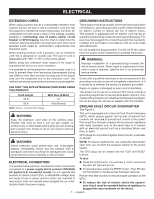
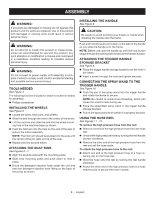
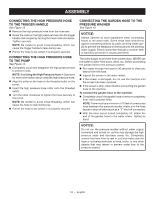
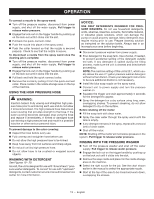
ASSEMBLY CONNECTING THE HIGH PRESSURE HOSE TO THE TRIGGER HANDLE See Figure 13. n Remove the high pressure hose from the hose reel. n Screw the collar on the high pressure hose onto the trigger handle inlet coupler by turning the hose collar clockwise. Tighten securely. NOTE: Be careful to avoid cross-threading, which can cause the trigger handle to leak during use. n Pull on the hose to be certain it is properly secured. CONNECTING THE HIGH PRESSURE HOSE TO THE PUMP See Figure 14. n Completely uncoil and straighten the high pressure hose to prevent kinks. NOTE: See Using the High Pressure Hose in Operation for more information about using the high pressure hose. n Align the collar on the hose to the threaded outlet on the pump. n Insert the high pressure hose collar onto the threaded outlet. n Turn the collar clockwise to tighten the hose securely to the pump. NOTE: Be careful to avoid cross-threading, which can cause the hose to leak during use. n Pull on the hose to be certain it is properly secured. CONNECTING THE GARDEN HOSE TO THE PRESSURE WASHER See Figure 15. NOTICE: Always observe all local regulations when connecting hoses to the water main. Some areas have restrictions against connecting directly to public drinking water supply to prevent the feedback of chemicals into the drinking water supply. Direct connection through a receiver tank or backflow preventer is usually permitted. The water supply must come from a water main. NEVER use hot water or water from pools, lakes, etc. Before connecting the garden hose to the pressure washer: n Run water through the hose for 30 seconds to clean any debris from the hose. n Inspect the screen in the water intake. n If the screen is damaged, do not use the machine until the screen has been replaced. n If the screen is dirty, clean it before connecting the garden hose to the machine. To connect the garden hose to the machine: n Completely uncoil the garden hose or remove completely from reel to prevent kinks. NOTE: There must be a minimum of 10 feet of unrestricted hose between the pressure washer intake and the hose faucet or shut off valve (such as a "Y" shut off connector). n With the hose faucet turned completely off, attach the end of the garden hose to the water intake. Tighten by hand. NOTICE: Do not run the pressure washer without water supply connected and turned on, as this may damage the high pressure seals and decrease pump life. Completely unwind the hose from its reel or coil and make sure the hose is not being restricted by tires, rocks, or any other objects that may lessen or prevent water flow to the pressure washer. 10 - English
-
 1
1 -
2
-
3
-
4
-
5
-
6
-
7
-
8
-
 9
9 -
 10
10 -
 11
11 -
 12
12 -
 13
13 -
 14
14 -
 15
15 -
 16
16 -
 17
17 -
 18
18 -
 19
19 -
20
-
21
-
22
-
23
-
24
-
25
-
26
-
27
-
28
-
29
-
30
-
31
-
32
-
33
-
34
-
35
-
36
-
37
-
38
-
39
-
40
-
41
-
42
-
43
-
44
-
45
-
46
-
47
-
48
-
49
-
50
-
51
-
52
-
53
-
54
-
55
-
56
 |
 |