Ryobi RY48ZTR100 Operation Manual - Page 24
Tire Maintenance, Warning, Tire Repair, Replacing Tires, Adjusting The Brakes, Danger
 |
View all Ryobi RY48ZTR100 manuals
Add to My Manuals
Save this manual to your list of manuals |
Page 24 highlights
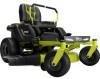
MAINTENANCE TIRE MAINTENANCE This mower is equipped with tubeless tires of the size and type listed below: Front Rear Size 13x5x6 18x8.5x8 Tire Air Pressure Check the air pressure in all tires before use. Improper air pressure will affect handling, steering response, traction, tire life, level cutting, and operator comfort. Be sure tires are inflated to the pressure shown below. NOTE: Tire pressure should only be measured or adjusted when tires are cold. Recommended Pressure Front 19 PSI Rear 18 PSI WARNING: Check the tire pressure carefully while inflating. Too much air in the tire could cause the tire to burst, causing serious personal injury. WARNING: Maintaining correct air pressure in the tires is very important. Too little pressure could allow the tire to rotate off the wheel rim. Too much pressure could cause the tire to burst. Failure to maintain correct air pressure in the tires could cause problems with mower operation and stability, causing death or serious personal injury. ADJUSTING THE BRAKES See Figure 21. DANGER: Ensure the brakes are properly functioning at all times and prior to each use. Improper brake function can cause loss of control in an emergency situation and result in death or serious personal injury. Being able to stop the mower properly is critical to mowing safety. If you've noticed your mower traveling farther before stopping when you depress the brake pedal, the brakes may need adjusting. To test: Park the mower on a level surface and set the parking brake. Place the drive levers in the open position. Stand behind the mower and try to push it forward. If the rear tires turn, the brakes need to be tightened. To tighten: Locate the brake adjustment nuts along the frame in front of each of the rear wheels. Turn each adjustment nut 1/4 turn clockwise, then try again to push the mower. Continue rotating each nut 1/4 turn and testing until the mower can no longer be moved by pushing. After final adjustment, test the brakes by driving the mower at normal speed on flat ground to be sure the mower stops quickly when the brake pedal is depressed. TIRE REPAIR If a leak or flat tire occurs due to a puncture, the tire may be repaired using a plug-type patch. If the damage is from a cut, or if the puncture cannot be repaired using a plug, the tire should be replaced. REPLACING TIRES When tires are worn, the traction of the mower will be decreased, which increases the chance of having an accident. Tires should be replaced when the depth on the tread is 0.16 in. (4 mm) or less, or any time there is damage to the tire. Always use identical replacement tires. Using improper tires on the mower could cause loss of control, which could cause serious personal injury. Have tires replaced by an authorized service center or a qualified tire repair station. ADJUSTMENT NUTS Fig. 21 24 - English
-
 1
1 -
2
-
3
-
4
-
5
-
6
-
7
-
8
-
9
-
10
-
11
-
12
-
13
-
14
-
15
-
16
-
17
-
18
-
 19
19 -
 20
20 -
 21
21 -
 22
22 -
 23
23 -
 24
24 -
 25
25 -
 26
26 -
 27
27 -
 28
28 -
 29
29 -
30
-
31
-
32
-
33
-
34
-
35
-
36
-
37
-
38
-
39
-
40
-
41
-
42
-
43
-
44
-
45
-
46
-
47
-
48
-
49
-
50
-
51
-
52
-
53
-
54
-
55
-
56
-
57
-
58
-
59
-
60
-
61
-
62
-
63
-
64
-
65
-
66
-
67
-
68
-
69
-
70
-
71
-
72
-
73
-
74
-
75
-
76
-
77
-
78
-
79
-
80
-
81
-
82
-
83
-
84
-
85
-
86
-
87
-
88
-
89
-
90
-
91
-
92
-
93
-
94
-
95
-
96
-
97
-
98
-
99
-
100
-
101
-
102
-
103
-
104
 |
 |
