Samsung 2494HM User Manual (user Manual) (ver.1.0) (English) - Page 50
Uninstall, MultiScreen, Installation, Click the Add or Remove Programs icon in Control Panel.
 |
UPC - 729507809939
View all Samsung 2494HM manuals
Add to My Manuals
Save this manual to your list of manuals |
Page 50 highlights
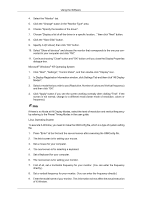
Using the Software Uninstall The AutoRotation program can be removed only by using the "Add or Remove Programs" option of the Windows® Control Panel. Perform the following steps remove AutoRotation. 1. Go to [Task Tray] → [Start] → [Settings] and select [Control Panel] in the menu. If the program runs on Windows® XP, go to [Control Panel] in the [Start] menu. 2. Click the "Add or Remove Programs" icon in Control Panel. 3. In the "Add or Remove Programs" screen, scroll down to find "AutoRotation." Click on it to highlight it. 4. Click the "Change/Remove" button to remove the program. 5. Click "Yes" to begin the uninstall process. 6. Wait until the "Uninstall Complete" dialog box appears. 7. After uninstall restart the system to complete the uninstallation. Note Visit the AutoRotation website for technical support for AutoRotation, FAQs (questions and answers) and software upgrades. MultiScreen Installation 1. Insert the installation CD into the CD-ROM drive. 2. Click the MultiScreen installation file. Note If the popup window to install the software for the main screen is not displayed, proceed with the installation using the MultiScreen executable file on the CD. 3. When the Installation Shield Wizard window appears, click "Next". 4. Select "I agree to the terms of the license agreement" to accept the terms of use. 5. Choose a folder to install the MultiScreen, program. 6. Click "Install". 7. The "Installation Status" window appears. 8. Click "Finish".
-
 1
1 -
2
-
3
-
4
-
5
-
6
-
7
-
8
-
9
-
10
-
11
-
12
-
13
-
14
-
15
-
16
-
17
-
18
-
19
-
20
-
21
-
22
-
23
-
24
-
25
-
26
-
27
-
28
-
29
-
30
-
31
-
32
-
33
-
34
-
35
-
36
-
37
-
38
-
39
-
40
-
41
-
42
-
43
-
44
-
 45
45 -
 46
46 -
 47
47 -
 48
48 -
 49
49 -
 50
50 -
 51
51 -
 52
52 -
 53
53 -
 54
54 -
 55
55 -
56
-
57
-
58
-
59
-
60
-
61
-
62
-
63
-
64
-
65
-
66
-
67
-
68
-
69
-
70
-
71
-
72
-
73
-
74
-
75
-
76
-
77
-
78
-
79
-
80
-
81
-
82
-
83
-
84
-
85
-
86
-
87
-
88
-
89
-
90
-
91
-
92
-
93
-
94
-
95
-
96
 |
 |
