Samsung 550S User Manual (user Manual) (ver.1.0) (English) - Page 4
Operation
 |
View all Samsung 550S manuals
Add to My Manuals
Save this manual to your list of manuals |
Page 4 highlights
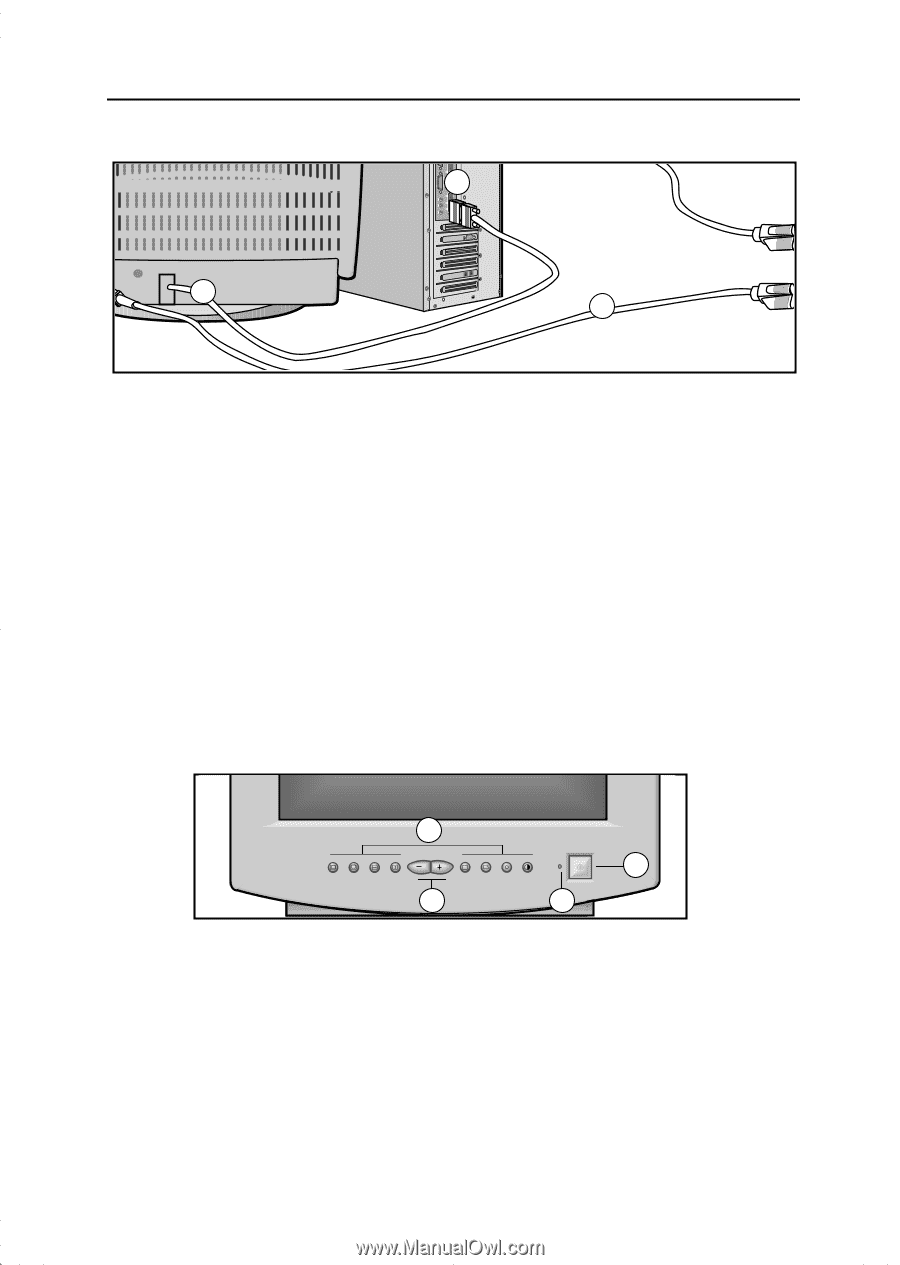
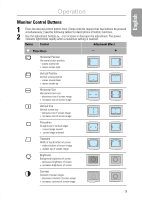
Operation Connecting Your Monitor 2 3 4 1 Turn off your computer and unplug the power cord. 2 Signal cable Connect the end of the signal cable to your computer's video port. If you are using a Macintosh computer, connect the cable to a Macintosh adapter, and set the pins on your adapter (adapter not included). A PC-compatible computer does not need an adapter. 3 Power port Connect the power cord for your monitor to the power port on the back of the monitor. The Front Panel 4 Power cords Plug the power cord for the monitor and the power cord for your computer into a nearby outlet. 5 Turn on your computer and monitor. If your monitor displays an image, installation is complete. 6 Install the monitor driver • Insert the provided diskette into the A drive. • Double click the "install.exe" file. 1 4 2 3 1 Monitor control buttons All adjustments to the image display are made using these control buttons, including control of the screen display area shape and the display image. 2 Adjustment buttons The decrease ( - ) button lowers the value of the selected function. The increase ( + ) button raises the value of the selected function. 3 Power indicator This light glows green during normal operation. It also blinks when a function button is pressed, or while a function setting is being automatically saved. 4 Power button Turns the monitor on and off. 2
-
 1
1 -
 2
2 -
 3
3 -
 4
4 -
 5
5 -
 6
6 -
 7
7 -
 8
8
 |
 |