Samsung BRF425200AP/AA User Manual - Page 40
Aligning the Panel, Top of the Door
 |
View all Samsung BRF425200AP/AA manuals
Add to My Manuals
Save this manual to your list of manuals |
Page 40 highlights
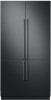
Installation instructions 13. Aligning the Panel NOTE Each custom panel comes with 12 dedicated screws for fine-tuning. Use a minimum number of screws to fine-tune the custom panel with the cabinet. Once fine-tuning is complete, fix the custom panel with the top nut. There are two panel-adjustment mechanisms at the top and two at the bottom of the door. Adjust the panel so it aligns with the surrounding cabinetry. The gap between the cabinet and the panel must be: • 1/8" (3 mm) on top • 1/8" (3 mm) on the side 1/8" 1/8" 1/8" Top of the Door 1. Use the double-threaded bolts to align the door panel. 2. Engage a side screw (see the graphic) to shift the panel side to side. 3. Engage Screw 1 (see the graphic) to shift the panel forward/backward; engage Screw 2 to set the panel in place. 40 English T-TYPE_BRF9000M_IM_DA68-03621D-02_EN.indd 40 2017-12-14 12:27:07
-
 1
1 -
2
-
3
-
4
-
5
-
6
-
7
-
8
-
9
-
10
-
11
-
12
-
13
-
14
-
15
-
16
-
17
-
18
-
19
-
20
-
21
-
22
-
23
-
24
-
25
-
26
-
27
-
28
-
29
-
30
-
31
-
32
-
33
-
34
-
 35
35 -
 36
36 -
 37
37 -
 38
38 -
 39
39 -
 40
40 -
 41
41 -
 42
42 -
 43
43 -
 44
44 -
 45
45 -
46
-
47
-
48
-
49
-
50
-
51
-
52
-
53
-
54
-
55
-
56
-
57
-
58
-
59
-
60
-
61
-
62
-
63
-
64
-
65
-
66
-
67
-
68
-
69
-
70
-
71
-
72
-
73
-
74
-
75
-
76
-
77
-
78
-
79
-
80
-
81
-
82
-
83
-
84
-
85
-
86
-
87
-
88
-
89
-
90
-
91
-
92
-
93
-
94
-
95
-
96
-
97
-
98
-
99
-
100
-
101
-
102
-
103
-
104
-
105
-
106
-
107
-
108
-
109
-
110
-
111
-
112
-
113
-
114
-
115
-
116
-
117
-
118
-
119
-
120
-
121
-
122
-
123
-
124
-
125
-
126
-
127
-
128
-
129
-
130
-
131
-
132
-
133
-
134
-
135
-
136
-
137
-
138
-
139
-
140
-
141
-
142
-
143
-
144
-
145
-
146
-
147
-
148
-
149
-
150
-
151
-
152
-
153
-
154
-
155
-
156
 |
 |
