Samsung C32HG70QQN User Manual
Samsung C32HG70QQN Manual
 |
View all Samsung C32HG70QQN manuals
Add to My Manuals
Save this manual to your list of manuals |
Samsung C32HG70QQN manual content summary:
- Samsung C32HG70QQN | User Manual - Page 1
MANUAL Gaming Monitor C27HG70QQ* C32HG70QQ* The color and the appearance may differ depending on the product, and the specifications are subject to change without prior notice to improve the performance. The contents of this manual are subject to change without notice to improve quality. © Samsung - Samsung C32HG70QQN | User Manual - Page 2
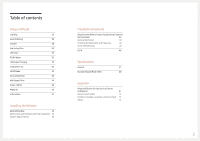
Operation 7 Preparations Parts 9 Control Panel 9 Function Key Guide 10 Game Setting Key 11 Changing Brightness, Contrast and Product Tilt and Height 16 Rotating the Monitor Screen 17 Anti-theft Lock 18 Precautions for moving the monitor 18 Installation 19 Attaching the Stand - Samsung C32HG70QQN | User Manual - Page 3
40 Information 41 Installing the Software Easy Setting Box 43 Restrictions and Problems with the Installation 43 System Requirements 43 Troubleshooting Guide Requirements Before Contacting Samsung Customer Service Center 44 Testing the Product 44 Checking the Resolution and Frequency - Samsung C32HG70QQN | User Manual - Page 4
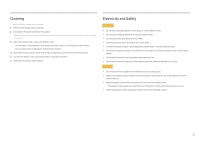
Caution A serious or fatal injury may result if instructions are not followed. Personal injury or damage to properties may result if instructions are not followed. 10 cm (3.93 Inches) 10 nearby. ――Contact your nearest Samsung Customer Service Center if you want to clean the inside of the product - Samsung C32HG70QQN | User Manual - Page 5
apply a cleaning agent that contains alcohol, solvent, or surfactant to the monitor. ‒‒ Do not spray water or detergent directly on the product. 4 is being used. •• Only use the power cord provided with your product by Samsung. Do not use the power cord with other products. •• Keep the power socket - Samsung C32HG70QQN | User Manual - Page 6
of moisture, or a place where the product will operate continuously for an extended period of time) may seriously affect its performance. ‒‒ Be sure to consult Samsung Customer Service Center if you want to install the product at such a place. 6 - Samsung C32HG70QQN | User Manual - Page 7
harmed. •• If the product is dropped or the outer case is damaged, turn off the power and disconnect the power cord. Then contact Samsung Customer Service Center. ‒‒ Continued use can result in a fire or electric shock. •• Do not leave heavy objects or items that children like (toys, sweets, etc - Samsung C32HG70QQN | User Manual - Page 8
Caution •• Leaving the screen fixed on a stationary image for an extended period of time may cause afterimage burn-in or defective pixels. ‒‒ Activate power-saving mode or a moving-picture screen saver if you will not be using the product for an extended period of time. •• Disconnect the power cord - Samsung C32HG70QQN | User Manual - Page 9
Key Guide may vary depending on the function or product model. Please refer to the actual product. Use shortcut keys to access previously saved custom game modes. •• Game Setting 1 / Game Setting 2 / Game Setting 3 ――The Game Setting Keys are located at the bottom right on the front of the monitor - Samsung C32HG70QQN | User Manual - Page 10
(ENTER): The selected item will be applied. Return Icons Description Menu Selects by moving the JOG button in the function key guide screen. The OSD (On Screen Display) of your Monitor's feature appears. Source Selects to change the input signal by moving the JOG button in the Function Key - Samsung C32HG70QQN | User Manual - Page 11
bottom without using an OSD menu. You can directly see the settings for three different modes. •• Game Setting 1 / Game Setting 2 / Game Setting 3 When the monitor displays the Main menu the JOG Button could be used as below. JOG Button UP/DOWN LEFT RIGHT PRESS(ENTER) Action Move the option - Samsung C32HG70QQN | User Manual - Page 12
Mute? The function mutes the audio to improve sound effect when there is sound noise or when the input signal is weak, usually due to a problem with the volume of an input device. ――To activate the Mute function, access the Volume control screen, then use the JOG button to move the - Samsung C32HG70QQN | User Manual - Page 13
IN Connects to a PC using a DP cable. /SERVICE MIC IN Connect to an audio output device such as headphones. Dedicated to service technicians. Connect to a microphone. MIC OUT Connect to power cord for your monitor to the POWER IN port on the back of the product. ――(C32HG70QQ* model only) 13 - Samsung C32HG70QQN | User Manual - Page 14
screen. 2 When the message as shown in the following figure is displayed on the monitor, select Yes to upgrade the software. USB 1 HDMI IN 1 HDMI IN 2 DP IN MIC IN /SERVICE MIC OUT 1 2 (PC IN) 3 When the screen as shown in the following figure is displayed, select Yes. Check Signal Cable - Samsung C32HG70QQN | User Manual - Page 15
for each model, and then follow the instructions in this guide. 4 If you want to revert or . ‒‒ The USB disk format is not supported. ‒‒ The USB disk contains no valid upgrade files. monitor. And prevent the upgrading from any interruption as far as possible. If an interruption happens, the monitor - Samsung C32HG70QQN | User Manual - Page 16
to Left ~ 15.0° to Right (Total 30.0°, ±2.0°) -2.0° (±2.0°) ~ 92.0° (±2.0°) 145.0 mm (±5.0 mm) -5.0° (±2.0°) ~ 15.0° (±2.0°) 145.0 mm (±5.0 mm) -5.0° (±2.0°) ~ 15.0° (±2.0°) •• The monitor tilt and height can be adjusted. •• When adjusting the tilt and height, hold both sides of the product - Samsung C32HG70QQN | User Manual - Page 17
upright or when the height is not at the maximum can also damage the product. •• Hold the bezel at both side edges and rotate the monitor. (Be careful not to directly hold the LCD display.) •• The screen can be rotated up to 90° clockwise if you are facing the screen. 17 - Samsung C32HG70QQN | User Manual - Page 18
monitor •• Hold the lower part of the monitor when moving it. •• When moving the monitor, rotate to portrait orientation and hold the top and bottom of the monitor device can be purchased separately. ‒‒ Refer to the user guide provided with your anti-theft locking device for details. ‒‒ Anti - Samsung C32HG70QQN | User Manual - Page 19
the grooves on either side of the top layer of styrofoam covering the product and remove it. Attach the stand to the back of the monitor, in the direction of the arrow. Use the screws on the stand to tightly fasten. 5 6 Attaching the COVER-REAR TOP to the stand neck, Turn - Samsung C32HG70QQN | User Manual - Page 20
with one hand and remove the screws of the stand base with another hand. ――Make sure to use the styrofoam (cushion) that came with the monitor. Remove the stand base. 5 6 Turn the COVER-REAR TOP counterclockwise to detach it from the rear cover. Remove the COVER-REAR TOP after detaching it - Samsung C32HG70QQN | User Manual - Page 21
attaching the wall-mount kit or desktop stand using excessive force. ‒‒ Samsung shall not be held liable for any product damage or personal injury install the monitor using a wall mount, disconnect the stand base from the monitor. Unit: mm (inches) Model name VESA screw hole specs in Standard - Samsung C32HG70QQN | User Manual - Page 22
Source Device Pre-connection Checkpoints ――Before connecting a source device, read the user manual provided with it. The number and locations of ports on source devices may HDMI IN 1, HDMI IN 2 ――The audio function is not supported if the source device is connected using the HDMI-DVI cable. 22 - Samsung C32HG70QQN | User Manual - Page 23
to Microphone MIC IN ――A DP cable shorter under 1.5 m in length is recommended. Using a cable longer than 1.5 m can affect the picture quality. Connecting to Headphones /SERVICE Connection Using the Audio Cable MIC OUT ――Use headphones when activating sound with an HDMI-HDMI or DP cable. 23 - Samsung C32HG70QQN | User Manual - Page 24
product to a PC. However, to take full advantage of the USB 3.0 function, connect a USB 3.0 cable between the PC and the product. Ensure the PC supports USB 3.0. If multiple source devices are connected to the PC, the many cables around the PC may look messy. Connecting the devices directly to the - Samsung C32HG70QQN | User Manual - Page 25
your PC. ――The product does not support media play. If you need to on your PC. ――For USB-related problems caused by OS, drive programs or the Power (C27HG70QQ* model only) DP IN /SERVICE MIC IN MIC OUT 11 2 (PC IN) monitor to turn it on. ――The input voltage is switched automatically. 25 - Samsung C32HG70QQN | User Manual - Page 26
Connecting the Power (C32HG70QQ* model only) POWER IN To use the product, connect the power cable to a power outlet and the POWER IN port on the product. ――The input voltage is switched automatically. 26 - Samsung C32HG70QQN | User Manual - Page 27
Tidying Up the Connected Cables 1 2 3 4 Stand assembly is complete. 5 Adjust the screen, as shown in the figure. 6 Connect cables to the appropriate connectors. Run the cables through the holder in the direction of the arrow from the lower part of the holder, as shown in the image. Pull - Samsung C32HG70QQN | User Manual - Page 28
for this product by installing the corresponding drivers. ――To install the latest version of the product driver, download it from the Samsung Electronics website at http://www.samsung.com. Use the product in the correct posture as follows: •• Allow a distance of 45 to 50cm between your eye and the - Samsung C32HG70QQN | User Manual - Page 29
to obtain a picture quality optimized for the AOS game screen. •• sRGB: Adjust the color system to sRGB mode. This is the standard mode of this monitor. •• Cinema: Obtain the brightness and sharpness of TVs suitable for enjoying video and DVD content. In AV mode When the external input is connected - Samsung C32HG70QQN | User Manual - Page 30
Refresh Rate Response Time Change the screen refresh rate. A higher refresh rate can reduce eye strain. •• DisplayPort : 60 Hz / 100 Hz / 120 Hz / 144 Hz •• HDMI1, HDMI2 : 60 Hz / 100 Hz / 120 Hz / 144 Hz ――This menu is not available when FreeSync is set to Standard Engine or Ultimate Engine mode. - Samsung C32HG70QQN | User Manual - Page 31
on the resolution. A higher resolution generally decreases the response rate. •• The sound quality of the monitor may be degraded. ――If you encounter any issues when using the function, contact the Samsung Service Center. ――When the resolution is changed while setting FreeSync to Standard Engine or - Samsung C32HG70QQN | User Manual - Page 32
graphics cards: Make sure to install the latest official graphics drivers from AMD that support FreeSync. ――For additional AMD graphics card models that support the FreeSync feature, visit the official AMD website. ――Select FreeSync Off if you are using a graphics card from a different manufacturer - Samsung C32HG70QQN | User Manual - Page 33
satisfied. ――A digital output device is connected using the HDMI/DP cable. ――The input signal is 480p, 576p, 720p, or 1080p and monitor can display normally (Not every model can support all of these signals.). ――This can only be set when the external input is connected through HDMI/DP and PC/AV Mode - Samsung C32HG70QQN | User Manual - Page 34
to obtain a picture quality optimized for the AOS game screen. •• sRGB: Adjust the color system to sRGB mode. This is the standard mode of this monitor. •• Cinema: Obtain the brightness and sharpness of TVs suitable for enjoying video and DVD content. In AV mode When the external input is connected - Samsung C32HG70QQN | User Manual - Page 35
Brightness You can adjust the general brightness of the picture. (Range: 0~100) A higher value will make the picture appear brighter. ――This menu is not available when Eco Saving Plus is enabled. ――This menu is not available when Eye Saver Mode is enabled. Contrast Adjust the contrast between the - Samsung C32HG70QQN | User Manual - Page 36
Size is set to Screen Fit in AV Mode. When a 480P or 576P or 720P or 1080P signal is input in AV mode and the monitor can display normally, select Screen Fit to adjust horizontal position in 0-6 levels. Configuring H-Position & V-Position H-Position: Move the screen to the left or right. V-Position - Samsung C32HG70QQN | User Manual - Page 37
Chapter 06 Adjusting OSD (On Screen Display) settings A detailed description of each function is provided. Refer to your product for details. ――The functions available may vary depending on the product model. The color and shape of parts may differ from what is shown. Specifications are subject to - Samsung C32HG70QQN | User Manual - Page 38
: Deactivate the Local Dimming function. •• Auto: Local Dimming is automatically activated or deactivated based on whether the content is HDR. ――When the Monitor detects that the input video contains HDR information, the Information menu and the Source menu will display HDR. In this case, Auto needs - Samsung C32HG70QQN | User Manual - Page 39
for the wide models only such as 16:9 or 16:10. ――If the monitor is in HDMI1, HDMI2, DisplayPort mode and the screen says Check Signal Cable or vary, depending on the connected device. ――Quick battery charging may not be supported and/or charging may take more time on some mobile devices. ――When - Samsung C32HG70QQN | User Manual - Page 40
cards cannot achieve the level of 120 Hz/144 Hz. ――If you select 1.2↑, the monitor can support up to 2560 x 1440 @ 144 Hz and 10-bit color signals. HDMI Mode Select the HDMI Save Settings will not be changed. Source Detection Select either Auto or Manual as the method to recognize input signal. 40 - Samsung C32HG70QQN | User Manual - Page 41
will not output any HDR metadata and thus will not be recognized as an HDR signal. In this case, Local Dimming needs to be enabled manually so as to ensure optimal HDR effects. The HDR (High Dynamic Range) technology implements video images that are very similar to the images seen through - Samsung C32HG70QQN | User Manual - Page 42
to be installed to enable the HDR effect. 2 When a Blu-Ray DVD that supports HDMI 2.0a plays a UHD Blu-Ray disc with the UHDA (or HDR) logo, be enabled. ――For information about the Xbox One S/PS4 (Pro) games that support HDR, visit the official Xbox/PS4 websites. * When the HDR is enabled - Samsung C32HG70QQN | User Manual - Page 43
monitor by partitioning multiple sections. To install the latest version of Easy Setting Box, download it from the Samsung Electronics website at http://www.samsung 60MB of free space on the hard disk drive Restrictions and Problems with the Installation The Easy Setting Box installation may be - Samsung C32HG70QQN | User Manual - Page 44
Troubleshooting Guide Requirements Before Contacting Samsung Customer Service Center ――Before calling Samsung Customer Service Center, test your product as follows. If the problem persists, contact Samsung Customer Service a mode that exceeds the supported resolution(refer to Standard Signal Mode - Samsung C32HG70QQN | User Manual - Page 45
the product. Next, if required, change the settings, referring to Standard Signal Mode Table (P.48) in this manual and the Information menu on the product. The screen is too bright. The screen is too dark. Adjust booting. If a beeping sound is heard when your PC is booting, have your PC serviced. 45 - Samsung C32HG70QQN | User Manual - Page 46
to the user manual for your PC or graphics card for further instructions on adjustment. How can I change the frequency? Set the frequency on your graphics card. •• Windows 7: Go to Control Panel → Appearance and Personalization → Display → Screen Resolution → Advanced settings → Monitor, and adjust - Samsung C32HG70QQN | User Manual - Page 47
. Two-way data exchange between the monitor and PC system optimizes the monitor settings. Monitor installation takes place automatically. However, you B digital apparatus. ――For detailed device specifications, visit the Samsung Electronics website. (USA only) Dispose unwanted electronics through an - Samsung C32HG70QQN | User Manual - Page 48
the power LED turns on. In such a case, change the settings according to the following table by referring to the graphics card user manual. HDMI1/HDMI2 Resolution Horizontal Frequency (kHz) Vertical Frequency (Hz) Pixel Clock (MHz) Sync Polarity (H/V) IBM, 720 x 400 31.469 70.087 28.322 - Samsung C32HG70QQN | User Manual - Page 49
HDMI1/HDMI2 Resolution VESA DMT, 1280 x 1024 VESA DMT, 1440 x 900 VESA DMT, 1600 x 900 VESA DMT, 1680 x 1050 VESA DMT, 1920 x 1080 VESA CVT, 2560 x 1440 VESA CVT, 2560 x 1440 VESA CVT, 2560 x 1440 Unique Custom Timing, 2560 x 1440 Displayport Resolution IBM, 720 x 400 MAC, 640 x 480 MAC, 832 x 624 - Samsung C32HG70QQN | User Manual - Page 50
Displayport Resolution Horizontal Frequency (kHz) Vertical Frequency (Hz) Pixel Clock (MHz) Sync Polarity (H/V) VESA DMT, 1280 x 720 45.000 60.000 74.250 +/+ VESA DMT, 1280 x 800 49.702 59.810 83.500 -/+ VESA DMT, 1280 x 1024 63.981 60.020 108.000 +/+ VESA DMT, 1280 x 1024 79. - Samsung C32HG70QQN | User Manual - Page 51
etc. •• If a service technician gives instructions on how to use service company or partner of Samsung Electronics Co., Ltd. •• Remodeling or repairing the product by customer. •• Using it with incorrect voltage or non-authorised electrical connections. •• Not following the "cautions" in User Manual
-
 1
1 -
 2
2 -
 3
3 -
 4
4 -
 5
5 -
 6
6 -
 7
7 -
8
-
9
-
10
-
11
-
12
-
13
-
14
-
15
-
16
-
17
-
18
-
19
-
20
-
21
-
22
-
23
-
24
-
25
-
26
-
27
-
28
-
29
-
30
-
31
-
32
-
33
-
34
-
35
-
36
-
37
-
38
-
39
-
40
-
41
-
42
-
43
-
44
-
45
-
46
-
47
-
48
-
49
-
50
-
51
 |
 |

USER MANUAL
C27HG70QQ* C32HG70QQ*
Gaming Monitor
The color and the appearance may differ depending on the product, and the specifications are subject to change without prior
notice to improve the performance.
The contents of this manual are subject to change without notice to improve quality.
© Samsung Electronics
Samsung Electronics owns the copyright for this manual.
Use or reproduction of this manual in parts or entirety without the authorization of Samsung Electronics is prohibited.
Trademarks other than that of Samsung Electronics are owned by their respective owners.
•
An administration fee may be charged if either
‒
(a) an engineer is called out at your request and there is no defect in the product
(i.e. where you have failed to read this user manual).
‒
(b) you bring the unit to a repair center and there is no defect in the product
(i.e. where you have failed to read this user manual).
•
The amount of such administration charge will be advised to you before any work or home visit is carried out.