Samsung CLX 3175FN User Manual (ENGLISH) - Page 148
Maintenance parts, Checking replaceables, Managing your machine from the website, To access SyncThru™ Web Service:, Checking the machine’s serial number - transfer belt
 |
UPC - 635753710281
View all Samsung CLX 3175FN manuals
Add to My Manuals
Save this manual to your list of manuals |
Page 148 highlights
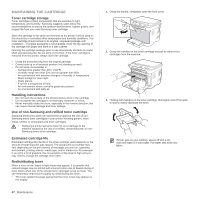
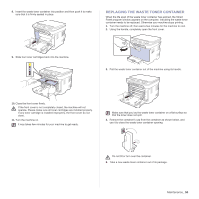
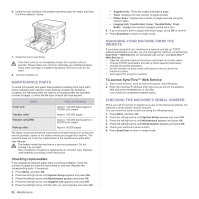
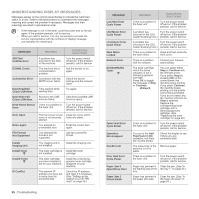
6. Insert the new container into position and then push it to make sure that it is firmly seated in place. 7. Close the front cover firmly. If the front cover is not completely closed, the machine will not operate. Please make sure all toner cartridges are installed properly. If any toner cartridge is installed improperly, the front cover do not close. 8. Turn the machine on. MAINTENANCE PARTS To avoid print quality and paper feed problems resulting from worn parts, and to maintain your machine in top working condition the following condition, the following items will need to be replaced after the specified number of pages, or when the life span of each item has expired. ITEMS YIELD (AVERAGE) Fuser unit Approx. 100,000 black pages or 25,000 color pages Transfer roller Approx. 100,000 pages Transfer unit (ITB) Approx. 100,000 black pages or 25,000 color pages Pick-up roller Approx. 50,000 pages We highly recommend that this maintenance be performed by an authorized service provider, dealer or the retailer where you bought the machine. The warranty does not cover the replacement of the maintenance parts after their lifespan. The battery inside the machine is a service component. Do not change it by yourself. Risk of explosion if battery is replaced by an incorrect type. Dispose used betteries according to the instructions. Checking replaceables If you experience frequent paper jams or printing problems, check the number of pages the machine has printed or scanned. Replace the corresponding parts, if necessary. 1. Press Menu, and then OK. 2. Press the left/right arrow until System Setup appears and press OK. 3. Press the left/right arrow until Maintenance appears and press OK. 4. Press the left/right arrow until Supplies Life appears and press OK. 5. Press the left/right arrow until the item you want appears and press OK. 51 _Maintenance • Supplies Info: Prints the supply information page. • Total: Displays the total number of pages printed. • Platen Scan: Displays the number of pages scanned using the scanner glass. • Imaging Unit, Transfer Belt, Fuser, TransferRoller, Tray1 Roller: displays the number of pages printed each item. 6. If you selected to print a supply information page, press OK to confirm. 7. Press Stop/Clear to return to ready mode. MANAGING YOUR MACHINE FROM THE WEBSITE If you have connected your machine to a network and set up TCP/IP network parameters correctly, you can manage the machine via Samsung's SyncThru™ Web Service, an embedded web server. Use SyncThru™ Web Service to: • View the machine's device information and check its current status. • Change TCP/IP parameters and set up other network parameters. • Change the printer properties. • Set the machine to send email notifications to let you know the machine's status. • Get support for using the machine. To access SyncThru™ Web Service: 1. Start a web browser, such as Internet Explorer, from Windows. 2. Enter the machine IP address (http://xxx.xxx.xxx.xxx) in the address field and press the Enter key or click Go. Your machine's embedded website opens. CHECKING THE MACHINE'S SERIAL NUMBER When you call for service or register as a user on the Samsung website, the machine's serial number may be required. You can check the serial number by taking the following steps: 1. Press Menu, and then OK. 2. Press the left/right arrow until System Setup appears and press OK. 3. Press the left/right arrow until Maintenance appears and press OK. 4. Press the left/right arrow until Serial Number appears and press OK. 5. Check your machine's serial number. 6. Press Stop/Clear to return to ready mode.
-
 1
1 -
2
-
3
-
4
-
5
-
6
-
7
-
8
-
9
-
10
-
11
-
12
-
13
-
14
-
15
-
16
-
17
-
18
-
19
-
20
-
21
-
22
-
23
-
24
-
25
-
26
-
27
-
28
-
29
-
30
-
31
-
32
-
33
-
34
-
35
-
36
-
37
-
38
-
39
-
40
-
41
-
42
-
43
-
44
-
45
-
46
-
47
-
48
-
49
-
50
-
51
-
52
-
53
-
54
-
55
-
56
-
57
-
58
-
59
-
60
-
61
-
62
-
63
-
64
-
65
-
66
-
67
-
68
-
69
-
70
-
71
-
72
-
73
-
74
-
75
-
76
-
77
-
78
-
79
-
80
-
81
-
82
-
83
-
84
-
85
-
86
-
87
-
88
-
89
-
90
-
91
-
92
-
93
-
94
-
95
-
96
-
97
-
98
-
99
-
100
-
101
-
102
-
103
-
104
-
105
-
106
-
107
-
108
-
109
-
110
-
111
-
112
-
113
-
114
-
115
-
116
-
117
-
118
-
119
-
120
-
121
-
122
-
123
-
124
-
125
-
126
-
127
-
128
-
129
-
130
-
131
-
132
-
133
-
134
-
135
-
136
-
137
-
138
-
139
-
140
-
141
-
142
-
 143
143 -
 144
144 -
 145
145 -
 146
146 -
 147
147 -
 148
148 -
 149
149 -
 150
150 -
 151
151 -
 152
152 -
 153
153 -
154
-
155
-
156
-
157
-
158
-
159
-
160
-
161
-
162
-
163
-
164
-
165
-
166
-
167
-
168
-
169
-
170
-
171
-
172
-
173
-
174
-
175
-
176
-
177
-
178
-
179
-
180
-
181
-
182
-
183
-
184
-
185
-
186
-
187
-
188
-
189
-
190
-
191
-
192
-
193
-
194
-
195
-
196
-
197
-
198
-
199
-
200
-
201
-
202
-
203
-
204
-
205
-
206
-
207
-
208
-
209
-
210
-
211
-
212
-
213
-
214
-
215
-
216
-
217
-
218
 |
 |
