Samsung DV22K6800EW/AC User Manual - Page 22
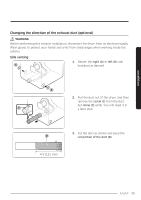
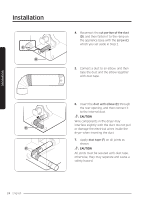
Exhaust ducting guide, STEP 4
 |
View all Samsung DV22K6800EW/AC manuals
Add to My Manuals
Save this manual to your list of manuals |
Page 22 highlights
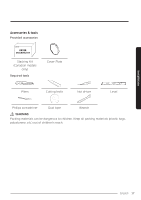
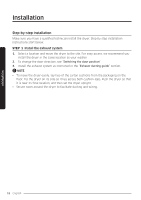
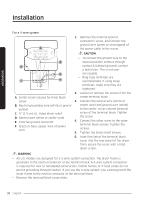
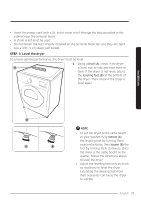
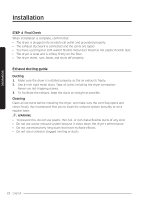
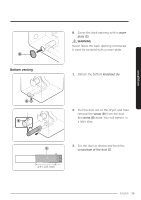
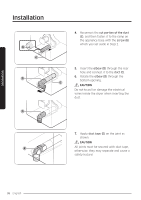
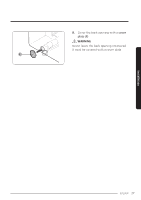
Installation Installation STEP 4 Final Check When installation is complete, confirm that: • The dryer is plugged into an electrical outlet and grounded properly. • The exhaust ductwork is connected and the joints are taped. • You have used rigid or stiff-walled flexible metal duct material, not plastic flexible duct. • The dryer is level and is sitting firmly on the floor. • The dryer starts, runs, heats, and shuts off properly. Exhaust ducting guide Ducting 1. Make sure the dryer is installed properly so the air exhausts freely. 2. Use 4-inch rigid metal ducts. Tape all joints including the dryer connection. Never use lint-trapping screws. 3. To facilitate the exhaust, keep the ducts as straight as possible. Cleaning Clean all old ducts before installing the dryer, and make sure the vent flap opens and closes freely. We recommend that you to clean the exhaust system annually or on a regular basis. WARNING • To prevent fire, do not use plastic, thin-foil, or non-metal flexible ducts of any kind. • Do not use a poor exhaust system because it slows down the dryer's performance. • Do not use excessively long ducts that have multiple elbows. • Do not use crushed or clogged venting or ducts. 22 English
-
 1
1 -
2
-
3
-
4
-
5
-
6
-
7
-
8
-
9
-
10
-
11
-
12
-
13
-
14
-
15
-
16
-
 17
17 -
 18
18 -
 19
19 -
 20
20 -
 21
21 -
 22
22 -
 23
23 -
 24
24 -
 25
25 -
 26
26 -
 27
27 -
28
-
29
-
30
-
31
-
32
-
33
-
34
-
35
-
36
-
37
-
38
-
39
-
40
-
41
-
42
-
43
-
44
-
45
-
46
-
47
-
48
-
49
-
50
-
51
-
52
-
53
-
54
-
55
-
56
-
57
-
58
-
59
-
60
-
61
-
62
-
63
-
64
-
65
-
66
-
67
-
68
-
69
-
70
-
71
-
72
-
73
-
74
-
75
-
76
-
77
-
78
-
79
-
80
-
81
-
82
-
83
-
84
-
85
-
86
-
87
-
88
-
89
-
90
-
91
-
92
-
93
-
94
-
95
-
96
-
97
-
98
-
99
-
100
-
101
-
102
-
103
-
104
-
105
-
106
-
107
-
108
-
109
-
110
-
111
-
112
-
113
-
114
-
115
-
116
-
117
-
118
-
119
-
120
-
121
-
122
-
123
-
124
-
125
-
126
-
127
-
128
-
129
-
130
-
131
-
132
-
133
-
134
-
135
-
136
-
137
-
138
-
139
-
140
-
141
-
142
-
143
-
144
-
145
-
146
-
147
-
148
-
149
-
150
-
151
-
152
-
153
-
154
-
155
-
156
-
157
-
158
-
159
-
160
-
161
-
162
-
163
-
164
-
165
-
166
-
167
-
168
-
169
-
170
-
171
-
172
-
173
-
174
-
175
-
176
-
177
-
178
-
179
-
180
 |
 |