Samsung DV457GVGSGR/AA User Manual Ver.1.0 (English, French, Spanish) - Page 28
Setting Up Your Dryer For The First Time
 |
View all Samsung DV457GVGSGR/AA manuals
Add to My Manuals
Save this manual to your list of manuals |
Page 28 highlights
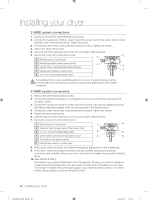
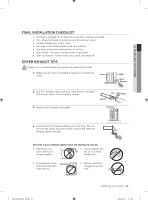
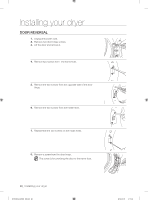
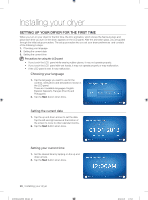
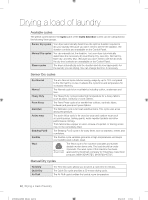
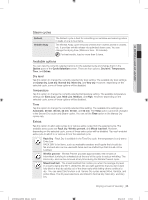
Installing your dryer SETTING UP YOUR DRYER FOR THE FIRST TIME When you turn on your dryer for the first time, the intro animation, which shows the Samsung logo and plays each time you turn on the dryer, appears on the LCD panel. After the animation plays, you are guided through the initial setup procedure. The setup procedure lets you set your dryer preferences and consists of the following 5 steps: 1. Choosing your language 2. Setting the current date 3. Setting the current time Precautions for using the LCD panel • If you touch the LCD panel while wearing rubber gloves, it may not operate properly. • If you touch the LCD panel with wet hands, it may not operate properly or may malfunction. • If the LCD panel is wet, it may malfunction. Choosing your language 1. Tap the language you want to use for the controls, instructions and descriptions shown in the LCD panel. There are 4 available languages: English, Español (Spanish), Français (French) and Portuguese. 2. Tap the Next button when done. Setting the current date 1. Tap the up and down arrows to set the date. Tap the left and right arrows at the bottom of the screen to move to other calendar months. 2. Tap the Next button when done. Setting your current time 1. Set the desired time by tapping on the up and down arrows. 2. Tap the Next button when done. 28_ Installing your dryer DV457E(G)-02836E_EN.indd 28 2012-04-09 4:15:43
-
 1
1 -
2
-
3
-
4
-
5
-
6
-
7
-
8
-
9
-
10
-
11
-
12
-
13
-
14
-
15
-
16
-
17
-
18
-
19
-
20
-
21
-
22
-
 23
23 -
 24
24 -
 25
25 -
 26
26 -
 27
27 -
 28
28 -
 29
29 -
 30
30 -
 31
31 -
 32
32 -
 33
33 -
34
-
35
-
36
-
37
-
38
-
39
-
40
-
41
-
42
-
43
-
44
-
45
-
46
-
47
-
48
-
49
-
50
-
51
-
52
-
53
-
54
-
55
-
56
-
57
-
58
-
59
-
60
-
61
-
62
-
63
-
64
-
65
-
66
-
67
-
68
-
69
-
70
-
71
-
72
-
73
-
74
-
75
-
76
-
77
-
78
-
79
-
80
-
81
-
82
-
83
-
84
-
85
-
86
-
87
-
88
-
89
-
90
-
91
-
92
-
93
-
94
-
95
-
96
-
97
-
98
-
99
-
100
-
101
-
102
-
103
-
104
-
105
-
106
-
107
-
108
-
109
-
110
-
111
-
112
-
113
-
114
-
115
-
116
-
117
-
118
-
119
-
120
-
121
-
122
-
123
-
124
-
125
-
126
-
127
-
128
-
129
-
130
-
131
-
132
-
133
-
134
-
135
-
136
-
137
-
138
-
139
-
140
-
141
-
142
-
143
-
144
-
145
-
146
-
147
-
148
-
149
-
150
-
151
-
152
-
153
-
154
-
155
-
156
-
157
-
158
-
159
-
160
-
161
-
162
-
163
-
164
-
165
-
166
-
167
-
168
-
169
-
170
-
171
-
172
-
173
-
174
-
175
-
176
-
177
-
178
-
179
-
180
-
181
-
182
-
183
-
184
-
185
-
186
-
187
-
188
-
189
-
190
-
191
-
192
-
193
-
194
-
195
-
196
-
197
-
198
-
199
-
200
-
201
-
202
-
203
-
204
-
205
-
206
-
207
-
208
-
209
-
210
-
211
-
212
-
213
-
214
-
215
-
216
 |
 |