Samsung DVD-HD931 User Manual (ENGLISH) - Page 6
Description-Rear Panel, Display Indicators - user manual
 |
UPC - 036725609310
View all Samsung DVD-HD931 manuals
Add to My Manuals
Save this manual to your list of manuals |
Page 6 highlights
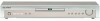
Display Indicators 1 2 3 Front Panel Display 1. Disc type indicators 2. Play/Pause/Forward play 3. Displays various messages concerning operations such as PLAY, STOP, LOAD ... no DISC : No disc loaded. OPEN : The disc tray is open. LOAD : Player is loading disc information. 10 Description-Rear Panel 1 2 3 456 Rear Panel 1. DVI OUT JACK • Use the DVI cable to connect this jack to the DVI jack on your television for a higher quality picture. 2. DIGITAL AUDIO OUT JACKS • Use either an optical or coaxial digital cable to connect to a compatible Dolby Digital receiver. • Use to connect to an A/V Amplifier that contains a Dolby Digital or DTS decoder. 3. ANALOG AUDIO OUT JACKS • Connect to the Audio input jacks of your television, audio/video receiver, or VCR. 4. VIDEO OUT JACK • Use a video cable to connect to the VIDEO input jack on your television. • The PROGRESSIVE SCAN button must be set to off. 5. S-VIDEO JACK • Use the S-Video cable to connect this jack to the S-Video jack on your television for a higher quality picture. • The PROGRESSIVE SCAN button must be set to off. 6. COMPONENT VIDEO OUT JACKS • Use these jacks if you have a TV with Component Video in jacks. These jacks provide Pr, Pb and Y video. Along with S-Video, Component Video provides the best picture quality. • If PROGRESSIVE SCAN button is set to on, progressive scan mode will work. • If PROGRESSIVE SCAN button is set to off, interlace scan mode will work. Important Note • Consult your TV User's Manual to find out if your TV supports Progressive Scan. If Progressive Scan is supported, follow the TV User's Manual's instructions regarding Progressive Scan settings in the TV's menu system. • If PROGRESSIVE SCAN button is set to on, VIDEO, S-VIDEO and DVI will not work. • Make sure to stop DVD playback before enabling the PROGRESSIVE SCAN function. 11 SETUP
-
 1
1 -
 2
2 -
 3
3 -
 4
4 -
 5
5 -
 6
6 -
 7
7 -
 8
8 -
 9
9 -
 10
10 -
 11
11 -
 12
12 -
13
-
14
-
15
-
16
-
17
-
18
-
19
-
20
-
21
-
22
-
23
-
24
-
25
-
26
 |
 |
