Samsung DW80R5061US/AA User Manual - Page 12
Preparing The Dishwasher
 |
View all Samsung DW80R5061US/AA manuals
Add to My Manuals
Save this manual to your list of manuals |
Page 12 highlights
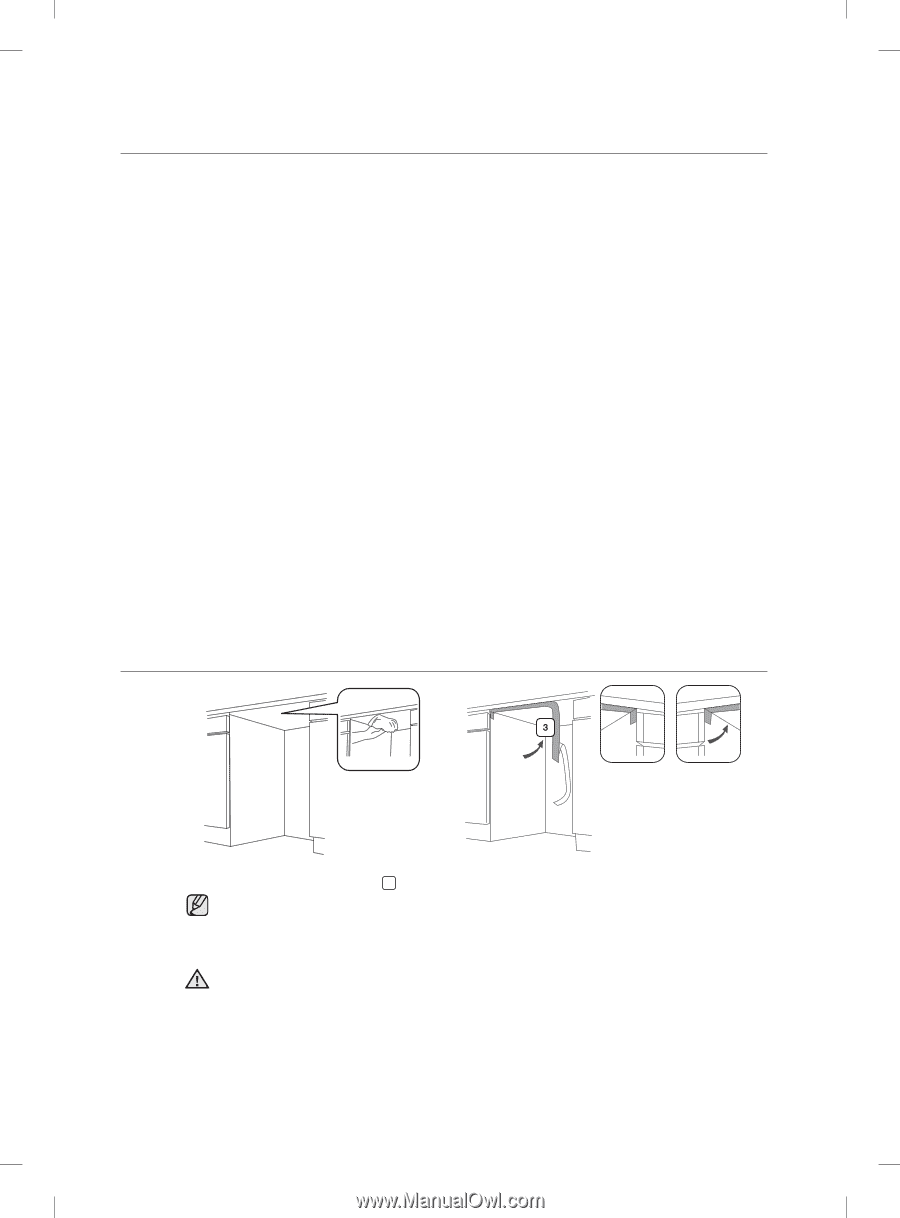
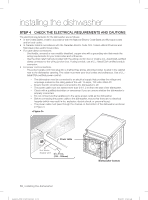
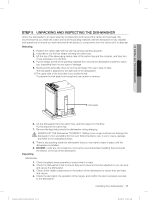
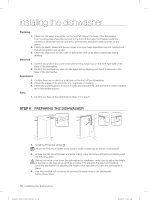
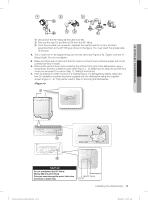
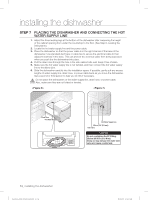
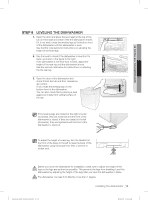
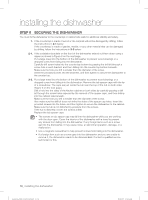
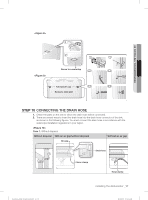
installing the dishwasher Plumbing 1. Check the hot water connection on the front left-side of the base of the dishwasher. The mounting plate should be secured to the front of the base, the threads inside the connection should be smooth and shiny, and the area should be clean and free of any debris. 2. Check the plastic Brake and Sensor cases to ensure these assemblies are not cracked and that all connections are secure. 3. Check the drain hose for any holes or deformities that could allow a water leak during draining. Electrical 1. Confirm the junction box cover is secured to the junction box on the front right-side of the base of the dishwasher. 2. Confirm the electrical box was not damaged during shipping and that it is secured to the base of the dishwasher. Appearance 1. Confirm there are no dents or scratches on the front of the dishwasher. 2. Check the edges of the doors for any roughness or cracking 3. Check the control panel to ensure it is clear and unscratched, and that all the control markers are in their proper places. Parts 1. Confirm you have all the parts listed in Step 1 on page 6. STEP 6 PREPARING THE DISHWASHER 1. Install the Protective sticker 3 . Attach the Protective sticker to the bottom of the counter top as shown in the picture. 2. Ensure that the circuit breaker and water supply valve are turned off before proceeding with the following steps. Before you move or lay down the dishwasher for installation, make sure to adjust the height CAUTION of the legs so the legs are as short as possible. This prevents the legs from breaking. Level the dishwasher by adjusting the height of the legs after you have the dishwasher in place. 3. Use the provided nut connector to connect the water hose to the dishwasher. Follow these steps: 12_ installing the dishwasher Installation_DD81-02034B-020_EN.indd Sec3:12 2/51/0/82/0210617 101:05:65:60:303AAMM
-
 1
1 -
2
-
3
-
4
-
5
-
6
-
 7
7 -
 8
8 -
 9
9 -
 10
10 -
 11
11 -
 12
12 -
 13
13 -
 14
14 -
 15
15 -
 16
16 -
 17
17 -
18
-
19
-
20
-
21
-
22
-
23
-
24
-
25
-
26
-
27
-
28
-
29
-
30
-
31
-
32
-
33
-
34
-
35
-
36
-
37
-
38
-
39
-
40
-
41
-
42
-
43
-
44
-
45
-
46
-
47
-
48
-
49
-
50
-
51
-
52
-
53
-
54
-
55
-
56
-
57
-
58
-
59
-
60
-
61
-
62
-
63
-
64
-
65
-
66
-
67
-
68
-
69
-
70
-
71
-
72
 |
 |