Samsung HMX-R10BN User Manual (ENGLISH) - Page 109
Analog TV Out, Default Set
 |
UPC - 036725302419
View all Samsung HMX-R10BN manuals
Add to My Manuals
Save this manual to your list of manuals |
Page 109 highlights
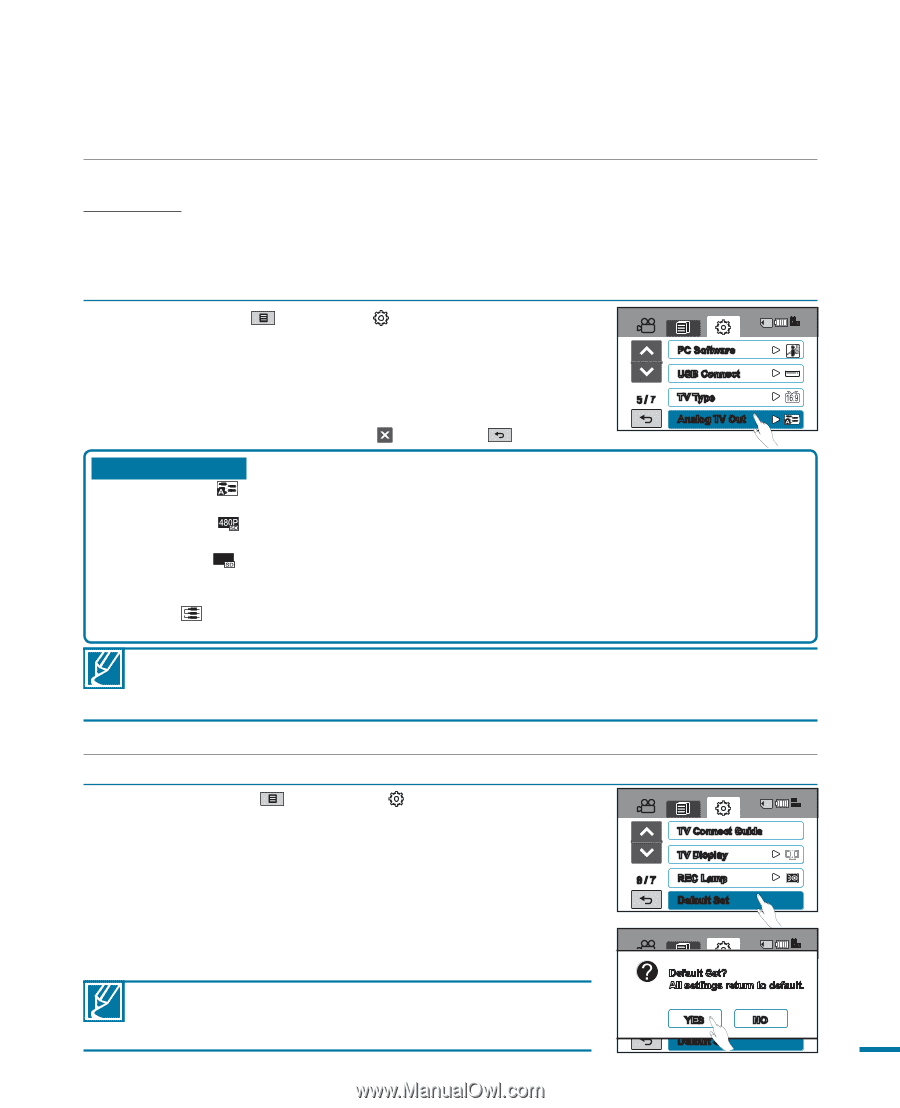
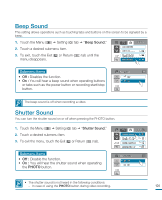
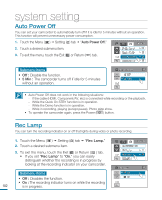
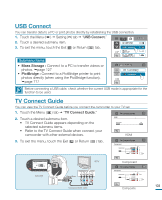
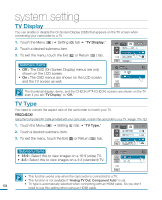
Analog TV Out You can set the component or composite video output to match the TV you have connected. PRECHECK! • Using the Component/AV Cable provided with your camcorder, connect the camcorder to your TV. page 119~123 • This HD camcorder provides the two-in-one component/AV cable that fits the purpose of the component and the AV cable. Therefore, when using the component/AV cable, you must check the right method for the TV output by setting the "Analog TV Out" menu. 1. Touch the Menu ( ) Setting ( ) tab "Analog TV Out." 90 MIN 2. Touch a desired submenu item. • Check the TV type, connection jack, and the resolution of the recorded video before you choose the desired submenu item. 3. To exit the menu, touch the Exit ( ) or Return ( ) tab. PC Software USB Connect 5 / 7 TV Type Analog TV Out Submenu items • Component Auto( ): The video signals are output in the same format as the recorded file. Use this setting only when connecting to an HDTV. • Component 480p( ): The recorded file is output in the 720x480P format. Use this setting only when connecting to a regular TV which supports the progressive scan at the SD(Standard Definition) level by using the component(Y/Pb/Pr, AUDIO) jacks. • Component 480i( 480i ): The recorded file is output in the 720x480i format. Use this setting only when connecting to a regular TV which only supports the SD(Standard Definition) resolution without the progressive scan by using the component(Y/Pb/Pr, AUDIO) jacks. • Composite( ): The composite video signals are output via the Component/AV cable (green). Use this setting only when connecting to a regular TV that has no component video jacks. • The Analog TV Out indicator is displayed only when the camcorder is connected to a TV. • For details on TV specification, refer to the user manual of the connected TV. • Although the "Analog TV Out" is set to "Component 480p," the component video signal is output as interlaced format if the resolution is set to [HD]1080/60i. Default Set You can restore all menu settings to the default conditions. 1. Touch the Menu ( ) Setting ( ) tab "Default Set." • A message appears asking for your confirmation. 90 MIN TV Connect Guide 2. Touch "Yes" if you want all the settings return to the default. • The Time Zone screen appears after all settings return TV Display 6 / 7 REC Lamp Default Set to the default. 3. Set the date and time again. page 35 • Do not turn off the power while using this function. • Initializing the HD camcorder settings to factory defaults does not affect recorded images. 90 MIN DeTfVauCltoSnnete?ct Guide All settings return to default. TV Display 6 / 7 REYCESLamp NO Default Set 105
-
 1
1 -
2
-
3
-
4
-
5
-
6
-
7
-
8
-
9
-
10
-
11
-
12
-
13
-
14
-
15
-
16
-
17
-
18
-
19
-
20
-
21
-
22
-
23
-
24
-
25
-
26
-
27
-
28
-
29
-
30
-
31
-
32
-
33
-
34
-
35
-
36
-
37
-
38
-
39
-
40
-
41
-
42
-
43
-
44
-
45
-
46
-
47
-
48
-
49
-
50
-
51
-
52
-
53
-
54
-
55
-
56
-
57
-
58
-
59
-
60
-
61
-
62
-
63
-
64
-
65
-
66
-
67
-
68
-
69
-
70
-
71
-
72
-
73
-
74
-
75
-
76
-
77
-
78
-
79
-
80
-
81
-
82
-
83
-
84
-
85
-
86
-
87
-
88
-
89
-
90
-
91
-
92
-
93
-
94
-
95
-
96
-
97
-
98
-
99
-
100
-
101
-
102
-
103
-
 104
104 -
 105
105 -
 106
106 -
 107
107 -
 108
108 -
 109
109 -
 110
110 -
 111
111 -
 112
112 -
 113
113 -
 114
114 -
115
-
116
-
117
-
118
-
119
-
120
-
121
-
122
-
123
-
124
-
125
-
126
-
127
-
128
-
129
-
130
-
131
-
132
-
133
-
134
-
135
-
136
-
137
-
138
-
139
-
140
-
141
-
142
-
143
-
144
-
145
-
146
-
147
-
148
-
149
-
150
-
151
-
152
-
153
-
154
-
155
-
156
-
157
 |
 |