Samsung HW-T650/ZA User Manual - Page 35
Software Update, Update Procedure
 |
View all Samsung HW-T650/ZA manuals
Add to My Manuals
Save this manual to your list of manuals |
Page 35 highlights
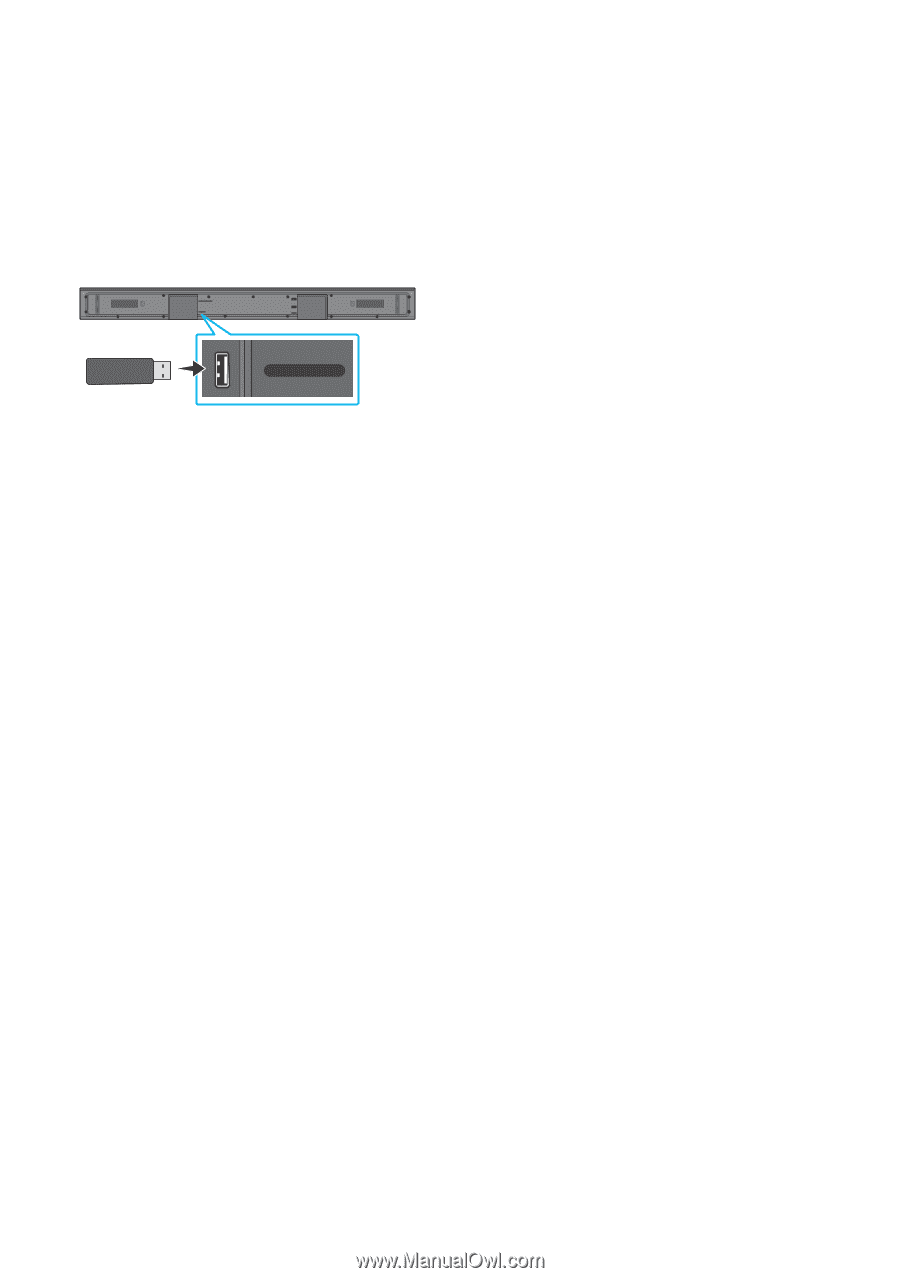
11 SOFTWARE UPDATE Samsung may offer updates for the Soundbar's system firmware in the future. USB port DIGITAL AUDIO IN (OPTICAL) USB (5V 0.5A) DIGITAL AUDIO IN HDMI (OPTICAL) HDMI TO TV (ARC) DC 24V USB (5V 0.5A) If an update is offered, you can update the firmware by connecting a USB device with the firmware update stored on it to the USB port on your Soundbar. For more information about how to download update files, go to the Samsung Electronics website at https://www.samsung.com/us/support/ downloads/. Then, select the product type or enter the model number of your Soundbar, select the Software & Apps option, and then Downloads. Note that the option names can vary. Update Procedure Important: The updating function erases all user settings. We recommend you write down your settings so that you can easily reset them after the update. Note that updating the firmware resets the subwoofer connection too. 1. Connect a USB thumb drive to the USB port on your computer. Important: Make sure there are no music files on the USB thumb drive. This may cause the firmware update to fail. 2. Go to the Samsung website https://www.samsung.com/us/support/ downloads/ on your computer select Enter Model Number and enter the model of your Soundbar. Select manuals and downloads and download the latest software file. 3. Save the downloaded software to a USB stick and select "Extract Here" to unzip the folder. 4. Turn off the Soundbar and connect the USB stick containing the software update to the USB port. 5. Turn on the Soundbar. Within 3 minutes, "UPDATE" is displayed and updating begins. 6. When the update finishes, the Soundbar turns off. Press the p button on the remote control for 5 seconds. "INIT" appears on the display and then the Soundbar turns off. The update is complete. •• This product has a DUAL BOOT function. If the firmware fails to update, you can update the firmware again. 7. Restore your settings on the Soundbar. ENG - 29
-
 1
1 -
2
-
3
-
4
-
5
-
6
-
7
-
8
-
9
-
10
-
11
-
12
-
13
-
14
-
15
-
16
-
17
-
18
-
19
-
20
-
21
-
22
-
23
-
24
-
25
-
26
-
27
-
28
-
29
-
 30
30 -
 31
31 -
 32
32 -
 33
33 -
 34
34 -
 35
35 -
 36
36 -
 37
37 -
 38
38 -
 39
39 -
 40
40 -
41
 |
 |