Samsung ME21H9900AS/AA Installation Instructions - Page 16
C. Use The Top Cabinet, Template To Prepare, The Cabinet Above, D. Mount The Microwave
 |
View all Samsung ME21H9900AS/AA manuals
Add to My Manuals
Save this manual to your list of manuals |
Page 16 highlights
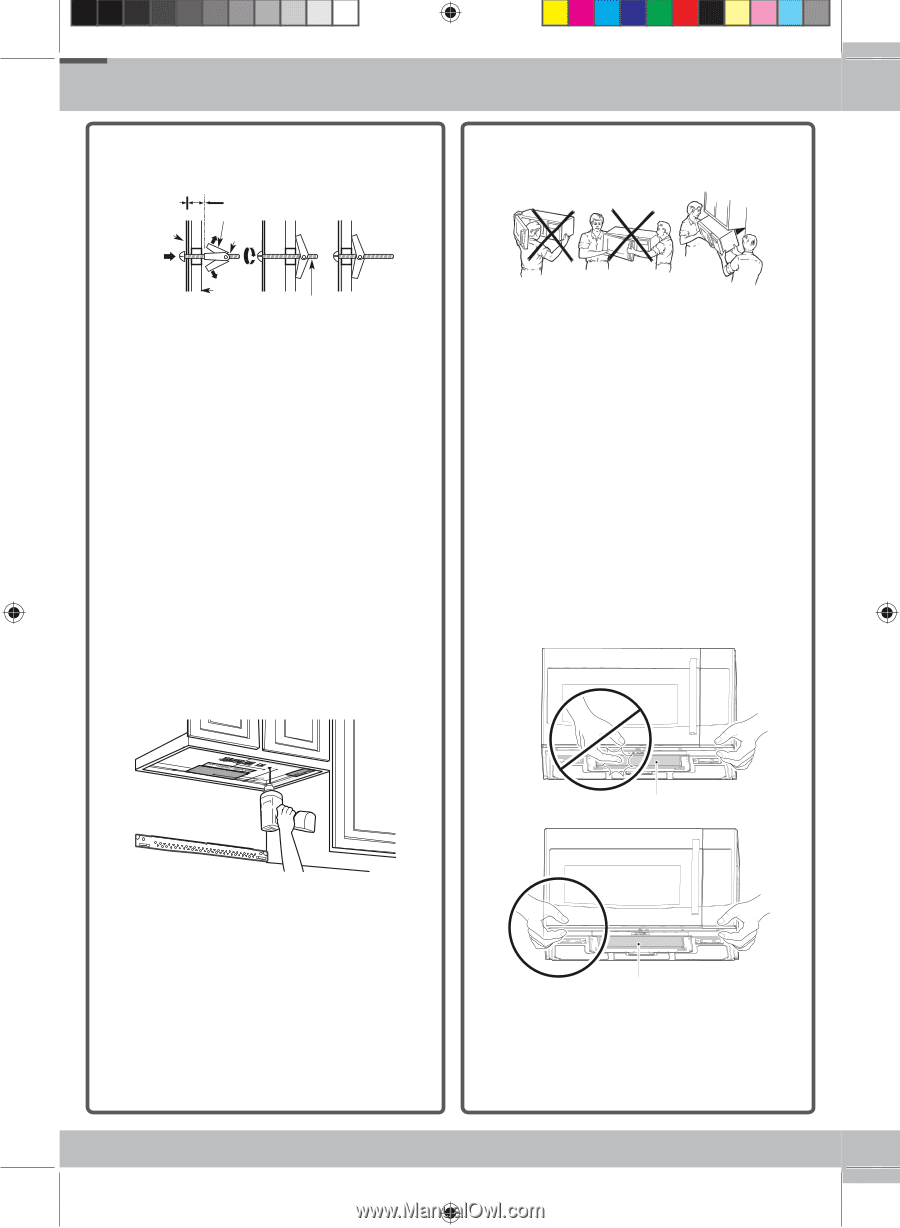
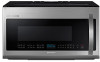
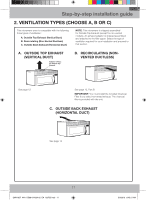
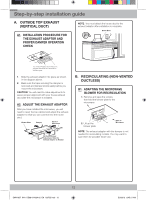
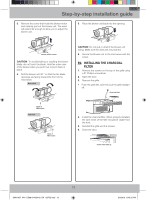
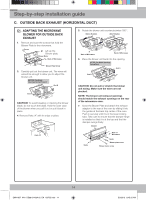
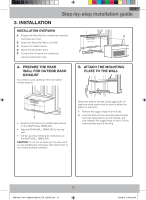
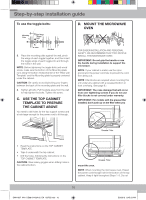
Step-by-step installation guide To use the toggle bolts: MoMuonutnintingg PlaPtlaete Spacing for Toggles More Than Wall Thickness TToogggllee WWininggss TToogggglele BBooltlt D. Mount the microwave oven WWaalll BBoolltt End 3. Place the mounting plate against the wall, pinch the wings of each toggle together, and then insert the toggle wings of each toggle into and through the holes in the wall. NOTE: Before tightening the toggle bolts and wood screw, make sure the bottom of the Mounting plate runs along the bottom Horizontal line of the "Rear wall Template" and the Mounting plate is properly centered under the cabinet. CAUTION: Be careful to avoid pinching your fingers between the back of the mounting plate and the wall. 4. Tighten all bolts. Pull the plate away from the wall to help tighten the bolts. Tighten the screw. C. Use the top cabinet template to prepare the CABINET ABOVE You need to drill holes for the top support screws and a hole large enough for the power cord to fit through. FOR EASIER INSTALLATION AND PERSONAL SAFETY, WE RECOMMEND THAT TWO PEOPLE INSTALL THIS MICROWAVE OVEN. IMPORTANT: Do not grip the handle or use the handle during installation to support the microwave. NOTE: If your cabinet is metal, use the nylon grommet in the power cord hole to prevent the cord from being cut. NOTE: Filler blocks are required when mounting this unit under any cabinet with a recessed bottom or front overhang. (See page 9.) IMPORTANT: The case damage that will occur from over tightening screws if you do not use filler blocks is not covered under warranty. IMPORTANT: For models with the grease filter installed, don't push up on the filter when you Grease Filter • Read the instructions on the TOP CABINET TEMPLATE. • Tape it underneath the top cabinet. • Drill the holes, following the instructions on the TOP CABINET TEMPLATE. CAUTION: Wear safety goggles when drilling holes in the cabinet bottom. Grease Filter mount the oven. NOTE: When mounting the microwave oven, thread the power cord through hole in the bottom of the top cabinet. Keep it tight throughout Steps 1-3. Do not 16 SMH1927_XAA_DE68-04108A-02_EN_120725.indd 16 5/3/2013 8:45:23 AM
-
 1
1 -
2
-
3
-
4
-
5
-
6
-
7
-
8
-
9
-
10
-
 11
11 -
 12
12 -
 13
13 -
 14
14 -
 15
15 -
 16
16 -
 17
17 -
 18
18 -
 19
19 -
 20
20
 |
 |