Samsung ME21H9900AS/AA Installation Instructions - Page 17
E. Connect The Ductwork, For Outside Top, Exhaust - installation manual
 |
View all Samsung ME21H9900AS/AA manuals
Add to My Manuals
Save this manual to your list of manuals |
Page 17 highlights
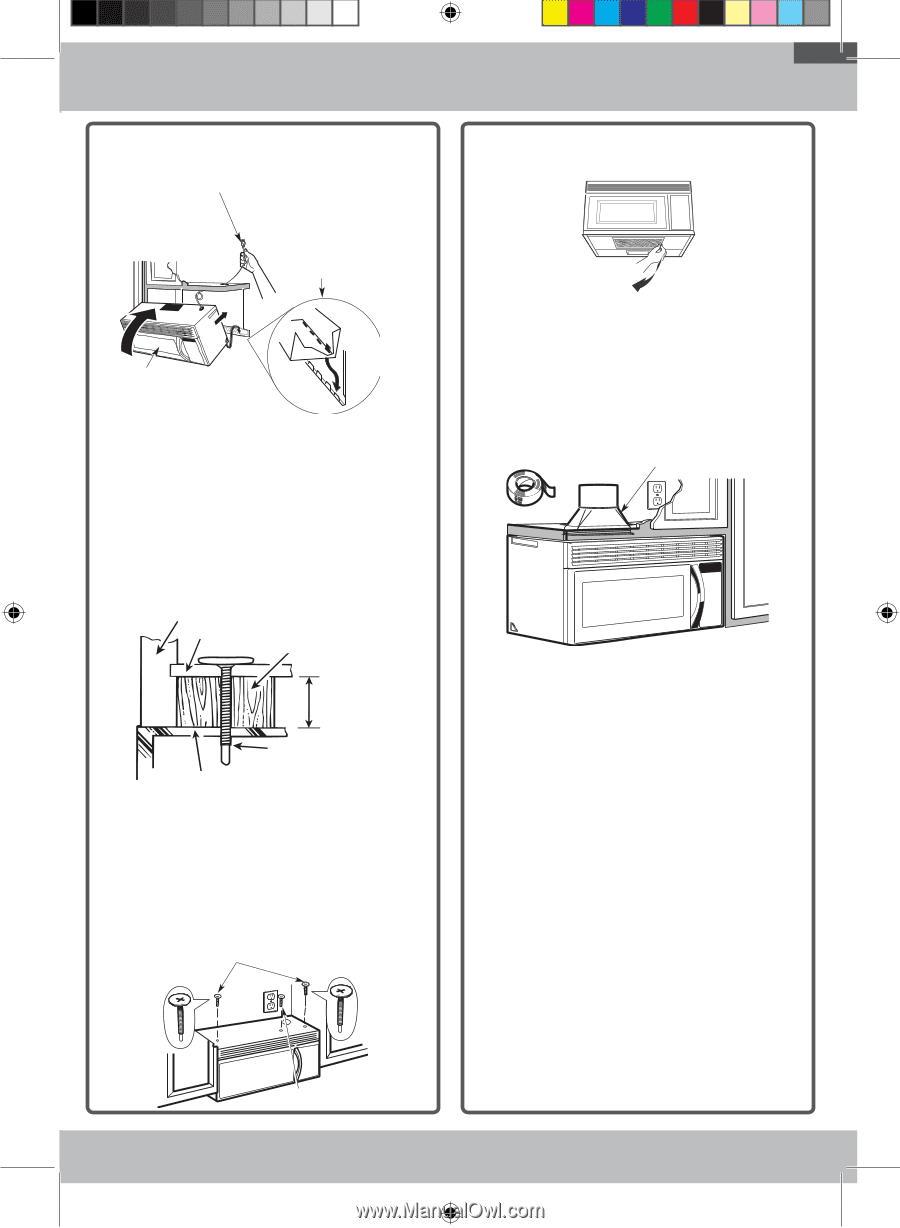
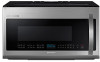
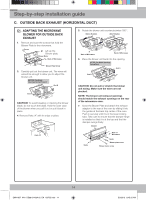
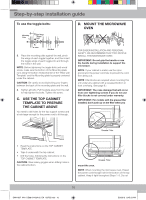
Step-by-step installation guide pinch the cord or lift the oven by pulling cord. 1. Lift the microwave, tilt it forward, and hook the slots at the back bottom edge onto the four lower tabs of the mounting plate. 6. Install the grease filters. See the Owner's Manual packed with the microwave for instructions. 2. Rotate the front of the oven up against the cabinet bottom. 3. Insert a self-aligning screw through the top center cabinet hole. Temporarily secure the oven by turning the screw at least two full turns after the threads have engaged. (It will be completely tightened later.) Be sure to keep the power cord tight. Be careful not to pinch the cord, especially when mounting flush to the bottom of the cabinet. CCaabbinineet tFFrornotnt CabbiinneettBBootttotmomShSehlfelf FFiilllleerr BBlloocckk EEqquuiivvaalelennt tto DtoepDtehpotfh of CCaabbiinneettRReeccesesss Selff--AAlilgignnininggScSrcerwew MiMcricorwowaavveeOOvveenn TTop 4. Attach the microwave oven to the top cabinet. 5. Insert the 2 self-aligning screws through the cabinet bottom and, if used, through the filler blocks into the outer top of the unit. (See the illustration above). Continue to support the unit until both screws are inserted and engaged at least two full turns, then fully tighten both screws until the unit is secure. NOTE: For models with installed grease filters, you do not need to install a filter E. Connect THE ductwork for outside top exhaust HHousseeDDuucct t 1. Extend the house duct down to connect to the exhaust adaptor. 2. Seal the exhaust duct joints using duct tape. 17 SMH1927_XAA_DE68-04108A-02_EN_120725.indd 17 5/3/2013 8:45:24 AM
-
 1
1 -
2
-
3
-
4
-
5
-
6
-
7
-
8
-
9
-
10
-
11
-
 12
12 -
 13
13 -
 14
14 -
 15
15 -
 16
16 -
 17
17 -
 18
18 -
 19
19 -
 20
20
 |
 |