Samsung SCD27 User Manual (user Manual) (ver.5.0) (English) - Page 55
The DATE/TIME is not affected by the OSD ON/OFF DISPLAY button.
 |
View all Samsung SCD27 manuals
Add to My Manuals
Save this manual to your list of manuals |
Page 55 highlights
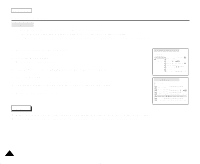
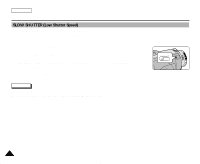
Advanced Recording q DATE/TIME ✤ The DATE/TIME function works in CAMERA, PLAYER, M.REC and M.PLAY modes. ✤ The date and time are automatically recorded on a special data area of the tape. 1. Press the MENU button. s The menu list will appear. 2. Turn the MENU DIAL to highlight VIEWER and press the ENTER button. 3. Turn the MENU DIAL to highlight DATE/TIME. 4. Press the ENTER button to select the sub-menu. 5. Using the MENU DIAL, select the DATE/TIME mode. s You can choose to display - the OFF, DATE, TIME, DATE/TIME - OFF only - DATE only - TIME only - DATE & TIME s To return to the previous menu, highlight the DATE/TIME in the middle of the and press the ENTER button. 6. To exit, press the MENU button. Notes s The DATE/TIME is not affected by the OSD ON/OFF (DISPLAY) button. s The DATE/TIME will read "- - -" in the following conditions. - During playback of a blank section of a tape. - If the tape was recorded before setting the DATE/TIME in the Camera's memory. - When the lithium battery becomes weak or dead. s Before you can use the DATE/TIME function, you must set the Clock. See CLOCK SET on page 37. ENGLISH CAM MODE INITIAL CAMERA A/V MEMORY VIEWER LCD ADJUST DATE / TIME TV DISPLAY CAM MODE VIEWER SET LCD ADJUST DATE / TIME TV DISPLAY CAM MODE VIEWER SET DATE / TIME DATE TIME DATE&TIME 51
-
 1
1 -
2
-
3
-
4
-
5
-
6
-
7
-
8
-
9
-
10
-
11
-
12
-
13
-
14
-
15
-
16
-
17
-
18
-
19
-
20
-
21
-
22
-
23
-
24
-
25
-
26
-
27
-
28
-
29
-
30
-
31
-
32
-
33
-
34
-
35
-
36
-
37
-
38
-
39
-
40
-
41
-
42
-
43
-
44
-
45
-
46
-
47
-
48
-
49
-
 50
50 -
 51
51 -
 52
52 -
 53
53 -
 54
54 -
 55
55 -
 56
56 -
 57
57 -
 58
58 -
 59
59 -
 60
60 -
61
-
62
-
63
-
64
-
65
-
66
-
67
-
68
-
69
-
70
-
71
-
72
-
73
-
74
-
75
-
76
-
77
-
78
-
79
-
80
-
81
-
82
-
83
-
84
-
85
-
86
-
87
-
88
-
89
-
90
-
91
-
92
-
93
-
94
-
95
-
96
-
97
-
98
-
99
-
100
-
101
-
102
-
103
-
104
-
105
-
106
-
107
-
108
-
109
 |
 |
