Samsung SCH-R910 User Manual (user Manual) (ver.f4) (English) - Page 99
Sharing your Location with Friends, Latitude Options, Terms, Privacy & Notices, About
 |
View all Samsung SCH-R910 manuals
Add to My Manuals
Save this manual to your list of manuals |
Page 99 highlights
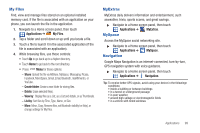
3. Touch the desired Wi-Fi network listing to connect to it. 4. Log on to your Google account. (For more information, refer to "Configuring Your Gmail Account" on page 64.) 5. Navigate to a Home screen panel, then touch Applications ➔ Latitude. Your location is displayed on the Latitude map screen, accurate to 1700 meters. Sharing your Location with Friends 1. From the Latitude map screen, tap to display your Latitude friends. At first, only your name is displayed. 2. Press , then touch Add friends. 3. Touch Select from Contacts or Add via email address. 4. Touch a Contact or enter an email address, then touch Add friends. 5. At the Send sharing requests prompt, touch Yes. Your friend will receive an email or text message with your location marked on a map. They will also receive instructions on how to view your location from the web or use Latitude on their phone or tablet provided it is available. Once they acknowledge your request, their location will display on your phone. They can share their location from their computer, phone, or tablet. For more information, go to http://www.google.com/latitude. Latitude Options 1. Press to display the following options: • Search: allows you to search for a place of interest. • Directions: displays navigation directions to a location from a starting point. • Starred Items: shows you locations you have marked as favorites, such as restaurants, museums, parks, and so on. • Clear Map: after viewing or following directions, this option resets the map. • Join Latitude: lets you and your friends share locations and status messages with each other. It also lets you send instant messages and emails and get directions to your friends' locations. • More: allows you to select the following additional options: - Labs: this is a testing ground for experimental features that aren't ready for primetime. They may change, break or disappear at any time. Click on a Lab to enable or disable it. - Help: displays the Google Mobile Help web page where you can receive help on Google Maps. - Terms, Privacy & Notices: displays the Terms and Conditions, Privacy Policy, o r Legal Notices information. Select the desired information from the pop-up menu. - About: displays general information about Google maps such as Version, Platform, Locale, Total data sent, Total data received, Free memory, etc. Applications 95
-
 1
1 -
2
-
3
-
4
-
5
-
6
-
7
-
8
-
9
-
10
-
11
-
12
-
13
-
14
-
15
-
16
-
17
-
18
-
19
-
20
-
21
-
22
-
23
-
24
-
25
-
26
-
27
-
28
-
29
-
30
-
31
-
32
-
33
-
34
-
35
-
36
-
37
-
38
-
39
-
40
-
41
-
42
-
43
-
44
-
45
-
46
-
47
-
48
-
49
-
50
-
51
-
52
-
53
-
54
-
55
-
56
-
57
-
58
-
59
-
60
-
61
-
62
-
63
-
64
-
65
-
66
-
67
-
68
-
69
-
70
-
71
-
72
-
73
-
74
-
75
-
76
-
77
-
78
-
79
-
80
-
81
-
82
-
83
-
84
-
85
-
86
-
87
-
88
-
89
-
90
-
91
-
92
-
93
-
 94
94 -
 95
95 -
 96
96 -
 97
97 -
 98
98 -
 99
99 -
 100
100 -
 101
101 -
 102
102 -
 103
103 -
 104
104 -
105
-
106
-
107
-
108
-
109
-
110
-
111
-
112
-
113
-
114
-
115
-
116
-
117
-
118
-
119
-
120
-
121
-
122
-
123
-
124
-
125
-
126
-
127
-
128
-
129
-
130
-
131
-
132
-
133
-
134
-
135
-
136
-
137
-
138
-
139
-
140
-
141
-
142
-
143
-
144
-
145
-
146
-
147
-
148
-
149
-
150
-
151
-
152
-
153
-
154
-
155
-
156
-
157
-
158
-
159
-
160
-
161
-
162
-
163
-
164
-
165
-
166
-
167
 |
 |