Samsung SMX-K45BN User Manual (ENGLISH) - Page 29
Preparation, Attaching The Grip Belt, Attaching The Core Filter, Adjusting The Lcd Screen
 |
View all Samsung SMX-K45BN manuals
Add to My Manuals
Save this manual to your list of manuals |
Page 29 highlights
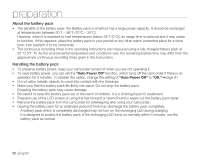
preparation This section provides information that you should know before using this camcorder: such as how to use the provided accessories, how to charge the battery, and how to setup the operation mode and initialize setup. ATTACHING THE GRIP BELT Adjust the length of grip belt so that the camcorder is stable when you press the Recording start/stop button with your thumb. 1 2 Please note if the hand strap is adjusted too tight and you use excessive force to insert your hand, the hand strap hook of the WARNING camcorder may be damaged. ATTACHING THE CORE FILTER Attach the core filters to the cables. The core filter reduces interference. 1. To open the core filter, release the stoppers on both ends of the core filter. 1 2. Attach the core filter to the cable near its connecter as shown in the figure. 3. Close the core filter until it clicks shut. • Take care not to damage the cable. • When connecting a cable, attach the end with the core filter to the camcorder. Stopper 2 a USB cable Core Filter 3 Wind the cable so that it is not slack. a mini HDMI cable ADJUSTING THE LCD SCREEN The wide LCD screen on your camcorder offers high quality image viewing. 1. Open the LCD screen with your finger. • The screen opens up to 90°. 2. Rotate the LCD screen towards the lens. ~ • You can rotate it up to 180° towards the lens and up to 90° backward. To view recordings { more conveniently, rotate the screen by 180° towards the lens, then fold it back to the body. vvmum tvkl Excessive rotation may damage the connective hinge between the screen and the WARNING camcorder. • When the LCD screen is rotated by 180°, the left and right sides of the subject are shown in reverse, which produces horizontally flipped image. • Remove fingerprints or dust on the screen with a soft cloth. English_15
-
 1
1 -
2
-
3
-
4
-
5
-
6
-
7
-
8
-
9
-
10
-
11
-
12
-
13
-
14
-
15
-
16
-
17
-
18
-
19
-
20
-
21
-
22
-
23
-
 24
24 -
 25
25 -
 26
26 -
 27
27 -
 28
28 -
 29
29 -
 30
30 -
 31
31 -
 32
32 -
 33
33 -
 34
34 -
35
-
36
-
37
-
38
-
39
-
40
-
41
-
42
-
43
-
44
-
45
-
46
-
47
-
48
-
49
-
50
-
51
-
52
-
53
-
54
-
55
-
56
-
57
-
58
-
59
-
60
-
61
-
62
-
63
-
64
-
65
-
66
-
67
-
68
-
69
-
70
-
71
-
72
-
73
-
74
-
75
-
76
-
77
-
78
-
79
-
80
-
81
-
82
-
83
-
84
-
85
-
86
-
87
-
88
-
89
-
90
-
91
-
92
-
93
-
94
-
95
-
96
-
97
-
98
-
99
-
100
-
101
-
102
-
103
-
104
-
105
-
106
-
107
-
108
-
109
-
110
-
111
-
112
-
113
-
114
-
115
-
116
-
117
-
118
-
119
-
120
-
121
-
122
-
123
-
124
-
125
-
126
-
127
-
128
-
129
-
130
-
131
-
132
-
133
-
134
-
135
-
136
-
137
-
138
-
139
-
140
-
141
-
142
 |
 |
