Samsung WA456DRHDSU/AA User Manual Ver.1.0 (English) - Page 17
Step 4, Step 5, Step 6 - washing machine leaking
 |
View all Samsung WA456DRHDSU/AA manuals
Add to My Manuals
Save this manual to your list of manuals |
Page 17 highlights
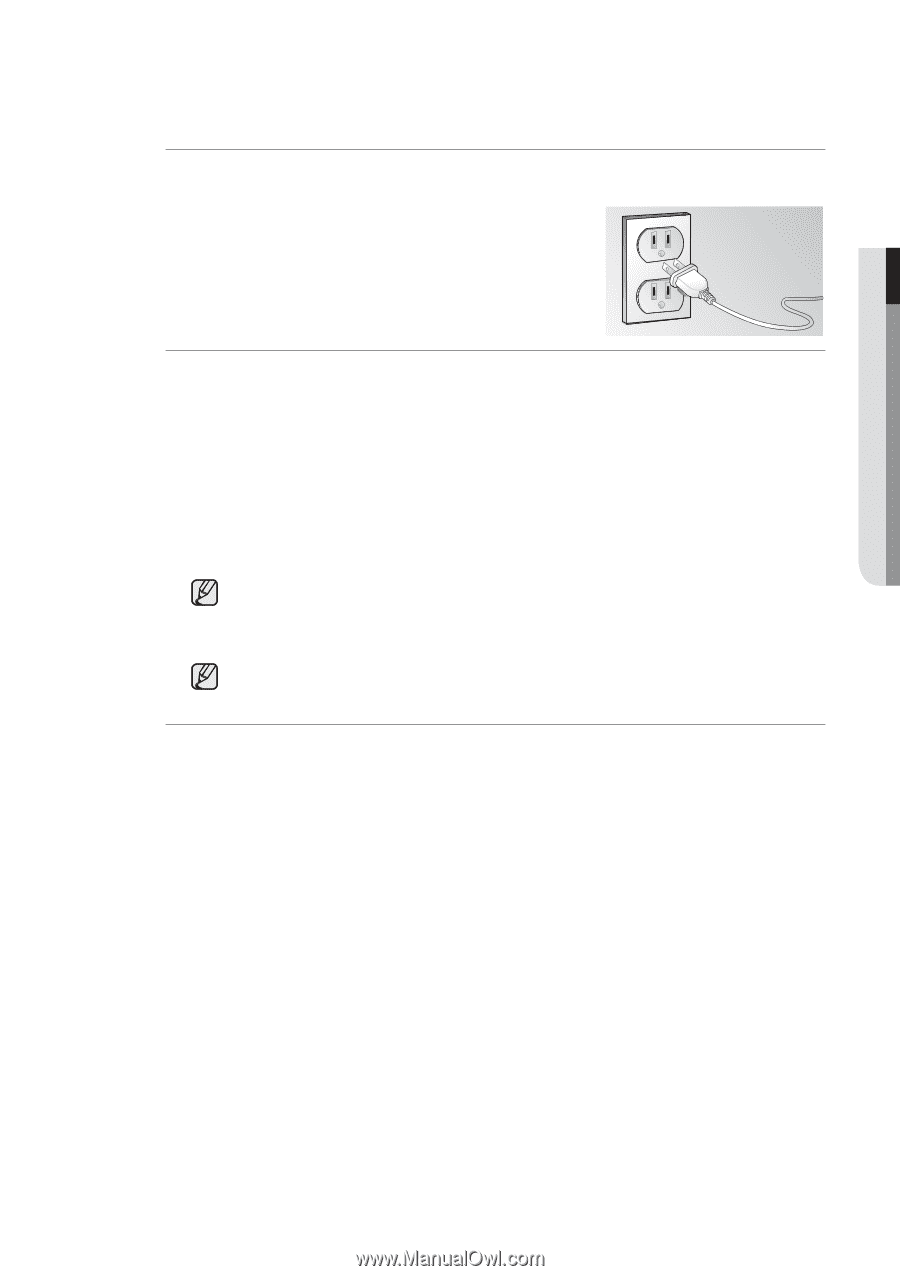
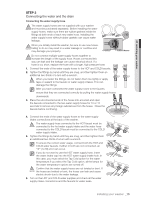
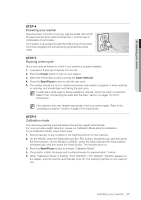
01 installing your washer STEP 4 Powering your washer Plug the power cord into a 3-prong, well grounded 120 volt 60 Hz approved electrical outlet protected by a 15-amp fuse or comparable circuit breaker. Your washer is grounded through the third prong of the power cord when plugged into a three-prong grounded electrical outlet. STEP 5 Running a test cycle Run a test cycle as follows to check if your washer is properly installed. 1. Load about 6 pounds of laundry into the tub. 2. Press the Power button to turn on your washer. 3. Select the Rinse+Spin cycle by turning the Cycle Selector. 4. Press the Start/Pause button to start the test cycle. 5. The washer should not rock or vibrate excessively when water is supplied or when washing or spinning, and should drain well during the spin cycle. If water leaks while water is being supplied or drained, check the water connections. Refer to the "Connecting the water and the drain" section on pages 15~16 for instructions. If the washer rocks and vibrates excessively, level your washer again. Refer to the "Leveling your washer" section on page 16 for instructions. STEP 6 Calibration mode Your Samsung washing machine detects the laundry weight automatically. For more accurate weight detection, please run Calibration Mode after the installation. To run Calibration Mode, follow these steps: 1. Remove laundry or any contents in the machine and turn on the machine. 2. On the WA456, press the Delay Start and Eco Plus buttons simultaneously, and then press the Power button. On the WA422 or WA400, press the Delay Start and Pre Soak buttons simultaneously, and then press the Power button. The machine turns on. 3. Press the Start/Pause button to activate "Calibration Mode". 4. The pulsator rotates clockwise and counterclockwise for approximately 1 minute. 5. When "Calibration Mode" is finished, "End" (WA456*) / "En" (WA422*, WA400*) appears on the display, and the machine automatically turns off. The washing machine is now ready for use. installing your washer _17
-
 1
1 -
2
-
3
-
4
-
5
-
6
-
7
-
8
-
9
-
10
-
11
-
 12
12 -
 13
13 -
 14
14 -
 15
15 -
 16
16 -
 17
17 -
 18
18 -
 19
19 -
 20
20 -
 21
21 -
 22
22 -
23
-
24
-
25
-
26
-
27
-
28
-
29
-
30
-
31
-
32
-
33
-
34
-
35
-
36
-
37
-
38
-
39
-
40
-
41
-
42
-
43
-
44
-
45
-
46
-
47
-
48
-
49
-
50
-
51
-
52
-
53
-
54
-
55
-
56
-
57
-
58
-
59
-
60
-
61
-
62
-
63
-
64
-
65
-
66
-
67
-
68
-
69
-
70
-
71
-
72
-
73
-
74
-
75
-
76
-
77
-
78
-
79
-
80
-
81
-
82
-
83
-
84
-
85
-
86
-
87
-
88
-
89
-
90
-
91
-
92
-
93
-
94
-
95
-
96
-
97
-
98
-
99
-
100
-
101
-
102
-
103
-
104
-
105
-
106
-
107
-
108
-
109
-
110
-
111
-
112
-
113
-
114
-
115
-
116
-
117
-
118
-
119
-
120
-
121
-
122
-
123
-
124
-
125
-
126
-
127
-
128
-
129
-
130
-
131
-
132
 |
 |