Samsung XL24 User Manual (user Manual) (ver.1.0) (English)
Samsung XL24 Manual
 |
View all Samsung XL24 manuals
Add to My Manuals
Save this manual to your list of manuals |
Samsung XL24 manual content summary:
- Samsung XL24 | User Manual (user Manual) (ver.1.0) (English) - Page 1
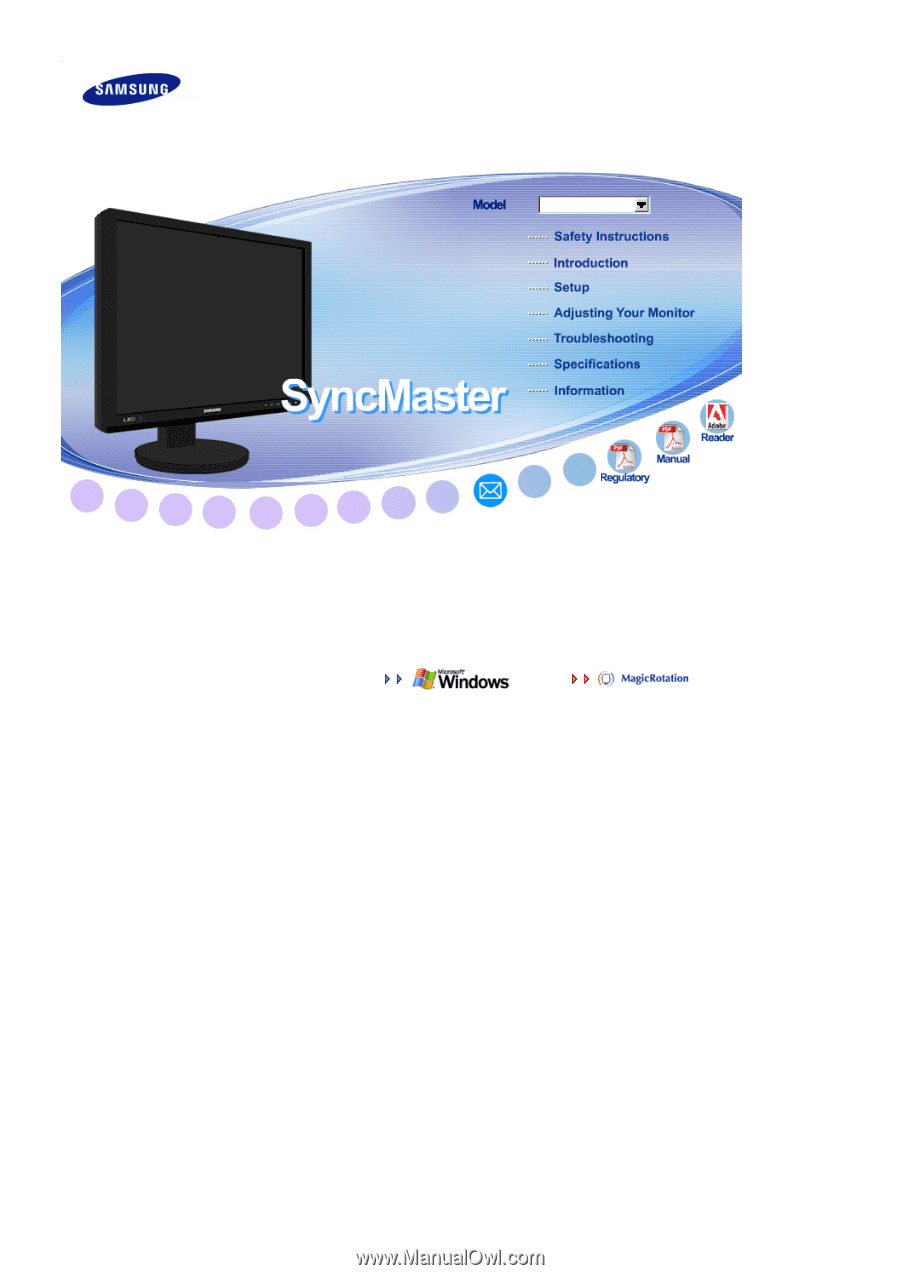
SyncMaster XL24 Install driver Install programs - Samsung XL24 | User Manual (user Manual) (ver.1.0) (English) - Page 2
Notational Failure to follow directions noted by this symbol could result in bodily harm or damage to the equipment. Prohibited Do not disassemble Do not touch Important to read and understand at all times Disconnect the plug from the outlet Ground to prevent an electric shock Power When not - Samsung XL24 | User Manual (user Manual) (ver.1.0) (English) - Page 3
extension cords or plugs to one outlet. z This may cause fire. Do not disconnect the power cord while using the monitor. z A surge may be caused by the separation and may damage the monitor. Do not use the power cord when the connector or plug is dusty. z If the connector or plug of - Samsung XL24 | User Manual (user Manual) (ver.1.0) (English) - Page 4
shock or fire. Installation Be sure to contact an authorized Service Center, when installing your monitor in a location with heavy dust, high or low temperatures, high humidity, and exposed to chemical substances and where it operates for 24 hours such as at airports, train stations etc. Failure to - Samsung XL24 | User Manual (user Manual) (ver.1.0) (English) - Page 5
not place the monitor face down. z This may damage the TFT-LCD surface. The installation of the bracket must be done by a qualified professional. z Installing the bracket by unqualified personnel may result in injury. z Always use the mounting device specified in the owner's manual. When installing - Samsung XL24 | User Manual (user Manual) (ver.1.0) (English) - Page 6
, insecticide, air freshener, lubricant or detergent. Others Do not remove the cover (or back). z This may cause electric shock or fire. z Refer to a qualified servicing company. If your monitor does not operate normally - in particular, if there is any unusual sound or smell coming from the - Samsung XL24 | User Manual (user Manual) (ver.1.0) (English) - Page 7
. z This may cause a malfunction, electric shock or fire. z If a foreign substance enters the monitor, unplug the power cord and contact the Service Center. Keep the product away from combustible chemical sprays or inflammable substances. z This may cause an explosion or fire. Never insert anything - Samsung XL24 | User Manual (user Manual) (ver.1.0) (English) - Page 8
off, unplug the power connector from the wall outlet and contact the Service Center. When viewing a fixed screen for an extended period of time, inappropriate resolution may cause undesirable picture quality. 24 inch (61 cm) - 1924 x 1240 Viewing the monitor continuously at a too close angle may - Samsung XL24 | User Manual (user Manual) (ver.1.0) (English) - Page 9
. Look at the screen from slightly above it, and have the monitor directly in front of you. z Tilt the monitor upwards by 10 ~20 degrees. Adjust the monitor height so that the top of the monitor is slightly below eye level. z Adjust the monitor angle so that there is no reflected light on the screen - Samsung XL24 | User Manual (user Manual) (ver.1.0) (English) - Page 10
with your monitor. If any items are missing, contact your dealer. Contact a local dealer to buy optional items. Unpacking Without Stand Manual With Stand (Monitor & Sliding Stand) Quick Setup Guide Cable Warranty Card (Not available in all locations) User's Guide, Monitor Driver, MagicRotation - Samsung XL24 | User Manual (user Manual) (ver.1.0) (English) - Page 11
Power Cord DVI Cable Others Calibrater For more information on the use of the calibrater, see Natural Color Expert Help. USB Cable (A-B Type cable) Hood Front - Samsung XL24 | User Manual (user Manual) (ver.1.0) (English) - Page 12
color information on the screen. 3) AdobeRGB - Displays the Adobe RGB color information on the screen. 4) Emulation - With monitor saves your adjustments. See PowerSaver described in the manual for further information regarding power saving functions. For energy conservation, turn your monitor - Samsung XL24 | User Manual (user Manual) (ver.1.0) (English) - Page 13
Stopper Connect the DVI terminal of your monitor to your computer using a DVI cable. RGB terminals of your PC to this terminal. Remove the fixing pin on the stand to lift the monitor up and down. POWER 1. POWER S/W : Switches the monitor On/Off. 2. POWER : Connect the power cord for your monitor - Samsung XL24 | User Manual (user Manual) (ver.1.0) (English) - Page 14
separately.) For using a locking device, contact where you purchased it. USB connection terminal DOWN (USB downstream port): Connect the DOWN port of the USB monitor and a USB device with the USB cable. z To use DOWN (Downstream Port), you have to connect the UP (Upstream Cable ) to the PC. USB - Samsung XL24 | User Manual (user Manual) (ver.1.0) (English) - Page 15
for your computer. Using the DVI (Digital) connector on the video card. Connect the DVI Cable to the DVI Port on the back of your Monitor. [ DVI-D ] [ DVI-I ] Connected to a Macintosh. Connect the monitor to the Macintosh computer using the DVI connection cable. Turn on your computer and - Samsung XL24 | User Manual (user Manual) (ver.1.0) (English) - Page 16
Changing the Stand and Installing the Hoods Sliding Stand Stand Stopper Swivel stand Using ( ),You can swivel the monitor left and right at an angle of 330 ° to set the monitor lengthwise. The rubber under the stand is to avoid the monitor slide. Tilt angle - Samsung XL24 | User Manual (user Manual) (ver.1.0) (English) - Page 17
can adjust the tilt angle forward and backward for the most comfortable viewing angle. Removing the base 1. Turn off your monitor and unplug its power cord. 2. Lay the LCD monitor face-down on a flat surface with a cushion beneath it to protect the screen. 3. Remove two screws ( ) and then remove - Samsung XL24 | User Manual (user Manual) (ver.1.0) (English) - Page 18
the stand from the LCD monitor. 4. Align the mounting instructions. z To mount the monitor on a wall, you should purchase the wall mounting kit that allows you to mount the monitor at least 10cm away from the wall surface. z Contact the nearest Samsung Service Center for more information. Samsung - Samsung XL24 | User Manual (user Manual) (ver.1.0) (English) - Page 19
Insert the hooking parts ( ) of both hoods starting from the top and moving downwards into the grooves ( ) near the left and right edges at the back of the monitor. Fit the top part of the monitor into the top of the grooves of both hoods. - Samsung XL24 | User Manual (user Manual) (ver.1.0) (English) - Page 20
® XP/2000 Operating System) This monitor driver is under certifying MS logo,and this installation dosen't damage your system.The certified driver will be posted on Samsung Monitor homepage http://www.samsung.com/. 5. Monitor driver installation is completed. Installing the Monitor Driver (Manual) - Samsung XL24 | User Manual (user Manual) (ver.1.0) (English) - Page 21
you have. Prepare a blank disk and download the driver program file at the Internet web site shown below. z Internet web site : http://www.samsung.com/ (Worldwide) http://www.samsung.com/monitor (U.S.A) http://www.sec.co.kr/monitor (Korea) http://www.samsungmonitor.com.cn/ (China) Microsoft - Samsung XL24 | User Manual (user Manual) (ver.1.0) (English) - Page 22
MS logo, and this installation doesn't damage your system. The certified driver will be posted on Samsung Monitor homepage http://www.samsung.com/ 6. Click "Update Driver..." in the "Driver" tab. 7. Check the "Browse my computer for driver software" checkbox and click "Let me pick from a list of - Samsung XL24 | User Manual (user Manual) (ver.1.0) (English) - Page 23
"Close" → "OK" → "OK" on the following screens displayed in sequence. Microsoft® Windows® XP Operating System 1. Insert the CD into the CD-ROM driver. 2. Click "Start," click "Control Panel," and then click the "Appearance and Themes" Icon. 3. Click "Display" icon and choose the "Settings" tab then - Samsung XL24 | User Manual (user Manual) (ver.1.0) (English) - Page 24
" tab and select "Driver" tab. 5. Click "Update Driver." and select "Install from a list or." then click "Next" button. 6. Select "Don't search ,I will" then click "Next" and then click "Have disk". 7. Click the "Browse" button then choose A:(D:\Driver) and choose your monitor model in the model - Samsung XL24 | User Manual (user Manual) (ver.1.0) (English) - Page 25
then click the "Continue Anyway" button. Then click "OK" button. This monitor driver is under certified MS logo,and this installation doesn't damage your system.The certified driver will be posted on Samsung Monitor homepage. http://www.samsung.com/ 9. Click the "Close" button then click "OK" button - Samsung XL24 | User Manual (user Manual) (ver.1.0) (English) - Page 26
then choose A:(D:\Driver). 8. Click the "Open" button, then click "OK" button. 9. Choose your monitor model and click you see the screen working normally after clicking Test. If the screen is not normal, change to the Preset Timing Modes in the user guide. Linux Operating System To execute X-Window, - Samsung XL24 | User Manual (user Manual) (ver.1.0) (English) - Page 27
[ ]These buttons allow you to adjust items in the menu. [ ]Press this button to activate a highlighted menu item. [AUTO]Press to self-adjust to the incoming PC signal. The values of fine,coarse and position are adjusted automatically. [ ]Use this button to open the on-screen menu and exit from the - Samsung XL24 | User Manual (user Manual) (ver.1.0) (English) - Page 28
When the 'AUTO' button is pressed, the Auto Adjustment screen appears as shown in the animated screen on the center. Auto adjustment allows the monitor to self-adjust to the incoming video signal. The values of fine, coarse and position are adjusted automatically. (Available in analog mode only) To - Samsung XL24 | User Manual (user Manual) (ver.1.0) (English) - Page 29
the MENU button for more than five seconds to deactivate the OSD adjustment lock function. You can adjust only the brightness and contrast of the monitor with the OSD adjustment locking feature. Contrast - Samsung XL24 | User Manual (user Manual) (ver.1.0) (English) - Page 30
Menu Contrast Description When the OSD is not visible, push the button to adjust the Brightness. Brightness Menu Brightness Description When OSD is not visible, push the button to adjust the Contrast. SOURCE - Samsung XL24 | User Manual (user Manual) (ver.1.0) (English) - Page 31
Menu SOURCE Description Selects the video signal while the OSD is off. Picture Color Image OSD Setup Information Brightness Color Tone Coarse Language Auto Source Contrast Color Control Fine H-Position Image Reset Gamma Sharpness V-Position Color Reset H-Position Transparency Indicator V- - Samsung XL24 | User Manual (user Manual) (ver.1.0) (English) - Page 32
Menu Brightness Contrast Description You can use the on-screen menus to change the brightness according to personal preference. [MENU MENU] You can use the on-screen menus to change the contrast according to personal preference. [MENU MENU] Play/Stop Color - Samsung XL24 | User Manual (user Manual) (ver.1.0) (English) - Page 33
adjusting the frequency (clock speed). (Available in analog mode only) [MENU MENU] Changes the clearance of image. [MENU MENU] Changes the horizontal position of the monitor's entire display. (Available in analog mode only) Play/Stop - Samsung XL24 | User Manual (user Manual) (ver.1.0) (English) - Page 34
the computer. [MENU MENU] You can change the horizontal position where the OSD menu appears on your monitor. [MENU MENU] You can change the vertical position where the OSD menu appears on your monitor. [MENU MENU] Change the transparency of the background of the OSD. [MENU MENU] The menu will be - Samsung XL24 | User Manual (user Manual) (ver.1.0) (English) - Page 35
with the factory default values. [MENU MENU] Color parameters are replaced with the factory default values. [MENU MENU] Turns all LEDs On or Off. If it seems that the light from the LEDs affects the brightness of the LCD, you can turn off the power to them by setting the Indicator to Off. When - Samsung XL24 | User Manual (user Manual) (ver.1.0) (English) - Page 36
Menu Information Description Shows a video source, display mode on the OSD screen. [MENU → , → MENU] - Samsung XL24 | User Manual (user Manual) (ver.1.0) (English) - Page 37
This program does not support MAC. Installation 1. Insert the installation CD into the CD-ROM drive. 2. Click the MagicRotation installation file. 3. Select installation Language, Click "Next". 4. When the InstallShield Wizard - Samsung XL24 | User Manual (user Manual) (ver.1.0) (English) - Page 38
6. Choose a folder to install the MagicRotation program. 7. Click "Install." 8. The "Setup Status" window appears. - Samsung XL24 | User Manual (user Manual) (ver.1.0) (English) - Page 39
, the MagicRotation executable icon appears on your desktop. Installation Problems The installation of MagicRotation can be affected by the factors "Display Driver" should be properly loaded for the MagicRotation to work properly. The installed "Display Driver" should be the latest driver supplied by - Samsung XL24 | User Manual (user Manual) (ver.1.0) (English) - Page 40
application. In most cases this should fix the problem. 3. User Applications using OpenGL and DirectDraw (3D is not supported in Windows® 98, ME, NT 4.0. 6. MagicRotation does not provide support for 24 bits per above Service Packs z It is recommended that your System has the latest Service Pack - Samsung XL24 | User Manual (user Manual) (ver.1.0) (English) - Page 41
problems yourself. If you do need assistance, please call the phone number on the Information section or contact your dealer. Symptom No images on the screen. I cannot turn on the monitor screen (the login screen) does not appear, contact the Service Center or your dealer. Can you see "Not Optimum - Samsung XL24 | User Manual (user Manual) (ver.1.0) (English) - Page 42
manual. Have you changed the video card or Adjust screen image position and the driver? size using the OSD. Have you adjusted the resolution or Adjust the resolution and frequency frequency to the monitor on the monitor? of the video card. (Refer to the Preset Timing Modes). LED is blinking - Samsung XL24 | User Manual (user Manual) (ver.1.0) (English) - Page 43
the monitor driver according to the Driver Installation Instructions. See the video card manual to see if Install the monitor driver according the Plug & Play (VESA DDC) to the Driver Installation Instructions. function can be supported. Check the following items if there is trouble with - Samsung XL24 | User Manual (user Manual) (ver.1.0) (English) - Page 44
the screen goes blank although the power indicator LED is still on. The message may indicate that the monitor is out of scan range or that you not supported, etc. In this case, first check the source of the problem, and then contact the Service Center or your dealer. z Judging the monitor's working - Samsung XL24 | User Manual (user Manual) (ver.1.0) (English) - Page 45
General General Model Name SyncMaster XL24 LCD Panel Size 24 inch (61 cm) Display area 518.4 (H) x 324.0 (V) Pixel 60 Hz Maximum resolution 1920 x1200@60Hz Input Signal, Terminated RGB Analog, DVI(Digital Visual Interface) Compliant Digital RGB 0.7 Vp-p ± 5 % separate H/V sync, Composite - Samsung XL24 | User Manual (user Manual) (ver.1.0) (English) - Page 46
monitor settings. In most cases, the monitor installation will proceed automatically, unless the user wishes to select alternate settings. Dot Acceptable TFT LCD For example, the number of TFT LCD sub pixels that is contained in this product Less than 1 watts This monitor is EPA ENERGY STAR® - Samsung XL24 | User Manual (user Manual) (ver.1.0) (English) - Page 47
Timing Modes, the screen will be adjusted automatically. However, if the signal differs, the screen may go blank while the power LED is on. Refer to the video card manual and adjust the screen as follows. Table 1. Preset Timing Modes Display Mode IBM, 640 x 350 Horizontal Frequency (kHz) 31.469 - Samsung XL24 | User Manual (user Manual) (ver.1.0) (English) - Page 48
RICA ECUADOR EL SALVADOR GUATEMALA JAMAICA PANAMA PUERTO RICO REP. DOMINICA TRINIDAD & TOBAGO VENEZUELA Latin America 0800-333-3733 0800-124-421, 4004-0000 800-SAMSUNG(726-7864) 01-8000112112 0-800-507-7267 1-800-10-7267 800-6225 1-800-299-0013 1-800-234-7267 800-7267 1-800-682-3180 1-800-751 - Samsung XL24 | User Manual (user Manual) (ver.1.0) (English) - Page 49
samsung.com/it http://www.samsung.com/be http://www.samsung.com/nl http://www.samsung.com/no http://www.samsung.com/pl http://www.samsung.com/pt http://www.samsung.com/ie http://www.samsung.com/sk http://www.samsung.com/es http://www.samsung.com/se http://www.samsung.com/ch http://www.samsung.com/uk - Samsung XL24 | User Manual (user Manual) (ver.1.0) (English) - Page 50
sg http://www.samsung.com/th http://www.samsung.com/tw http://www.samsung.com/vn Middle East & Africa 0860-SAMSUNG(726-7864 ) 444 77 11 800-SAMSUNG(726-7864) 8000-4726 http://www.samsung.com/za http://www.samsung.com.tr http://www.samsung.com/mea Terms Dot Pitch The image on a monitor is composed - Samsung XL24 | User Manual (user Manual) (ver.1.0) (English) - Page 51
LCD. { Resolution: 1920 x 1200 { Vertical frequency (refresh rate): 60 Hz 2. TFT LCD LCD sub pixels that is contained in this product are 6,912,000. 3. When cleaning the monitor Samsung Electronics Co., Ltd. is strictly forbidden. Samsung Samsung is the registered trademark of Samsung Samsung - Samsung XL24 | User Manual (user Manual) (ver.1.0) (English) - Page 52
not been provided with any warranties from Adobe Systems Incorporated ("Adobe") in relation to the Adobe software products (the "Adobe Software Products") which are bundled together with Samsung products (the "Samsung Products") within the Samsung LCD Monitor to which this agreement relates (the - Samsung XL24 | User Manual (user Manual) (ver.1.0) (English) - Page 53
and exclusions apply to the extent permitted by applicable law in your jurisdiction. Samsung's aggregate liability related to or in connection with any claims which you able to bring in relation to the Adobe Software Products under the applicable law of your jurisdiction shall be limited to the - Samsung XL24 | User Manual (user Manual) (ver.1.0) (English) - Page 54
PRODUCT INFORMATION (Image Retention Free) LCD Monitors and TVs may have image retention when switching from one image to another especially after displaying a stationary image for a long time. This guide is to demonstrate correct usage of LCD products in order to protect them from Image retention. - Samsung XL24 | User Manual (user Manual) (ver.1.0) (English) - Page 55
Ex) The best way to protect your monitor from Image retention is to set your PC or System to operate a Screen Saver program when you are not using it. Image retention may not occur when a LCD panel is operated under normal conditions. Normal conditions are defined as continuously changing video - Samsung XL24 | User Manual (user Manual) (ver.1.0) (English) - Page 56
Correct Disposal of This Product (Waste Electrical & Electronic Equipment) - Europe only (Applicable in the European Union and other European countries with separate collection systems) This marking shown on the product or its literature, indicates that it should not be disposed with other household
-
 1
1 -
 2
2 -
 3
3 -
 4
4 -
 5
5 -
 6
6 -
 7
7 -
8
-
9
-
10
-
11
-
12
-
13
-
14
-
15
-
16
-
17
-
18
-
19
-
20
-
21
-
22
-
23
-
24
-
25
-
26
-
27
-
28
-
29
-
30
-
31
-
32
-
33
-
34
-
35
-
36
-
37
-
38
-
39
-
40
-
41
-
42
-
43
-
44
-
45
-
46
-
47
-
48
-
49
-
50
-
51
-
52
-
53
-
54
-
55
-
56
 |
 |
Install driver
Install programs
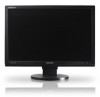
SyncMaster XL24