Sanyo 18KHS72 Instruction Manual
Sanyo 18KHS72 - 17,500 BTU Ductless Single Zone Mini-Split Wall-Mounted Heat Pump Manual
 |
View all Sanyo 18KHS72 manuals
Add to My Manuals
Save this manual to your list of manuals |
Sanyo 18KHS72 manual content summary:
- Sanyo 18KHS72 | Instruction Manual - Page 1
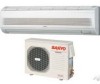
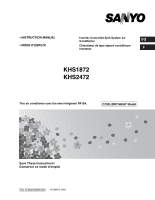
MANUAL • MODE D'EMPLOI Inverter-Controlled Split System Air Conditioner Climatiseur de type séparé contrôlé par inverseur KHS1872 KHS2472 This air conditioner uses the new refrigerant R410A. COOL/DRY/HEAT Model Save These Instructions! Conserver ce mode d'emploi Pub. OI-85264180801000 © SANYO - Sanyo 18KHS72 | Instruction Manual - Page 2
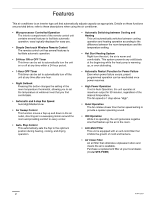
using the air conditioner. • Microprocessor Controlled Operation The interior compartment of the remote control unit contains several Hot Start Heating System Right from the start, the air is warm and comfortable. This system prevents any cold blasts at the beginning while the heat pump is warming - Sanyo 18KHS72 | Instruction Manual - Page 3
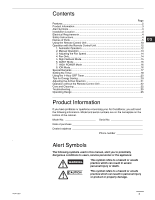
the Airflow Direction 21 Operation without the Remote Control Unit 22 Care and Cleaning 22 Troubleshooting...25 Operating Range...25 Product Information If you have problems or questions concerning your Air Conditioner, you will need the following information. Model and serial numbers are on the - Sanyo 18KHS72 | Instruction Manual - Page 4
or through the supply wiring. 3. Wiring must be done by a qualified electrician. Safety Instructions • Read this Instruction Manual carefully before using this air conditioner. If you still have any difficulties or problems, consult your dealer for help. • This air conditioner is designed to give - Sanyo 18KHS72 | Instruction Manual - Page 5
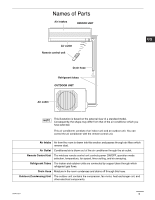
the external view of a standard model. Consequently, the shape may differ from that of the air conditioner which you have selected. This air conditioner consists of an indoor unit and an outdoor unit. You can control the air conditioner with the remote control unit. Air Intake Air from the room is - Sanyo 18KHS72 | Instruction Manual - Page 6
trouble happens, disconnect power and restart the air conditioner after a few minutes. QUIET OPERATION lamp TIMER lamp QUIET lamp ION lamp OPERATION button REMOTE CONTROL receiver REMOTE CONTROL preference for operation. Cooling operation (green) Heating operation (red) Stop (lamp off) OPERATION - Sanyo 18KHS72 | Instruction Manual - Page 7
is set to 12-hour time. Remote Control Unit (Display) Displayed when transmitting data Displayed when indoor unit sensor is in use Displayed when setting temperature Displayed when temperature is shown Displayed when setting timer (1) Operation mode AUTO HEAT MILD DRY COOL FAN 2) Fan - Sanyo 18KHS72 | Instruction Manual - Page 8
to transmit the setting changes to the receiver in the air conditioner. Sensor A temperature sensor inside the remote control unit senses the room temperature. Display Information on the operating conditions is displayed while the remote control unit is switched on. If the unit is turned off - Sanyo 18KHS72 | Instruction Manual - Page 9
: The air conditioner automatically decides the fan speeds. : High fan speed : Medium fan speed : Low fan speed NIGHT SETBACK button For details, see "5. Night Setback Mode". When you press this button in the HEAT, DRY or COOL mode, the mark appears in the display, and the remote control unit will - Sanyo 18KHS72 | Instruction Manual - Page 10
display fails to light, or when the remote control cannot be used to change the air conditioner's settings. • Use two fresh leak-proof type-AAA alkaline batteries. • In replacing batteries, follow the instructions as mentioned in the sub- section "How to Install Batteries". • If you do not use the - Sanyo 18KHS72 | Instruction Manual - Page 11
unit's transmitter head Control Unit directly at the air conditioner's receiver. Air conditioner (Indoor unit) Remote control unit Receiver (Transmitter head) Remote Control Unit The remote control unit may be operated either from a non-fixed position or from Installation Position a wall-mounted - Sanyo 18KHS72 | Instruction Manual - Page 12
heating operation according to the difference between the room temperature and the temperature setting. STEP 2 STEP 1 NOTE Check that the circuit breaker on the power panel is turned on. Once mode is selected and the unit is preset by following the steps below, you can have the air conditioner - Sanyo 18KHS72 | Instruction Manual - Page 13
2. Manual Operation Operation with the Remote Control Unit (continued) OI-801-13EG STEP 2 STEP 3 STEP select the desired mode. For heating operation → For dehumidifying operation → For cooling operation → For fan only operation → To start the air conditioner, press the ON/OFF operation - Sanyo 18KHS72 | Instruction Manual - Page 14
) NOTE • Choose the best position in the room for the remote control unit, which also acts as the sensor for room comfort and transmits the operating instructions. Once you've found this best position, always keep the remote control unit there. • This appliance has a built-in 5-minute time delay - Sanyo 18KHS72 | Instruction Manual - Page 15
5. Night Setback Mode Operation with the Remote Control Unit (continued) Night Setback Mode is used for 2 °F B. In Heating Mode: ( ) Press the NIGHT SETBACK button 30 min. 30 min. Time When the night setback mode is selected, the air conditioner automatically lowers the temperature setting - Sanyo 18KHS72 | Instruction Manual - Page 16
. NOTE • When set to High fan speed during heating operation, the fan runs at High fan speed even though during operation to generate negative ions that freshen up the air in the room. Press the ION button. The mark • ION "on" is the remote control unit's initial setting. • The negative ions are generated - Sanyo 18KHS72 | Instruction Manual - Page 17
unit will restart automatically within five minutes by the remote control unit. operation Clicking Sound Clicking sound is heard from • In heating or cooling operation, any plastic parts may expand or shrink due to the air conditioner a sudden temperature change. In this event, a clicking sound - Sanyo 18KHS72 | Instruction Manual - Page 18
temperature and time indicator selector button on the bottom front section of the remote control. • Temperature: °F • Time: AM, PM 1. How to set the current time. 2. How to set the OFF time (Example) To stop the air conditioner at 11:00 am. 1. Press the OFF TIME setting button once. 2. Press the - Sanyo 18KHS72 | Instruction Manual - Page 19
indication stops blinking and the present time is displayed. 4. How to set DAILY ON/OFF (Example) To start operation at 7:10 am. and stop the air conditioner at 11:00 am. REPEAT timer 10:30 pm. Present time 7:10 am. ON 11:00 am. OFF 1. Set the timer ON/OFF times as - Sanyo 18KHS72 | Instruction Manual - Page 20
Timer setting is given priority over the DAILY ON/OFF REPEAT DAILY ON/OFF REPEAT Timer setting. Tips for Energy Saving Do not • Block the air intake and outlet of the unit. If they are obstructed, the unit will not work well, and may be damaged. • Let direct sunlight into the - Sanyo 18KHS72 | Instruction Manual - Page 21
During the heating operation, the fan speed will be very low and the flap will be in the horizontal position (position ) until the air being blown out of the unit begins to warm. Once the air warms up, the flap position and fan speed change to the settings specified with the remote control. CAUTION - Sanyo 18KHS72 | Instruction Manual - Page 22
have lost the remote control unit or it has trouble, follow the steps below. When the air conditioner is not running during the heating operation, and the fan speed and flap are set to Auto. Care and Cleaning 1. For safety, be sure to turn the air conditioner off service center. 22 OI-801-22-EG - Sanyo 18KHS72 | Instruction Manual - Page 23
slide into the top of the indoor unit, and then insert it all the way inside. FRONT mark Hook Groove Pin Air intake grille OI-801-23EG 3. To attach the air intake grille to the indoor unit, press its bottom right and left corners as well as its bottom center into place - Sanyo 18KHS72 | Instruction Manual - Page 24
The air clean filter needs to be installed behind the air intake grille. 1. Remove the air intake grille. 2. Install the air clean filter in the position shown in the figure. 3. Remount the air intake grille. How to clean the air clean filter NOTE Cleaning the main unit and remote control unit - Sanyo 18KHS72 | Instruction Manual - Page 25
in remote control unit have 4. Replace batteries. run down. OPERATION lamp blinks and air conditioner does not operate. Trouble in system. Contact service center. Compressor runs but soon stops. Obstruction in front of condenser coil. Remove obstruction. Poor cooling (or heating) performance - Sanyo 18KHS72 | Instruction Manual - Page 26
ème évite de souffler de l'air froid au début lorsque la pompe de chaleur se met en marche ou même pendant le dégivrage. • Fonction de remise en marche automatique après une panne de courant Même après une panne de courant, les programmations sont remises en service lorsque le courant est rétabli - Sanyo 18KHS72 | Instruction Manual - Page 27
sur le produit 27 Symboles d'avertissement 27 Emplacement d'installation 28 Instructions relatives à l'alimentation 28 Conseils de sécurit 28 Nom l'énergie 44 Réglage du flux d'air 45 Fonctionnement sans télécommande 46 Entretien et nettoyage 46 Guide de dépannage 49 Plage de temp - Sanyo 18KHS72 | Instruction Manual - Page 28
qualifié et conformément aux instructions fournies avec l'appareil. • Avant de procéder à l'installation, vérifier que la tension secteur êmement dangereux. • Le climatiseur ne possède pas de ventilateur d'admission d'air frais extérieur. Il faudra donc ouvrir fréquemment les portes ou les - Sanyo 18KHS72 | Instruction Manual - Page 29
/hors tension (ON/ OFF), la sélection du mode de fonctionnement, la température, la vitesse du ventilateur, le réglage du temporisateur et le balayage d'air. Tuyaux de fluide frigorigène Les éléments intérieur et extérieur sont reliés par des tuyaux de cuivre par lesquels circule le fluide frigorig - Sanyo 18KHS72 | Instruction Manual - Page 30
faillance se produit, débrancher l'appareil et le remettre en service après quelques minutes. QUIET Voyant de fonctionnement (OPERATION) lorsque le système est en mode AUTO ([AUTOMATIQUE] (rouge ou vert)), HEAT ([CHAUFFAGE] (rouge)), DRY ([SÉCHAGE] (orange)), COOL ([REFROIDISSEMENT] (vert)) - Sanyo 18KHS72 | Instruction Manual - Page 31
réglage du temporisateur (1) Mode de fonctionnement Fonctionnement automatique ..... HEAT (chauffage MILD DRY (séchage COOL (refroidissement FAN (ventilation Indication d'angle du volet............ Indication de balayage d'air.......... (8) Mode de fonctionnement à haute puissance (9) - Sanyo 18KHS72 | Instruction Manual - Page 32
bouton permet de mettre le climatiseur en marche et de l'arrêter. fonctionnement (ON/OFF) Bouton de temporisateur 1 heure (1 HR. TIMER) : Qu'il soit en service ou non, quand ce bouton est actionné l'appareil fonctionne pendant une heure puis il s'arrête. 32 OI-801-8-F - Sanyo 18KHS72 | Instruction Manual - Page 33
pièce et il passe automatiquement au mode de refroidissement (COOL) ou de chauffage (HEAT) selon le cas. : Le climatiseur réchauffe la pièce. : Le climatiseur ré ) Appuyer sur ce bouton pour soit régler la direction du flux d'air sur Volet automatique dans chaque mode ou sur l'une des six positions - Sanyo 18KHS72 | Instruction Manual - Page 34
les réglages du climatiseur. • Utiliser deux piles alcalines neuves et étanches de format AAA. • Pour le remplacement des piles, suivre les instructions du paragraphe « Installation des piles ». • Si l'on ne se sert pas de la télécommande pendant plus d'un mois, retirer les piles. 34 OI-801 - Sanyo 18KHS72 | Instruction Manual - Page 35
montage mural). Pour garantir un bon fonctionnement du climatiseur, NE PAS installer la télécommande dans les endroits suivants : NE PAS • En plus de 26 pieds (8 mètres) du climatiseur • Sur le trajet du flux d'air du climatiseur • Dans un endroit qui risque de devenir extrêmement chaud ou froid - Sanyo 18KHS72 | Instruction Manual - Page 36
1. Fonctionnement automatique Fonctionnement avec télécommande Cet appareil effectue automatiquement le passage entre le refroidissement et le chauffage en tenant compte de la différence de température du local et du réglage de la température. ÉTAPE 2 ÉTAPE 1 REMARQUE Vérifier que le disjoncteur - Sanyo 18KHS72 | Instruction Manual - Page 37
(FAN SPEED) à la valeur souhaitée. ÉTAPE 5 Appuyer sur le bouton de volet (FLAP) et ajuster la direction du flux d'air selon ses préférences. (Voir « Réglage du flux d'air » en page 45.) Pour arrêter le climatiseur, appuyer à nouveau sur le bouton de marche/arrêt de fonctionnement (ON/OFF - Sanyo 18KHS72 | Instruction Manual - Page 38
également fonction de détecteur de confort et qui transmet les instructions de fonctionnement. Une fois que l'on a trouvé l'emplacement ] 4. Ventilateur uniquement ÉTAPE 2 ÉTAPE 3 ÉTAPE 1 Pour faire circuler l'air sans modifier la température, suivez la procédure suivante : ÉTAPE 1 Appuyer - Sanyo 18KHS72 | Instruction Manual - Page 39
5. Mode économie nocturne Fonctionnement avec télécommande (suite) Ce mode permet de réduire la consommation d'énergie. Appuyer sur le bouton d'économie nocturne (NIGHT SETBACK) pendant le fonctionnement. apparaît sur l'afficheur. Pour libérer la fonction d'économie nocturne, appuyer à nouveau sur - Sanyo 18KHS72 | Instruction Manual - Page 40
de silencieux, le ventilateur tourne à une vitesse plus faible que celle sur laquelle est réglé le ventilateur. • Si l'appareil fonctionne déjà avec un flux d'air très faible, le bruit du ventilateur peut ne pas changer même si le bouton de silencieux (QUIET) est enfoncé. 7. Mode de fonctionnement - Sanyo 18KHS72 | Instruction Manual - Page 41
, le ventilateur peut rester à l'arrêt si la température de la pièce est basse. Ceci est causé par l'entrée en service du système de prévention de courant d'air froid. • En cas d'une panne de courant, l'appareil s'arrête. Lorsque le courant est Panne de courant rétabli, l'appareil se remet - Sanyo 18KHS72 | Instruction Manual - Page 42
Réglage du temporisateur REMARQUE Dans les descriptions ci-dessous, les réglages suivants sont utilisés pour le bouton de sélection de l'affichage de température et d'heure sur la partie avant inférieure de la télécommande. • Température : °F • Heure : AM, PM 1. Réglage à l'heure actuelle ( - Sanyo 18KHS72 | Instruction Manual - Page 43
le programme doit être annulé, puis appuyez sur le bouton d'annulation (CANCEL). REMARQUE • Le réglage de la température, la direction du flux d'air et la vitesse de ventilateur peuvent être changées après une programmation du temporisateur, même si le climatiseur est arrêté. Même lorsqu'une op - Sanyo 18KHS72 | Instruction Manual - Page 44
de marche/arrêt de fonctionnement (ON/OFF) pour mettre l'appareil hors service, attendre qu'il s'arrête et appuyer une nouvelle fois sur le bouton nergie Choses à ne pas faire • Obstruer les arrivées et les sorties d'air de l'appareil. Si elles sont bouchées, l'appareil ne fonctionnera pas de fa - Sanyo 18KHS72 | Instruction Manual - Page 45
pour régler le volet sur la fonction de balayage ou sur une des six positions du flux d'air. SWEEP COOL DRY FAN SWEEP HEAT A. Balayage Le volet commence à se déplacer de haut en bas pour fournir l'air dans la plage de balayage. C. Fonction de volet automatique Le volet est réglé sur la position - Sanyo 18KHS72 | Instruction Manual - Page 46
provoquer des blessures. 3. La bobine interne et les autres composants de l'élément extérieur doivent être nettoyés tous les ans. Consulter le concessionnaire ou un service après-vente. 46 OI-801-22-F - Sanyo 18KHS72 | Instruction Manual - Page 47
FRONT du filtre anti-moisissure est située à l'avant, aligner les deux encoches près de la marque avec les crochets à l'arrière de la grille d'arrivée d'air, puis monter le filtre anti-moisissure. Filtre anti-moisissure Marque FRONT Crochet 2. Laisser le bord de la grille d'arriv - Sanyo 18KHS72 | Instruction Manual - Page 48
Faute de quoi, on s'exposerait dans les cas extrêmes à un risque d'asphyxie. Le filtre d'air doit être installé derrière la grille d'arrivée d'air. 1. Retirer la grille d'arrivée d'air. 2. Installer le filtre de nettoyage d'air dans la position illustrée sur la figure. 3. Remonter la grille d'arriv - Sanyo 18KHS72 | Instruction Manual - Page 49
Guide de dépannage Si le climatiseur ne fonctionne pas correctement, effectuer les vérifications suivantes avant de faire appel à un réparateur. Si le problème persiste, prendre contact avec son concessionnaire ou avec un service devant l'arrivée ou la sortie d'air. 5. Le thermostat est réglé sur - Sanyo 18KHS72 | Instruction Manual - Page 50
SANYO FISHER COMPANY A DIVISION OF SANYO NORTH AMERICA CORPORATION 21605 Plummer Street Chatsworth, CA 91311 U.S.A. In Canada SANYO Canada Inc. 300 Applewood Crescent, Concord Ontario, L4K 5C7, Canada
-
 1
1 -
 2
2 -
 3
3 -
 4
4 -
 5
5 -
 6
6 -
 7
7 -
8
-
9
-
10
-
11
-
12
-
13
-
14
-
15
-
16
-
17
-
18
-
19
-
20
-
21
-
22
-
23
-
24
-
25
-
26
-
27
-
28
-
29
-
30
-
31
-
32
-
33
-
34
-
35
-
36
-
37
-
38
-
39
-
40
-
41
-
42
-
43
-
44
-
45
-
46
-
47
-
48
-
49
-
50
 |
 |

© SANYO 2006
Pub. OI-85264180801000
• INSTRUCTION MANUAL
• MODE D’EMPLOI
Inverter-Controlled Split System Air
Conditioner
Climatiseur de type séparé contrôlé par
inverseur
Save These Instructions!
Conserver ce mode d’emploi
KHS1872
KHS2472
This air conditioner uses the new refrigerant R410A.
COOL/DRY/HEAT Model