Sanyo Em-z2000s Service Manual - Page 15
The Transformer., The Fan Motor.
 |
UPC - 086483045615
View all Sanyo Em-z2000s manuals
Add to My Manuals
Save this manual to your list of manuals |
Page 15 highlights
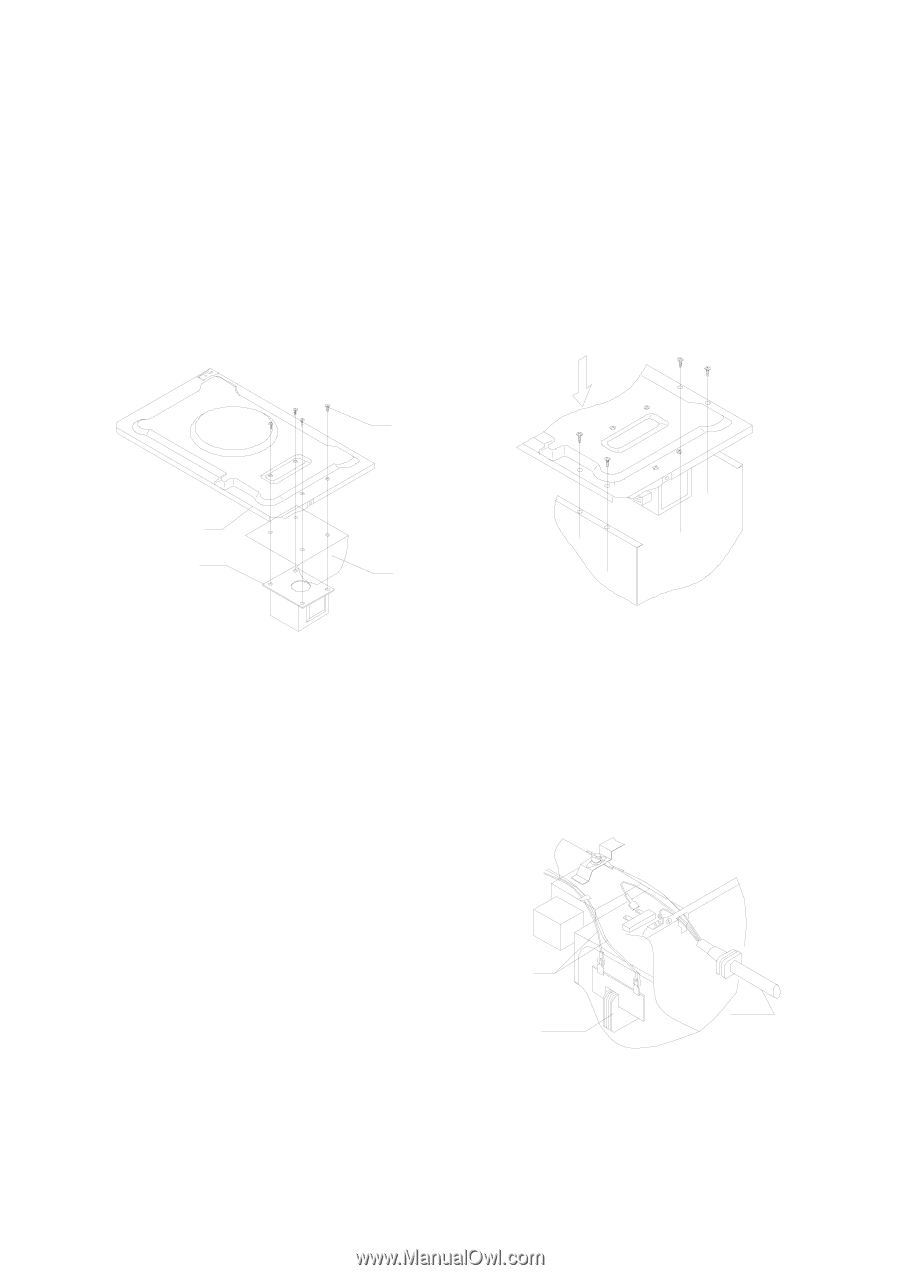
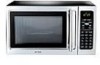
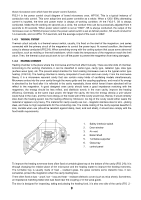
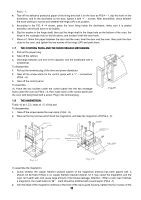
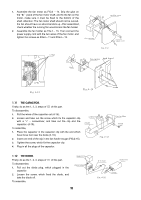
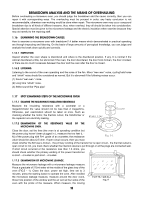
magnetron vertically, and also tighten the screws of the lampshade (FIG.4 - 8). 3. Plug in the two terminals of the magnetron filament and the thermal cutout. 1.9 THE TRANSFORMER. Firstly, do as the 1,2,3, steps at Ⅲ of this part. Dismantling steps for the transformer: (as FIG.4 -9). 1. Pull out all the terminal of the transformer. 2. Turn the microwave over. 3. Take off the right baseboard with the transformer after loosened the four screws, which fix the board on the oven. (4-10). 4. Take off the four screws, a, b, c, d with a "+"- screwdriver. 5. Take off the right baseboard, the seat and the rubber space between the transformer and the oven. screw base board transformer seat Fig.4-9 Fig.4-10 to mount the transformer, 1. Place the transformer as the FIG.4 - 9, tear off the protective paper of the rubber lining tape, stick it on the transformer as shown on the figure. Then put on the seat and the right base board, make sure the screw hole are tallied, then tighten the four screws for the high voltage winding is earthing here. 2. Fix the transformer on the oven as FIG.4-10.tear off the protect paper of the rubber spacer, set it between the transformer and the oven, make sure the adhesive side is sticked on the oven. 3. Plug in all the terminals of the transformer precisely. 1.10 THE FAN MOTOR. Firstly, do as the 1, 2, 3, steps of Ⅲ of this part. To disassemble, 1. Pull out the two terminal of the fan motor (FIG. 4 -11). 2. According to the FIG.4 -12, pull out the lead plug which marked "A" and "C" from the thermal cutout and the fuse housing separately, and take off the earthing screw which marked "B" (FIG.4 -12). lead fan motor 3. Take out the power supply cord from the trough as the figure shows. 4. Loosen the screws shown on the FIG.4 -13 with a "+" - screwdriver, and take off the fan holder. 5. Take off the fan from the fan motor shaft as FIG.4 -14, then the fan motor. to mount the fan motor, Fig.4-11 power supply cord 14
-
 1
1 -
2
-
3
-
4
-
5
-
6
-
7
-
8
-
9
-
 10
10 -
 11
11 -
 12
12 -
 13
13 -
 14
14 -
 15
15 -
 16
16 -
 17
17 -
 18
18 -
 19
19 -
 20
20 -
21
-
22
-
23
-
24
-
25
-
26
 |
 |