Sanyo POA-USB02 Owners Manual
Sanyo POA-USB02 Manual
 |
UPC - 086483059353
View all Sanyo POA-USB02 manuals
Add to My Manuals
Save this manual to your list of manuals |
Sanyo POA-USB02 manual content summary:
- Sanyo POA-USB02 | Owners Manual - Page 1
MODEL POA-USB02 Memory Viewer Slide Converter This is the manual for the Memory Viewer function. Read this manual thoroughly to operate the Memory Viewer function. First, read the owner's manual of the projector to understand the basic operation of the projector and the safety instructions. The - Sanyo POA-USB02 | Owners Manual - Page 2
2 - Sanyo POA-USB02 | Owners Manual - Page 3
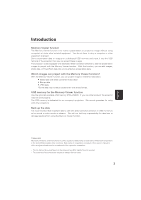
USB memory for the Memory Viewer function Use the optionally available USB memory (POA-USB02). If you use other product, the projector may not work properly. The . Each name of corporation or product in this owner's manual is either a registered trademark or a trademark of its respective corporation - Sanyo POA-USB02 | Owners Manual - Page 4
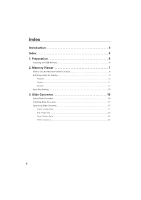
Index Introduction 3 Index 4 1. Preparation 5 Installing the USB Memory 6 2. Memory Viewer 7 How to Use the Memory Viewer Function 8 Edit Image Data for Display 9 Rotation ...10 Delete...11 Reorder ...12 Auto Play Setting 13 3. Slide Converter 15 About Slide Converter 16 Installing Slide - Sanyo POA-USB02 | Owners Manual - Page 5
English 1 Chapter 1. Preparation Read this chapter before use. 5 - Sanyo POA-USB02 | Owners Manual - Page 6
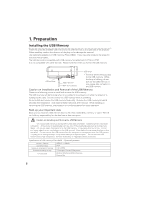
right side of the projector. When installing, confirm the direction of the plug not to damage the terminal. Use optionally available our USB memory (POA-USB02). If you use other product, the projector may not work properly. The USB terminal is compatible with USB memory formatted with FAT16 or FAT32 - Sanyo POA-USB02 | Owners Manual - Page 7
English 2 Chapter 2. Memory Viewer 7 - Sanyo POA-USB02 | Owners Manual - Page 8
2. Memory Viewer Cautions in Projecting Images The projector supports only JPEG, Bitmap and index data (.idx) which is edited with Slide Converter. Other data formats are not compatible. Use an optionally available USB memory. - Sanyo POA-USB02 | Owners Manual - Page 9
English 2. Memory Viewer 3. Select an Image to be displayed. Press the Point buttons on the remote control or the top control of the projector to move the blue framed pointer to the index file to be displayed and then press the SELECT button. Images will be displayed following their configurations. - Sanyo POA-USB02 | Owners Manual - Page 10
2. Memory Viewer 1. Select an Index file you wish to project. Select "Index" in the Viewer menu. Press the MENU button to hide the On-Screen Menu. Select the index file to edit by pressing the Point 7 8 buttons. Viewer Index Select the index file to edit. 2. Display the Edit Menu Select "Edit" from - Sanyo POA-USB02 | Owners Manual - Page 11
English 2. Memory Viewer Delete q Move the red arrow pointer with the Point button to "Delete" and press the SELECT button. Move the pointer to "Delete" and press the SELECT button. Reset Quit w Move the red framed pointer to the image you want to delete. e Press the SELECT button. Confirmation - Sanyo POA-USB02 | Owners Manual - Page 12
2. Memory Viewer Reorder q Move the red arrow pointer to "Reorder" and press the SELECT button. w Move the red framed pointer to the image you wish to move. e Press the SELECT button. A red bar appears at the left side of the selected image. Move the red bar to the position where the image to be - Sanyo POA-USB02 | Owners Manual - Page 13
2. Memory Viewer Auto Play Setting Images in the Index file can be projected automatically. Select "Auto Play" in the projector menu and set the interval time between the images. Note: Interval time between images which is set in "Image Switch Timing Settings" (p22) is prior to this Auto Play - Sanyo POA-USB02 | Owners Manual - Page 14
14 - Sanyo POA-USB02 | Owners Manual - Page 15
English 3 Chapter 3. Slide Converter 15 - Sanyo POA-USB02 | Owners Manual - Page 16
main memory. (More memory will be required depending on applications running at the same time.) Pentium III 300MHz or higher More than 100MB free space Supports the following resolutions. VGA (640 x 480) SVGA(800 X 600), XGA (1024 X 768) Number of colors : Either of 16 bit (65536 colors) or 24/32 - Sanyo POA-USB02 | Owners Manual - Page 17
on your computer. The software (Slide Converter) is included in the CD ROM provided with the projector. Refer to the owner's manual (Adittional Vol.) of the projector ➔ "2. Setup Procedures" ➔ "Installing the Software" ➔ step 3 to install the Slide converter. Operating Slide Converter Activate Slide - Sanyo POA-USB02 | Owners Manual - Page 18
3. Slide Converter - Capture images on your computer screen [Image] -> [Screen Capture] Capture images on your computer screen and load it to the Edit screen of Slide Converter. If you select "Screen Capture", the following dialog box will appear. Parameter Description Capture Capture whole - Sanyo POA-USB02 | Owners Manual - Page 19
3. Slide Converter - Import PowerPoint data [Image] -> [Import PowerPoint File] Convert PowerPoint data to JPEG or Bitmap image and import it to the Edit screen of Slide Converter. *The computer needs to be installed PowerPoint software. Parameter Description Output Import the image displayed - Sanyo POA-USB02 | Owners Manual - Page 20
3. Slide Converter - Open or add existing Index files [File] -> [Open Index] Select "Open Index" from File menu to open stored index files on Slide Converter. [File] -> [Add Index] Select "Add Index" from File menu to add another index file to the opened index file. Edit Image files - Cut / Copy / - Sanyo POA-USB02 | Owners Manual - Page 21
3. Slide Converter - Convert image size and file format Select an image then [Image] -> [Arrange Image File] -> [Convert Image] The following dialog box will appear. English Parameter Description Image Size Conversion ......Convert the size of the image selected to the size input in Width (1- - Sanyo POA-USB02 | Owners Manual - Page 22
images at the interval time set on Timer Value* Timer Value Set an interval time for Automatic Timer. Note1: Note2: At the factory, "Manual Advance" is selected. When projecting images automatically with the projector, interval time between images set on "Image Switch Timing Settings" is prior to - Sanyo POA-USB02 | Owners Manual - Page 23
3. Slide Converter Save / Delete Data Select "Save as" from File menu. Image data is saved in Index format. - Save [File] -> [Save As] Name the opened index file and save it on a USB memory drive. Save Index File screen will appear. English Parameter Description USB Memory Drive............ - Sanyo POA-USB02 | Owners Manual - Page 24
3. Slide Converter - Select image files to be projected and arrange them in order [File] -> [Registered Index Order Setting] Select Index files you wish to display with the projector from those stored in the USB memory. Also arrange the files in the order to be displayed. Note: "The order to be - Sanyo POA-USB02 | Owners Manual - Page 25
3. Slide Converter Other Functions - See information of the image file [Image] -> [Image File Information] See the information of the selected image. Parameter Description File Name Show the file name. Address Show where the file is. File Size Show the data size. Format Show the file format. - Sanyo POA-USB02 | Owners Manual - Page 26
-
 1
1 -
 2
2 -
 3
3 -
 4
4 -
 5
5 -
 6
6 -
 7
7 -
8
-
9
-
10
-
11
-
12
-
13
-
14
-
15
-
16
-
17
-
18
-
19
-
20
-
21
-
22
-
23
-
24
-
25
-
26
 |
 |
Memory Viewer
Slide Converter
This is the manual for the Memory Viewer function.
Read this manual thoroughly to operate the Memory Viewer
function.
First, read the owner's manual of the projector to understand
the basic operation of the projector and the safety
instructions.
The safety instructions in the owner's manuals should be
followed strictly.
English
Français
Español
Deutsch
Italiano
Owner's Manual
USB Memory
MODEL POA-USB02
日本語