Sanyo VDC-HD3100 VDC-HD3300 Manual - Page 13
Introduction 13/15
 |
UPC - 086483075124
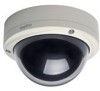
View all Sanyo VDC-HD3100 manuals
Add to My Manuals
Save this manual to your list of manuals |
Page 13 highlights
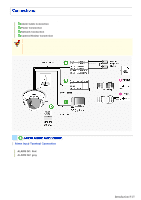
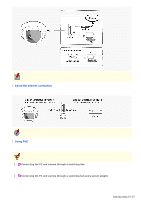
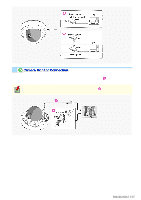
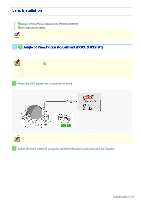
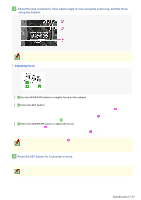
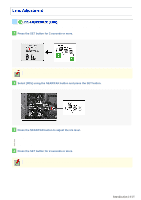
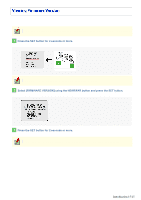
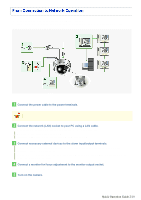
3 Adjust the lens orientation. Then adjust angle of view using the zoom ring, and the focus using the buttons. PEAK HOLD: Shows the value of the maximum focus level. INDICATOR: Shows the value of the current focus level. Adjusting focus 1 Use the NEAR/FAR button to roughly focus on the subject. Adjust by monitoring the video image on the monitor. 2 Press the SET button. The camera automatically focuses on the subject. Note that the color of the status indicator ( A ) "FOCUSING" turns from black to orange. If the camera fails to automatically focus on the object, the status indicator ( A ) will indicate "ERROR". In this case, manually adjust the focus (in Step 3 ). 3 Press the NEAR/FAR button to adjust the focus. Adjust to set the FA bar ( B ) to the maximum level. When the subject comes into focus, the color of the status indicator ( A ) "FOCUSING" turns from black to orange. Pressing the button causes the FB bar ( C ) gauge to move. The position changes step by step each time the button is pressed and continuously at a high speed when the button is held down. 4 Press the SET button for 2 seconds or more. The focus adjustment screen will close. The focus adjustment screen will also close automatically if left idle for 5 minutes or more. If video is out of focus in either color or black-and-white mode, adjust the focus in respective modes. Introduction 13/15
-
 1
1 -
2
-
3
-
4
-
5
-
6
-
7
-
 8
8 -
 9
9 -
 10
10 -
 11
11 -
 12
12 -
 13
13 -
 14
14 -
 15
15 -
 16
16 -
 17
17 -
 18
18 -
19
-
20
-
21
-
22
-
23
-
24
-
25
-
26
-
27
-
28
-
29
-
30
-
31
-
32
-
33
-
34
-
35
-
36
-
37
-
38
-
39
-
40
-
41
-
42
-
43
-
44
-
45
-
46
-
47
-
48
-
49
-
50
-
51
-
52
-
53
-
54
-
55
-
56
-
57
-
58
-
59
-
60
-
61
-
62
-
63
-
64
-
65
-
66
-
67
-
68
-
69
-
70
-
71
-
72
-
73
-
74
-
75
-
76
-
77
-
78
-
79
-
80
-
81
-
82
-
83
-
84
-
85
-
86
-
87
-
88
-
89
-
90
-
91
-
92
-
93
-
94
-
95
-
96
-
97
-
98
-
99
-
100
-
101
-
102
-
103
-
104
-
105
-
106
-
107
-
108
-
109
-
110
-
111
-
112
-
113
-
114
-
115
-
116
 |
 |
