Schwinn Windsprint Owner's Manual - Page 3
Operation - exercise bike
 |
View all Schwinn Windsprint manuals
Add to My Manuals
Save this manual to your list of manuals |
Page 3 highlights
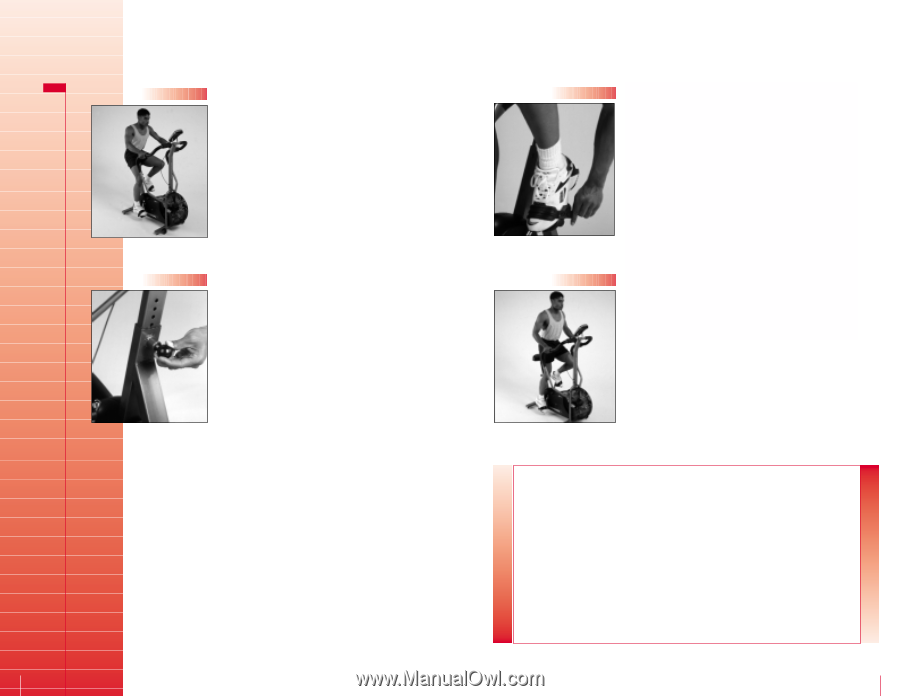
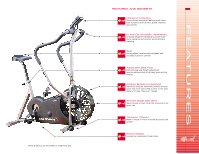
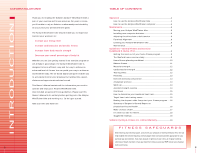
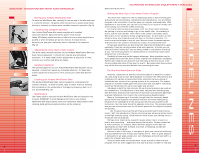
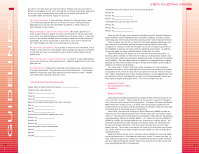
OPERATION HOW TO USE THE AIRDYNE® WINDTRAINER BIKE FIG.1 s Seat adjustment Proper seat adjustment ensures maximum exercise efficiency and comfort, while reducing the risk of injury. 1. Place one pedal in the forward position, and center the ball of your foot over the center of the the pedal. Your leg should be slightly bent at the knee (Fig. 1). 2. If your leg is too straight or your foot cannot touch the pedal, you will need to lower the seat - If your leg is bent too much, you will need to raise the seat. FIG.2 3. Dismount the bike. Pull out the adjustment knob on the seat tube and release the locking pin (Fig. 2) Lower or raise the seat to the desired height. Release the seat knob engaging the locking pin. Be sure that the pin is fully secured in a seat post hole. FIG.3 s Foot positioning/pedal strap adjustment Place the ball of each foot on the pedals. Rotate the pedals until one foot is within arm's reach. Then, reach down and fasten the rubber strap over your shoe and secure it to the pedal by slipping the nub at the end of the pedal through one of the slots in the strap. Pull down the strap until it snaps into place (Fig. 3). Repeat for the other foot. Point your toes and knees directly forward to ensure maximum pedal efficiency. s Sitting workout Once you are in position and sitting comfortably, slowly begin pedaling, with your hands on the handlebars. Pedal at an easy pace and low resistance until you fell secure and comfortable. FIG.4 s Sitting workout Once you are comfortable in the sitting position, try standing up out of the seat and continue pedaling (Fig. 4). FITNESS SAFEGUARDS Failure to follow any of these safeguards may result in injury or serious health problems. • Do not place fingers or any other objects into moving parts of the exercise equipment. • Keep children and pets away from the Airdyne WindTrainer bike while machine is in use. A child's curiosity may result in injury. Do not allow children to use the Airdyne WindTrainer bike. The pedal travel ranges are designed and intended for adults, not children. • Never turn pedal crank arms by hand. To avoid entanglement and possible injury, do not expose hands or arms to the drive mechanism. • Do not dismount the Airdyne WindTrainer bike until the pedals are at a complete STOP. • Warn bystanders to keep a safe distance. Do not allow anyone to touch the bike while it is in motion. • After exercising, turn the micro-resistance control clockwise to increase tension so the pedals will not rotate freely and possibly hurt someone. 4 5
-
 1
1 -
 2
2 -
 3
3 -
 4
4 -
 5
5 -
 6
6 -
 7
7 -
 8
8 -
 9
9 -
10
 |
 |