Seagate STM3250620A DiamondMax 20 & 21 Installation Guide - PATA - EN - Page 7
Installing the Hard Drive, Removing the System Cover
 |
View all Seagate STM3250620A manuals
Add to My Manuals
Save this manual to your list of manuals |
Page 7 highlights
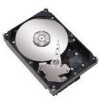
MAXTOR ATA HARD DRIVE INSTALLATION GUIDE Installing the Hard Drive This chapter describes how to physically install the hard drive in your computer. The installation steps are as follows: - Remove the system cover. - Set the jumper. - Mount the hard drive in your computer. - Attach the cables. - Configure the BIOS (Windows-based systems only). Removing the System Cover 1. Turn your computer off. 2. Unplug your system from the electrical outlet. 3. Remove the cover from your system case. Refer to your system user manual for instructions on removing the cover, or obtain the services of a qualified installation technician. 4. Attach a grounding strap or touch a metal portion of your computer case. This will ground you to minimize the risk of exposing the hard drive to electrostatic discharge. FIGURE 3 REMOVING THE SYSTEM COVER PAGE 5
-
 1
1 -
 2
2 -
 3
3 -
 4
4 -
 5
5 -
 6
6 -
 7
7 -
 8
8 -
 9
9 -
 10
10 -
 11
11 -
 12
12 -
13
-
14
-
15
-
16
-
17
-
18
-
19
-
20
-
21
-
22
-
23
-
24
-
25
-
26
-
27
-
28
 |
 |
