Sealey MM20 Instruction Manual - Page 2
Features, Operation - leads
 |
View all Sealey MM20 manuals
Add to My Manuals
Save this manual to your list of manuals |
Page 2 highlights
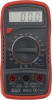
3. features Measures: • AC Voltage Function V Red Lead Connection VΩmA Input Limits 600V DC • DC Voltage • DC Current • Resistance • Temperature 1 • Diode Test V~ VΩmA 600V AC (sine) • Continuity Test A VΩmA 200mA DC • Transistor Test 6 A 10A 10A DC 10A DC hFE VΩmA °C VΩmA 0-1000 -40°C to 1000°C Layout: 1. 12.5mm LCD Display 2. Rotary Function Switch 2 VΩmA 70Ω 3. VΩmA Input Socket 4. COM Input Socket 7 2k VΩmA 2kΩ 5. 10A Input Socket Ω VΩmA 2MΩ 6. Hold Button 7. Transistor Socket 5 3 4. operation 4 ‰‰ WARNING! Ensure that you read, understand and apply the safety and operational instructions before connecting the multimeter. Only when the user is sure that they understand the procedures, is it safe to proceed with testing. Normal operating: temperature range: 0°C to 40°C, relative humidity less than 75%. Remember to turn off the multimeter when measurements are completed. Note: When the figure '1' is displayed, it indicates AN over-range situation and a higher range needs to be selected. 4.1. MEASURING VOLTAGE (AC and DC) 4.1.1. Connect the black test lead to the COM input socket and the red test lead to the VΩmA input socket. 4.1.2. Set the rotary switch to the required V (DC) or V ~ (AC) range, if unsure of the voltage range to be tested, set switch to the highest range first and then lower it until a satisfactory reading is obtained. 4.1.3. Connect the test probes across the source or load under measurement. 4.1.4. Turn on the power, the voltage will be displayed and the polarity of the red test lead connection will be indicated when measuring DC voltages. 4.2. MEASURING CURRENT (DC only) 4.2.1. Connect the black test lead to the COM input socket and the red test lead to the VΩmA input socket, or for measuring in the 200mA to 10A range, use the 10A DC input socket. 4.2.2. Set the rotary switch to the required A (DC) range and connect the test probes in series with the load under measurement. The current measured will be displayed. 4.3. MEASURING RESISTANCE 4.3.1. Connect the black lead to the COM input socket and the red test lead to the the VΩmA input socket (the polarity of the red lead is '+'). ‰‰ WARNING! When checking in-circuit resistance, ensure that the circuit under test has all power removed and all capacitors have been fully discharged before testing. 4.3.2. Set the rotary switch to the required Ω range and connect the test probes across the resistance under measurement. 4.3.3. When measuring resistance over 1MΩ, the meter may take a few seconds to get a stable reading. This is normal for high resistance measurements. 4.4. DIODE TESTING 4.4.1. Connect the black lead to the COM input socket and the red lead to the VΩmA input socket (the polarity of the red lead is '+'). 4.4.2. Set the rotary switch to the position and connect the red lead to the anode and the black lead to the cathode of the diode under test. 4.4.3. The meter will show the approximate forward voltage drop of the diode in mV. If the leads are reverse connected, '1' is displayed. 4.5. TRANSISTOR TESTING 4.5.1. Determine whether the transistor to be tested is NPN or PNP type and set the rotary switch to the appropriate NPN or PNP - hFE position. 4.5.2. Locate the Emitter, Base and Collector leads. Insert the leads of the transistor into the correct holes in the tester's front panel. 4.5.3. The meter will show the approximate hFE value (0-1000) at test conditions of (approx) base current 10µA and Vce 3.0V. 4.6. AUDIBLE CONTINUITY TEST 4.6.1. Connect the black lead to the COM input socket and the red lead to the VΩmA input socket (the polarity of the red lead is '+'). 4.6.2. Set the rotary switch to the position and connect the test leads across the two points of the circuit under test. If continuity exists (i.e. resistance is less than 70Ω), the built-in buzzer will sound. 4.7. MEASURING TEMPERATURE 4.7.1. Insert the red lead of the K-type thermocouple into the VΩmA input socket on the front panel and the black lead into the COM input socket. 4.7.2. Set the rotary switch to the °C position. 4.7.3. Touch the object to be measured with the thermocouple probe and the ambient temperature will be displayed. ‰‰ WARNING! To avoid electric shock, ensure that the thermocouple has been removed before changing to another function measurement. © Jack Sealey Limited Original Language Version MM20.V3 | Issue:5 (I) 20/10/17
-
 1
1 -
 2
2 -
 3
3 -
 4
4
 |
 |
