Sennheiser Wireless Digital Instructions for Use - Page 11
Insert the 9 V PP3 battery IEC 6 LR 61. Please observe - microphone
 |
View all Sennheiser Wireless Digital manuals
Add to My Manuals
Save this manual to your list of manuals |
Page 11 highlights
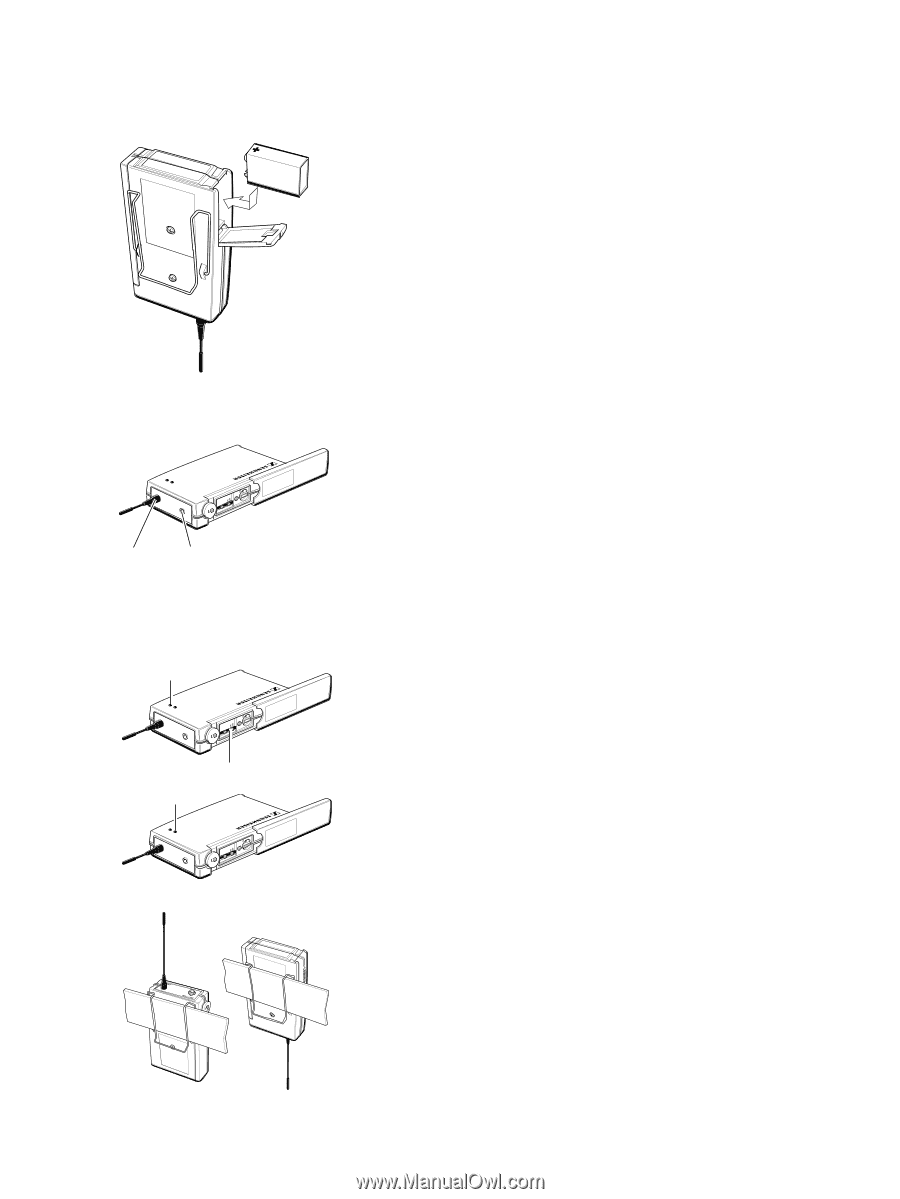
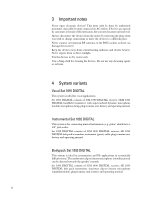
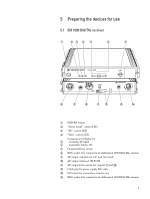
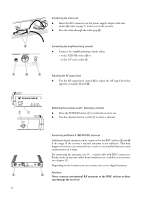
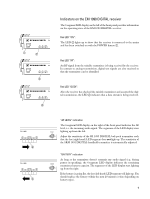
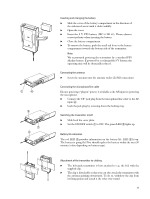
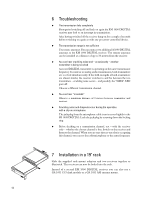
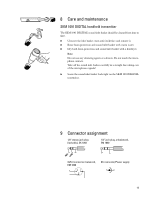
ቢ ብ ባ ቨ ቤ Inserting and changing the battery Ǡ Slide the cover of the battery compartment in the direction of the embossed arrow until it clicks audibly. Ǡ Open the cover. Ǡ Insert the 9 V PP3 battery (IEC 6 LR 61). Please observe correct polarity when inserting the battery. Ǡ Close the battery compartment. Ǡ To remove the battery, push the small red lever in the battery compartment towards the bottom side of the transmitter. Note: We recommend powering the transmitter by a standard PP3 alkaline battery. If powered by a rechargeable 9 V battery, the operating time will be drastically reduced. Connecting the antenna Ǡ Screw the antenna onto the antenna socket ቢ (M3 connection). Connecting the microphone/line cable Electret powering ("plug-in" power) is available at the AF input for powering the microphone. Ǡ Connect the 1/8" jack plug from the microphone/line cable to the AF input ብ. Ǡ Lock the jack plug by screwing down the locking ring. Switching the transmitter on/off Ǡ Slide back the cover plate. Ǡ Set the ON/OFF switch ቨ to ON. The green LED ባ lights up. Battery life indication The red LED ቤ provides information on the battery life. LED ቤ lit up: The battery is going flat! You should replace the battery within the next 20 minutes (value depending on battery type). Attachment of the transmitter to clothing Ǡ The belt pack transmitter is best attached to e.g. the belt with the supplied clip. Ǡ The clip is detachable so that you can also attach the transmitter with the antenna pointing downwards. To do so, withdraw the clip from its fixing points and attach it the other way round. 11
-
 1
1 -
2
-
3
-
4
-
5
-
 6
6 -
 7
7 -
 8
8 -
 9
9 -
 10
10 -
 11
11 -
 12
12 -
 13
13 -
 14
14 -
 15
15 -
 16
16 -
17
-
18
-
19
-
20
-
21
-
22
-
23
-
24
-
25
-
26
-
27
-
28
-
29
-
30
-
31
-
32
-
33
-
34
-
35
-
36
-
37
-
38
-
39
-
40
-
41
-
42
-
43
-
44
-
45
-
46
-
47
-
48
-
49
-
50
-
51
-
52
 |
 |