Sharp AL-1340 AL-1340 Operation Manual
Sharp AL-1340 - B/W Laser - Copier Manual
 |
UPC - 074000074347
View all Sharp AL-1340 manuals
Add to My Manuals
Save this manual to your list of manuals |
Sharp AL-1340 manual content summary:
- Sharp AL-1340 | AL-1340 Operation Manual - Page 1
Digital Laser Copier/Printer Operation Manual MODEL AL-1340 - Sharp AL-1340 | AL-1340 Operation Manual - Page 2
Station Address State Zip SERIAL NUMBER City Telephone City Telephone To obtain service, or to obtain product literature, accessories, or supplies, please call 1-(630)378-3590 in the USA or 1-877-SHARP-CC (toll free)/905-568-7140 in Canada. For customer assistance, please visit http://www - Sharp AL-1340 | AL-1340 Operation Manual - Page 3
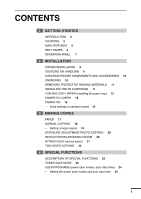
PART NAMES 6 OPERATION PANEL 7 2 INSTALLATION COPIER INSTALLATION 8 CAUTIONS ON HANDLING 9 CHECKING PACKED COMPONENTS AND ACCESSORIES 10 UNPACKING 10 REMOVING PROTECTIVE PACKING MATERIALS 11 INSTALLING THE TD CARTRIDGE FUNCTIONS DESCRIPTION OF SPECIAL FUNCTIONS 23 TONER SAVE MODE 23 USER PROGRAMS ( - Sharp AL-1340 | AL-1340 Operation Manual - Page 4
CONTENTS 5 SUPPLIES AND USER MAINTENANCE TD CARTRIDGE REPLACEMENT 26 DRUM CARTRIDGE REPLACEMENT 27 USER MAINTENANCE 28 - Cabinet 28 - Original table and original cover 29 - Transfer charger 29 - When copier is not in use 30 6 COPIER TROUBLE? MISFEED REMOVAL 31 - A Misfeed in the paper feed area 31 - - Sharp AL-1340 | AL-1340 Operation Manual - Page 5
manual and the copier. For quick reference during copier use, keep this manual in a handy location. This copier can be used as a laser printer. This manual describes only the copier features. For description of the printer features, see the printer operation manual. Conventions used in this manual - Sharp AL-1340 | AL-1340 Operation Manual - Page 6
copier does not produce hazardous laser radiation. For your safety, observe the precautions below. G Do not remove the cabinet, operation panel or any other covers. G The copier performed. G In addition to the automatic exposure mode, the manual exposure can be adjusted in five steps. G The photo - Sharp AL-1340 | AL-1340 Operation Manual - Page 7
and tear on the scanning mechanism. This feature provides for a higher reliability. Printer feature G This copier can be used as a laser printer. Environmentally friendly design G Paper output tray is housed in the copier for space saving. G Preheat mode and auto power shut-off mode are provided - Sharp AL-1340 | AL-1340 Operation Manual - Page 8
tray Side cover Manual bypass Front cover Paper guides Side cover open button Handle Paper output tray Parallel interface connector Power cord socket Power switch Paper output tray extension Handle TD cartridge lock release button Drum cartridge TD cartridge Drum cartridge handle Paper - Sharp AL-1340 | AL-1340 Operation Manual - Page 9
copy quantity, zoom copy ratio, user program code, and error code. ON LINE indicator Lights up when the machine is used as a printer. For description of the ON LINE indicator, see the printer operation manual. Power save indicator Lights up when the copier is in a power save mode. (p. 23, 24 - Sharp AL-1340 | AL-1340 Operation Manual - Page 10
Follow the installation procedure below to use the copier properly. COPIER INSTALLATION 2 Improper installation may damage the copier. Please note the following during initial installation and whenever the copier is moved. Installation If the copier is moved from a cool place to a warm place - Sharp AL-1340 | AL-1340 Operation Manual - Page 11
not drop the copier, subject it to shock or strike it against any object. Do not expose the drum cartridge to direct sunlight. Doing so will damage the surface (green portion) of the drum cartridge, causing smudges on copies. Store spare supplies such as drum cartridges and TD cartridges in a dark - Sharp AL-1340 | AL-1340 Operation Manual - Page 12
if the following components and accessories are included. Power cord 2 Operation manual Interface cable (IBM PC/AT or compatible computer) Printer driver (CD-ROM) Installation TD cartridge Copier Drum cartridge (installed in copier) G If anything is not included or is damaged, contact our - Sharp AL-1340 | AL-1340 Operation Manual - Page 13
. c g h a e f d 2 Installation b 2 Use a coin (or suitable object) to remove the screw. Store the screw in the paper tray because it will be used if the copier has to be moved. (p. 14) INSTALLING THE TD CARTRIDGE 1 Open the side cover while pressing the side cover open button. 11 - Sharp AL-1340 | AL-1340 Operation Manual - Page 14
CAUTION tape Protective pins 3 Push gently on both sides of the front cover to open the cover. Installation 4 Remove the TD cartridge from the bag. Remove the protective paper. Hold the cartridge on both sides and shake it horizontally four or five times. 4 or 5 times 5 Hold the tab of the - Sharp AL-1340 | AL-1340 Operation Manual - Page 15
INSTALLING THE TD CARTRIDGE 6 Gently insert the TD cartridge until it locks in place. 7 Close the front cover and then the side cover by pressing the round projections near the side cover open button. 2 - Sharp AL-1340 | AL-1340 Operation Manual - Page 16
tray to the copy paper width and length. Squeeze the lever of paper guide and slide the guide to match with the width of the paper. Move paper guide to the appropriate slot as marked on the tray. Paper guide B Paper guide A 5 Fan the copy paper and insert it into the tray. Make sure the - Sharp AL-1340 | AL-1340 Operation Manual - Page 17
in the OFF position. Insert the attached power cord into the power cord socket at the rear of the copier. If you use the copier in a country other than the country where the copier was purchased, you will need to make sure that your local power supply is compatible with your model. If - Sharp AL-1340 | AL-1340 Operation Manual - Page 18
of a run is made or power is turned on. 2 The settings of the power save modes can be modified. See page 24, USER PROGRAMS. G The copier will return to the initial settings a preset amount of time after the last copy is made.The preset amount of time (auto clear time) can - Sharp AL-1340 | AL-1340 Operation Manual - Page 19
some other copying functions using the manual bypass. PAPER For best results, use only paper recommended by SHARP. Type of paper Type of physical damage to the copier. ** For paper weighing from 28 to 34.5 lbs., 8-1/2" x 11" is the maximum size that can be fed through the manual bypass. G Special - Sharp AL-1340 | AL-1340 Operation Manual - Page 20
NORMAL COPYING 1 Ensure that paper of the desired size is set in the paper tray. See page 13, LOADING COPY PAPER. When copying onto 8-1/2" x 11" paper or a larger size, pull out the paper output tray extension. 2 Turn the power switch on. 3 3 Open the original cover. Making copies 4 Place the - Sharp AL-1340 | AL-1340 Operation Manual - Page 21
not change the ZOOM tens digit. G Press the left copy quantity key to set the tens digit from 1 to 9. Tens digit Unit digit 3 7 Press the print ( ) key. Making copies G To display the number of copies made in a continuous run, press the left copy quantity key. G To stop copying in the middle - Sharp AL-1340 | AL-1340 Operation Manual - Page 22
mode. To adjust the copy density manually or to copy photographs, the exposure level can be adjusted in five steps manually. 1 Set the original and check of copies using the copy quantity ( , ) keys and press the print ( ) key. REDUCTION/ENLARGEMENT/ZOOM Three preset reduction ratios and two - Sharp AL-1340 | AL-1340 Operation Manual - Page 23
To select a preset copy ratio: Preset reduction and enlargement ratios are: 50%, 64%, 78%, 129%, and 200% REDUCTION/ENLARGEMENT/ZOOM ζʔϜ - Sharp AL-1340 | AL-1340 Operation Manual - Page 24
Two-sided copying can be made on this copier using the manual bypass. Example: The following two originals will and make a copy. The first copy can be made using either the paper tray or the manual bypass. Making copies 2 Replace the first original with the second original on the original table - Sharp AL-1340 | AL-1340 Operation Manual - Page 25
will remain on or off as before. In this condition, the fuser in the copier is maintained at a lower heat level, thereby saving power. To copy from the preheat mode, make desired copier selections and press the print ( ) key using the normal copying procedure. Special functions G Auto power - Sharp AL-1340 | AL-1340 Operation Manual - Page 26
mode selector key for approximately 5 seconds. The manual ( ) indicator will go out and the photo ( ) indicator will begin to blink. The exposure indicator marked "5" will light up, indicating the standard toner mode is active. 3 To enter the toner save mode, press the light ( ) key. The - Sharp AL-1340 | AL-1340 Operation Manual - Page 27
1 ON off mode Factory default settings are indicated with an asterisk (*). 4 5 Press the print ( ) key. The right-hand number in the display will be steadily lit and the mode, press the clear ( ) key. The copier will return to step 2. 6 Press the light ( ) or dark ( ) key - Sharp AL-1340 | AL-1340 Operation Manual - Page 28
describes how to replace the TD cartridge and the drum cartridge and how to check the total number of copies. Be sure to use only genuine SHARP parts and supplies. TD CARTRIDGE REPLACEMENT The TD cartridge replacement required ( ) indicator will light up when toner is needed. For more information - Sharp AL-1340 | AL-1340 Operation Manual - Page 29
will be needed soon. For more information on purchasing the drum cartridge, see SUPPLY PART NUMBERS AND STORAGE on page 38. When the indicator begins to blink, the copier will stop operating until the cartridge is replaced. Replace the drum cartridge at this time. 5 Do not remove the protective - Sharp AL-1340 | AL-1340 Operation Manual - Page 30
. Then gently install the new drum cartridge. Do not touch the surface of the drum (green portion) of the cartridge. Doing so may cause smudges on the copies. 5 Gently install the TD cartridge. To install the TD cartridge, see page 11, INSTALLING THE TD CARTRIDGE. 6 Close the front cover and - Sharp AL-1340 | AL-1340 Operation Manual - Page 31
USER MAINTENANCE Original table and original cover Stains on the glass or cover will also be copied. Wipe the glass and the cover with a soft, clean cloth. If necessary, dampen the cloth with water or a glass cleaner. Original table Original cover Transfer charger If copies start becoming - Sharp AL-1340 | AL-1340 Operation Manual - Page 32
the round projections near the side cover open button. 5 Turn the power switch on. When copier is not in use To prevent entry of dust and foreign matter, store the copier as follows. 1 Remove the power cord and secure the copier using tape (two locations). 5 Supplies and user maintenance 30 - Sharp AL-1340 | AL-1340 Operation Manual - Page 33
touch the surface of the drum (green portion) of the drum cartridge when removing the misfed paper. Doing so may damage the drum and cause smudges on copies. G If the paper has been fed through the manual bypass, do not remove the misfed paper through the manual bypass. Toner on the paper may stain - Sharp AL-1340 | AL-1340 Operation Manual - Page 34
1 Lower the fusing unit release lever. Fusing unit release lever 6 Copier trouble? 2 Gently remove the misfed paper from under the fusing unit as other injury. G Do not touch the surface of the drum (green portion) of the drum cartridge when removing the misfed paper. Doing so may cause smudges - Sharp AL-1340 | AL-1340 Operation Manual - Page 35
1 Lower the fusing unit release lever. Fusing unit release lever 2 Push gently on both sides of the front cover to open the cover. 6 Copier trouble? 3 Rotate the feeding roller in the direction of the arrow and gently remove the misfed paper from the exit area. Feeding roller 4 Raise the - Sharp AL-1340 | AL-1340 Operation Manual - Page 36
TROUBLESHOOTING If any problem occurs, check the list below before contacting our Technical Assistance Department. Copier trouble? 6 34 Problem Possible cause Solution Copier plugged in? Copier Press the print ( ) key to cancel the auto power shut-off mode. Adjust the exposure manually. Adjust - Sharp AL-1340 | AL-1340 Operation Manual - Page 37
or the following alphanumeric codes appear in the display, solve the problem immediately referring to both the table below and the relevant page. Be sure to use only genuine SHARP parts and supplies. Indication Cause and remedy See page: Steadily Replacement of drum cartridge will be needed 38 - Sharp AL-1340 | AL-1340 Operation Manual - Page 38
will light up simultaneously. Also, if level 4 is selected, the two right-handmost indicators for that level will light up simultaneously. Copier trouble? 4 Press the exposure selector key. The AUTO indicator will stop blinking and light up steadily. This automatic exposure level will remain - Sharp AL-1340 | AL-1340 Operation Manual - Page 39
Type Digital laser copier/printer, desk-top sheets); one single-sheet manual bypass Fusing system Heat mm (D)) Weight Approx. 39.7 lbs. (18 kg), TD and drum cartridges included Copier dimensions 20.4" (W) x 17.5" (D) x 11.5" (H) a part of our policy of continuous improvement, SHARP reserves - Sharp AL-1340 | AL-1340 Operation Manual - Page 40
designed, engineered, and tested to maximize the life and performance of SHARP copiers. Look for the Genuine Supplies label on the toner package. Supply list Supply TD cartridge Drum cartridge Part number AL-100TD AL-110TD AL-100DR Usable life Approx. 6,000 sheets* Approx. 4,000 sheets Approx. 18 - Sharp AL-1340 | AL-1340 Operation Manual - Page 41
MOVING INSTRUCTIONS When moving this copier, follow the procedure below. When moving this copier, be sure to remove the TD cartridge in advance. 1 Turn the power switch off and disconnect the power cord. 2 Open the side cover while pressing the side cover open button. Push gently - Sharp AL-1340 | AL-1340 Operation Manual - Page 42
location 8 - TD cartridge 11 L Light key 20 Loading copy paper 13 M Maintenance 28 Manual bypass 21 Manual exposure 20 Manual feeding 21 Misfeed removal - fusing area 32 - paper feed area 31 - transport area 33 Moving instructions 39 N Names - operation panel 7 - part 6 E Enlargement - Sharp AL-1340 | AL-1340 Operation Manual - Page 43
paper 17 Specifications - copier 37 - paper 17 Status indicators 35 Supply - life 38 - part number 38 - storage 38 T TD cartridge - indicator 7, 35 - installation 11 - replacement 26 Toner save mode 23 Total number of copies 35 Transfer charger 6, 29 Troubleshooting 34 Two-sided - Sharp AL-1340 | AL-1340 Operation Manual - Page 44
MEMO - Sharp AL-1340 | AL-1340 Operation Manual - Page 45
to comply with the limits for a Class B digital device, pursuant to Part 15 of the FCC Rules. These limits are designed to provide reasonable energy and, if not installed and used in accordance with the instructions, may cause harmful interference to radio communications. However, there is - Sharp AL-1340 | AL-1340 Operation Manual - Page 46
SHARP ELECTRONICS CORPORATION Sharp Plaza, Mahwah, New Jersey 07430-2135. www.sharp-usa.com SHARP ELECTRONICS OF CANADA LTD. 335 Britannia Road East, Mississauga, Ontario, L4Z 1W9 SHARP CORPORATION PRINTED IN CHINA 2001J KS TINSE0675QSZZ
-
 1
1 -
 2
2 -
 3
3 -
 4
4 -
 5
5 -
 6
6 -
 7
7 -
8
-
9
-
10
-
11
-
12
-
13
-
14
-
15
-
16
-
17
-
18
-
19
-
20
-
21
-
22
-
23
-
24
-
25
-
26
-
27
-
28
-
29
-
30
-
31
-
32
-
33
-
34
-
35
-
36
-
37
-
38
-
39
-
40
-
41
-
42
-
43
-
44
-
45
-
46
 |
 |

Digital Laser Copier/Printer
Operation Manual
MODEL
AL-1340