Sharp AS241F-BK User Manual - AS221F-BK-AS241F-BK - Page 15
Setup, Connecting to a Computer with DisplayPort
 |
View all Sharp AS241F-BK manuals
Add to My Manuals
Save this manual to your list of manuals |
Page 15 highlights
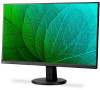
English Connecting to a Computer with DisplayPort • Please use a DisplayPort cable with the DisplayPort compliance logo. • It may take a moment for the signal to appear after turning on the computer. • When connecting a DisplayPort cable to a component with a signal conversion adapter, an image may not appear. • Some DisplayPort cables feature a locking function. When removing this cable, hold down the top button to release the lock. • If the monitor's power is turned on after a connected computer is turned on, sometimes an image is not displayed. In this case, please turn off the computer then turn it on again. Setup For box contents, please refer to the setup manual provided in the box. The accessories included depends on the location where the monitor was shipped. To attach the base to the LCD monitor stand: 1. Place the monitor face down on a non-abrasive surface. 2. Insert the Stand Neck into the monitor and press firmly until you hear a click, which signifies the Neck Stand is securely attached. 3. Attach the Base Stand to the Stand Neck. Tighten the screw at the base's bottom. Screw English−13
-
 1
1 -
2
-
3
-
4
-
5
-
6
-
7
-
8
-
9
-
 10
10 -
 11
11 -
 12
12 -
 13
13 -
 14
14 -
 15
15 -
 16
16 -
 17
17 -
 18
18 -
 19
19 -
 20
20 -
21
-
22
-
23
-
24
-
25
-
26
-
27
-
28
-
29
-
30
-
31
-
32
 |
 |
