Sharp BD-HP35U BD-HP35U Operation Manual - Page 16
Major Components - setting up wireless
 |
UPC - 074000355033
View all Sharp BD-HP35U manuals
Add to My Manuals
Save this manual to your list of manuals |
Page 16 highlights
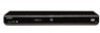
Major Components Main Unit (Front) 1 34 56 7 2 12 Main Unit (Rear) 2 3 4 5 89 10 11 1 POWER (p. 21) 8 USB2 terminal (p. 32) 2 POWER (ON/STANDBY) indicator (p. 21) 9 Remote control sensor (p. 20) 3 d PLAY (p. 25) 0 BD/DVD/CD mode indicator (p. 21) 4 H STOP (p. 25) Q Door flap 5 G REV (p. 35) W Disc tray (p. 25) 6 J FWD (p. 35) 7 OPEN/CLOSE (p. 25) 1 1 AC IN terminal (p. 20) 2 ETHERNET terminal (p. 18) 3 W-LAN*/USB1 terminal (p. 19, 27) 4 HDMI OUT terminal (p. 16) 5 DIGITAL AUDIO OUT OPTICAL terminal (p. 17) * The supplied wireless LAN adapter can be connected to this player. NOTE • When you insert or remove a USB memory device, be sure to turn the main power off. Also, be sure to set "Quick Start" to "No" (See page 43) before inserting or removing the device. If you insert or remove the device with the player or Quick Start on, the data may become damaged. 14
-
 1
1 -
2
-
3
-
4
-
5
-
6
-
7
-
8
-
9
-
10
-
 11
11 -
 12
12 -
 13
13 -
 14
14 -
 15
15 -
 16
16 -
 17
17 -
 18
18 -
 19
19 -
 20
20 -
 21
21 -
22
-
23
-
24
-
25
-
26
-
27
-
28
-
29
-
30
-
31
-
32
-
33
-
34
-
35
-
36
-
37
-
38
-
39
-
40
-
41
-
42
-
43
-
44
-
45
-
46
-
47
-
48
-
49
-
50
-
51
-
52
-
53
-
54
-
55
-
56
-
57
-
58
-
59
-
60
-
61
-
62
-
63
-
64
-
65
-
66
-
67
-
68
-
69
-
70
-
71
-
72
-
73
-
74
 |
 |
