Sharp BT421 User Manual for the - Page 9
Attaching Mounting Accessories, Orientation, Ventilation Requirements
 |
View all Sharp BT421 manuals
Add to My Manuals
Save this manual to your list of manuals |
Page 9 highlights
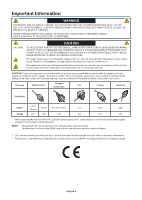
English Orientation • When using the monitor in the portrait position, it should be rotated clockwise so that the right side is moved to the top, left side is moved to the bottom. This will allow for proper ventilation and will extend the lifetime of the monitor. Improper ventilation may shorten the lifetime of the monitor. 2. Ventilation Requirements When mounting in an enclosed space or recessed area, leave adequate room between the monitor and the enclosure to allow heat to disperse, as shown below. 30mm Must be under 50 Degree Celsius. Allow adequate ventilation or provide air conditioning around the monitor, so that heat can properly dissipate away from the unit and the mounting equipment; especially when you use monitors in a multiple screen configuration. Remote control sensor and Power Indicator Attaching Mounting Accessories The monitor is designed for use with the VESA mounting system. 1. Attach Mounting Accessories Be careful to avoid tipping the monitor when attaching accessories. 400 mm 100 mm VESA Mounting Interface (M6) Mounting accessories can be attached with the monitor in the face down position. To avoid damaging the front face, place the protective sheet on the table underneath the LCD monitor. The protective sheet was wrapped around the LCD monitor in the original packaging. Make sure there is nothing on the table that can damage the monitor. NOTE: Prior to installation, be sure to place the monitor on a flat area with adequate space. NOTE: You can use 200 mm/100 mm holes for mounting. 200 mm 100 mm Mounting Interface (M6) English-7
-
 1
1 -
2
-
3
-
 4
4 -
 5
5 -
 6
6 -
 7
7 -
 8
8 -
 9
9 -
 10
10 -
 11
11 -
 12
12 -
 13
13 -
 14
14 -
15
-
16
-
17
-
18
-
19
-
20
-
21
-
22
-
23
-
24
-
25
-
26
-
27
-
28
-
29
-
30
-
31
 |
 |
