Sharp DK-CL5P DK-CL5P Operation Manual - Page 22
Alarm and, leep operation
 |
UPC - 074000369788
View all Sharp DK-CL5P manuals
Add to My Manuals
Save this manual to your list of manuals |
Page 22 highlights
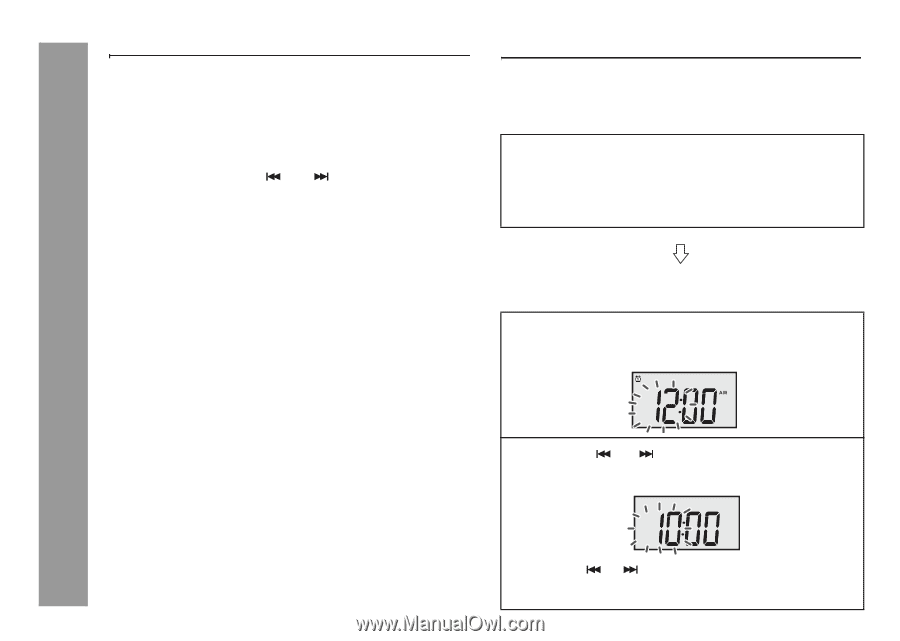
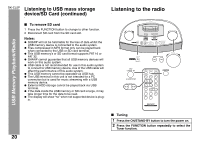
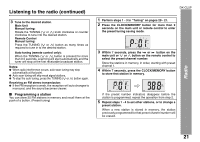
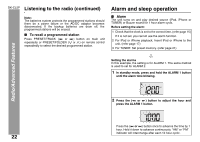
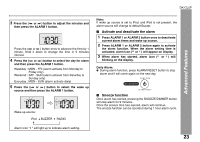
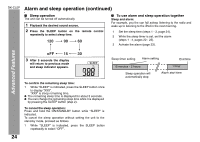
DK-CL5P Listening to the radio (continued) Note: The batteries system protects the programmed stations should there be a power failure or the AC/DC adaptor becomes disconnected. If the backup batteries are drain off, the programmed stations will be erased. ■ To recall a programmed station Press PRESET/TRACK ( or ) button on main unit repeatedly or PRESET/FOLDER (s or r) on remote control repeadtedly to select the desired programmed station. Alarm and sleep operation ■ Alarm The unit turns on and play desired source (iPod, iPhone or TUNER) or Buzzer sound for 1 hour alarm cycle. Before setting the alarm: 1 Check that the clock is set to the correct time. (refer page 15) If it is not set, you cannot use the alarm function. 2 For iPod or iPhone playback: Insert iPod or iPhone to the unit. (refer page 17) 3 For TUNER: Set preset memory. (refer page 21) Setting the alarms In this example, the setting is for ALARM 1. The same method is used to set for ALARM 2. 1 In standby mode, press and hold the ALARM 1 button until the alarm time blinking. Radio/Advanced Features 2 Press the ( or ) button to adjust the hour and press the ALARM 1 button. PM Press the ( or ) button once to advance the time by 1 hour. Hold it down to advance continuously. "AM" or "PM" indicator will interchange after each 12 hour cyclic. 22
-
 1
1 -
2
-
3
-
4
-
5
-
6
-
7
-
8
-
9
-
10
-
11
-
12
-
13
-
14
-
15
-
16
-
 17
17 -
 18
18 -
 19
19 -
 20
20 -
 21
21 -
 22
22 -
 23
23 -
 24
24 -
 25
25 -
 26
26 -
 27
27 -
28
-
29
-
30
-
31
-
32
 |
 |